Welcome! I’m Carolyn Dube – This colorful journey is all about the freedom of play!
Search My Blog
Search by Category
The Fine Print
Some of the links on this blog are affiliate links and I receive a small percentage. It doesn't cost you anything extra and helps keep all the free tutorials and videos coming! It's a win-win!
The website is copyright Carolyn Dube, and that is kinda common sense since this is my site.
As an Amazon Associate I earn from qualifying purchases.
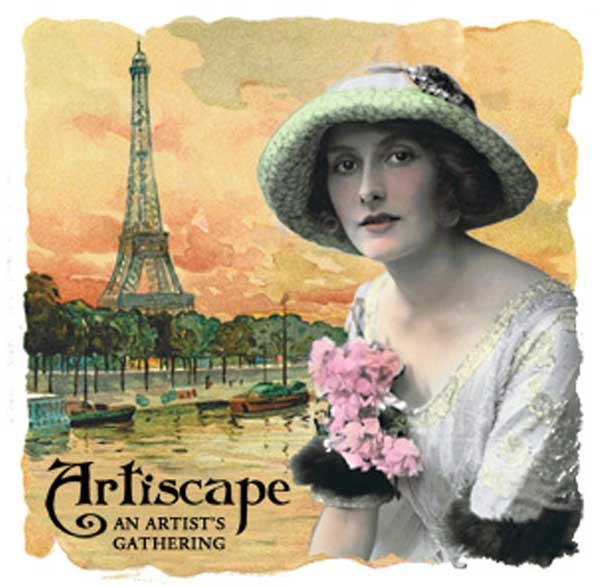
So excited to be teaching at Artiscape this year! If you’ve never been to Artiscape it is a treat! Not only are there workshops but other fun events too! The Outsider Art Fair, a Mad Hatter Tea, an Artist’s Marketplace, a Friday night kick off dinner with amazing artists lined up to demo and amaze, and more!
I’m teaching 2 Artiscape workshops, Magically Marbled Papers (April 10) and Stenciling Demystified (April 11). One of my favorite things about a day of artful play with friends is that look on their face when they let themselves be free, as they see where the play takes them!
In Magically Marbled Papers I’ll share with you paper marbling techniques that create stunning marbled papers with veins of shimmering gold enveloped inside swirls of color. The level of detail that can be achieved is both magical and quick. No waiting… absolutely no precision… just FUN! All by using easy to find supplies. Be prepared to be addicted to watching the colors mingle. I know I am!
For Magically Marbled Papers you need to bring…only an apron. I know what a pain it is to hunt for the “right”supply, the time to pack it all up, and unpack it so I have taken care of all of that for you!
There’s more than one way to use a stencil! Get comfortable with stenciling, then let yourself go wild playing in Stenciling Demystified! You only need to bring 5-6 colors of any kind of acrylic paint including white…and an apron. I will be bringing everything else including a huge stash of StencilGirl stencils for you to experiment and play with as I share techniques with you in this fast paced workshop of play.
You’ll walk out the knowing how to get a wide variety of looks from any stencil! As with all my workshops, there is a full color PDF, so once you are back home you can dive right in and continue playing!
I am super excited to be catching up in person with people I’ve met through the blog – hope to see you there!
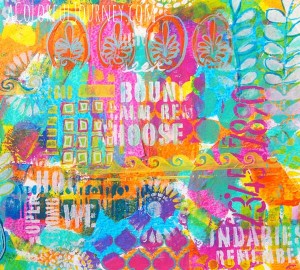
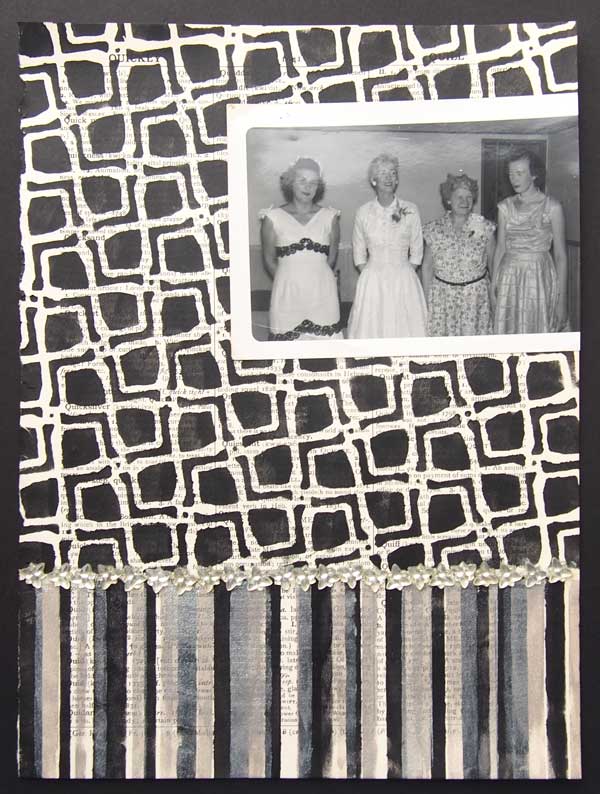
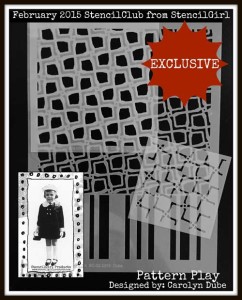
I’m playing with patterns as the designer of this month’s stencils for StencilClub! One of the best ways for me to learn is to play. What did I learn as I played with potential designs?
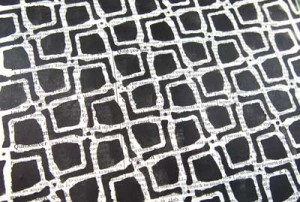
1. I wanted the ability to do complicated looking work effortlessly. I am not patient. At all. The 6×6 stencil and 9×12 stencil layer together. This allows for effortless color layering. And I made them simple to line up too.
2. I wanted contrast. The vertical lines create a very different feeling than the pattern above it or on the other stencils. This provides flexibility when creating.
3. I wanted patterns that worked in more than one way. The stencils can be used together or individually. Stencils that work well when used whole or in parts. Or all of one and part of another.
You can probably guess why they’re called Pattern Play.
If you’re new to layering stencils, in the exclusive StencilClub video, I’ll be sharing all sorts of way to get both subtle and bold looks from these stencils with club members. What’s StencilClub? It is a monthly club that ships 3 exclusive stencils to you on the 15th of every month. You can find out all about StencilClub over at StencilGirl Products.
In the video below, as I create this page, I show you how I used the bottom of the 9×12 stencil to create the layers. Might be addicted to that…can’t seem to stop doing it!
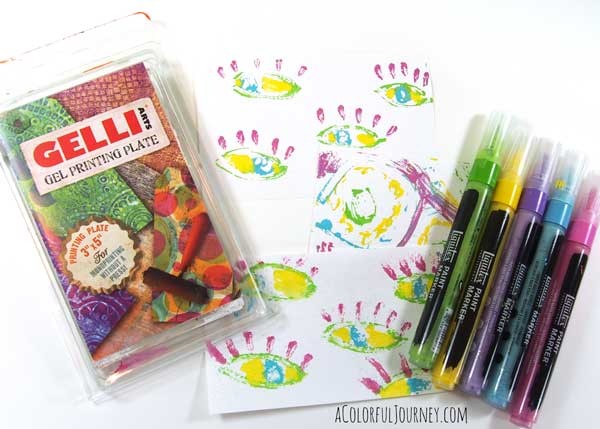
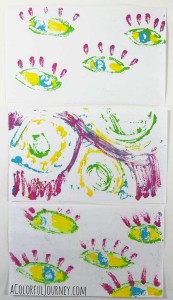
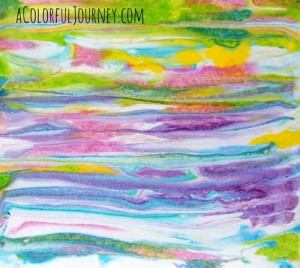
It’s experimentation time! For this month’s Colorful Gelli Print Party, I am playing with Liquitex Paint Markers on the Gelli Plate. The paint pens are water based acrylic paint (at least I think they are) so I wondered if they would work for Gelli printing. And they did!
They ended up creating a wood cut feeling, but in lots of colors.
This was a completely different feeling for me than using paint on the Gelli Plate. There is so much more precision that can be easily obtained by using a marker instead of a paint brush…at least the way I use a paint brush!
See what others are making with the Gelli Plate. Take a look in the Google+ community, A Colorful Playground. And while you’re there – share what you’ve been making! New to Google+? No problem! We’re all learning that together.
This website uses cookies to improve your experience while you navigate through the website. Out of these cookies, the cookies that are categorized as necessary are stored on your browser as they are essential for the working of basic functionalities of the website. We also use third-party cookies that help us analyze and understand how you use this website. These cookies will be stored in your browser only with your consent. You also have the option to opt-out of these cookies. But opting out of some of these cookies may have an effect on your browsing experience.
Necessary cookies are absolutely essential for the website to function properly. This category only includes cookies that ensures basic functionalities and security features of the website. These cookies do not store any personal information.
Any cookies that may not be particularly necessary for the website to function and is used specifically to collect user personal data via analytics, ads, other embedded contents are termed as non-necessary cookies. It is mandatory to procure user consent prior to running these cookies on your website.


 So excited to be teaching at Artiscape this year! If you’ve never been to Artiscape it is a treat! Not only are there workshops but other fun events too! The Outsider Art Fair, a Mad Hatter Tea, an Artist’s Marketplace, a Friday night kick off dinner with amazing artists lined up to demo and amaze, and more!
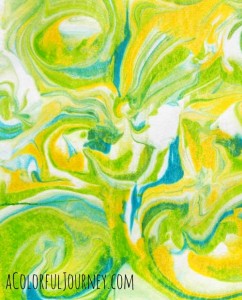
 1. I wanted the ability to do complicated looking work effortlessly. I am not patient. At all. The 6×6 stencil and 9×12 stencil layer together. This allows for effortless color layering. And I made them simple to line up too.
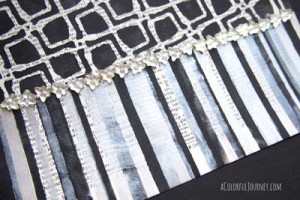
 3. I wanted patterns that worked in more than one way. The stencils can be used together or individually. Stencils that work well when used whole or in parts. Or all of one and part of another.