Welcome! I’m Carolyn Dube – This colorful journey is all about the freedom of play!
Search My Blog
Search by Category
The Fine Print
Some of the links on this blog are affiliate links and I receive a small percentage. It doesn't cost you anything extra and helps keep all the free tutorials and videos coming! It's a win-win!
The website is copyright Carolyn Dube, and that is kinda common sense since this is my site.
As an Amazon Associate I earn from qualifying purchases.
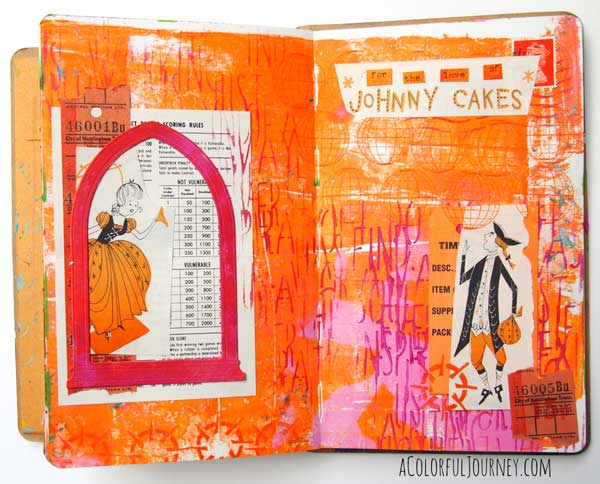
When I play in my art journal sometimes a story is revealed to me. This particular tale, of two lovers separated by time and space brought together thanks to Johnny Cakes, isn’t really Pulitzer prize worthy. In fact, it is quite a silly love story and I like it that way.
Between you and me…I expected to create a very modern looking art journal page as I added some stenciling to the page. I was thinking modern. I was feeling modern. And then my art journal led me a totally silly, fun, and playfully different way.
Enjoy a chuckle as I play around and create a story with classic elements of story telling and you’ll even get to see more of my postage stamp quirks in the video!
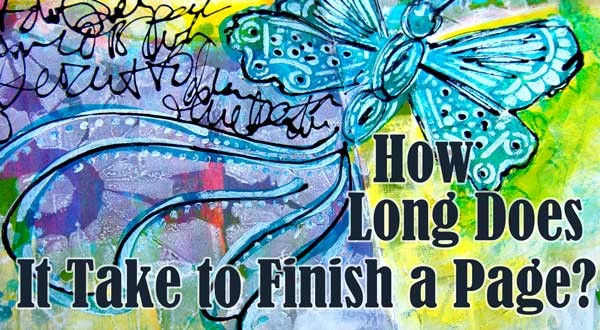
Does an art journal page happen in one afternoon? It can, but very very rarely for me. I used to feel pressure to “finish what I start” in one afternoon. That pressure that took the fun out of it for me so I decided to let an art journal page take as long as it wanted.
How long between each session? Every page, every canvas, every project is different.
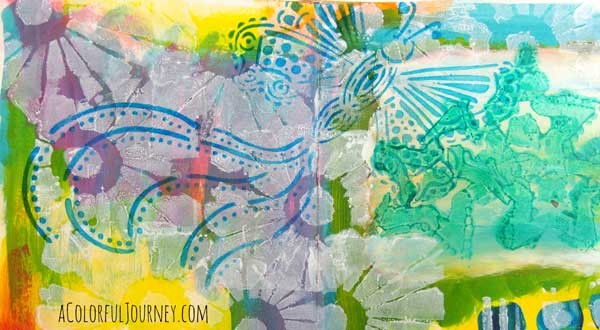
This was done 3-6 months ago or even longer – can’t remember. I was simply playing around with paint with no expectations.
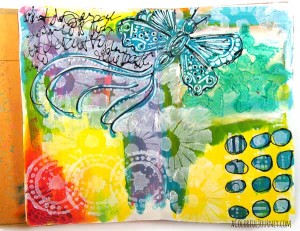
Today, my muse decided it was time to add more. Using just one stencil, Urban Insiders Tag by Seth Apter, I stenciled white in the grid of dots by using parts of the stencil.
I love the feeling of movement thanks to one of Maria McGuire’s butterflies from her Butterfly Duo stencil. At this point it is hard to see the detail of it on the page. Never fear! This is just the first layer with a quick stenciling with ink and a sponge.
I colored it in with All Purpose ink & a Fantastix.
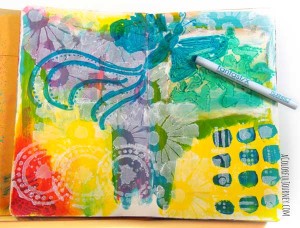
I put the stencil right back on top of where it was and stenciled it with white paint.
Then I traced over the butterfly with an irRESISTible pico embellisher.
The fine tip is a bit addictive…I just didn’t want to stop drawing with it so I kept on drawing!
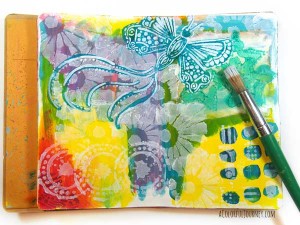
After adding a very very thin layer of white paint, I added more yellow with a Fantastix and yellow all purpose ink.
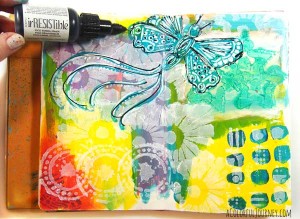
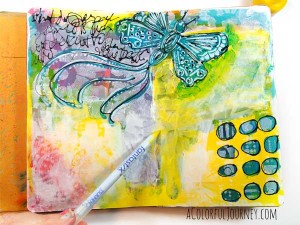
And this is where the page will wait until I am ready to add more since there is no rule about how quickly an art journal page must be completed. How long will it be? Could be a day. Could be a month. Could be more. Of course, I’ll share with you as it develops.
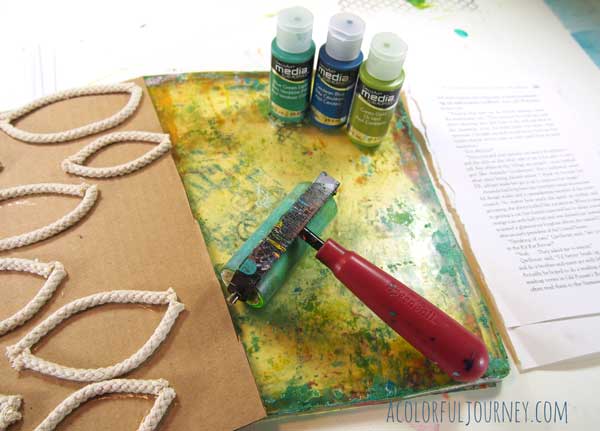
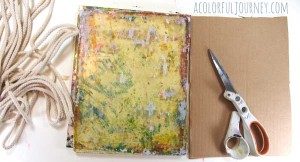
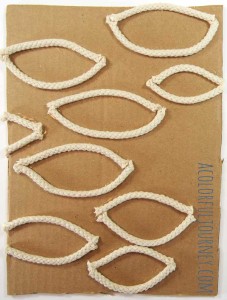
Just about anything can become a tool to use for Gelli Printing. A bit of rope, glue, and cardboard have endless possibilities on the Gelli Plate. Check out the video for this month’s Colorful Gelli Print Party to see how easy this is to make!
To make a rope texture stamping tool you need rope. What kind? I used super cheap clothesline from the hardware store. Any size rope will work, just make sure it is a cotton type of rope so it will absorb paint.
Use tacky glue to glue your shapes down and let it dry completely. This was the toughest part for me but it is very important that the glue is completely dry before using it on the Gelli Plate.
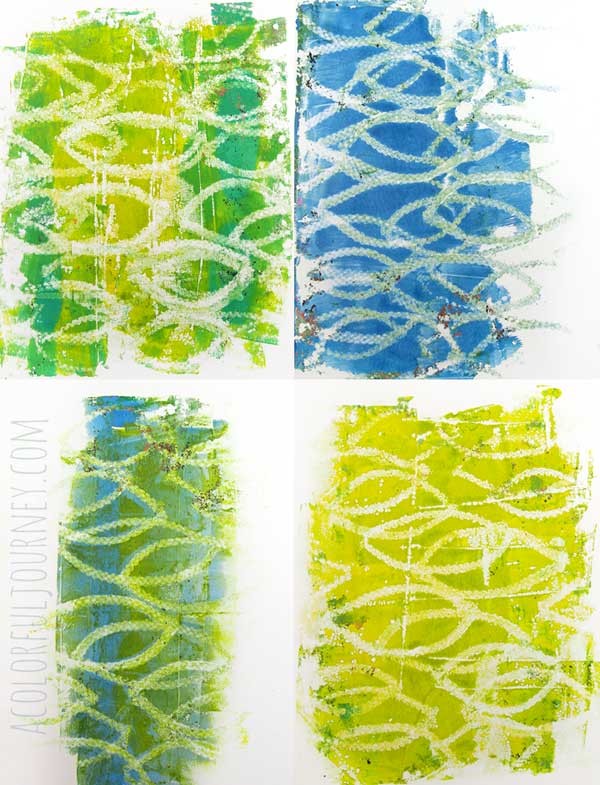
Below you can see some of the prints made with DecoArt Media line of acrylic paints and my eyeball shaped rope stamp.
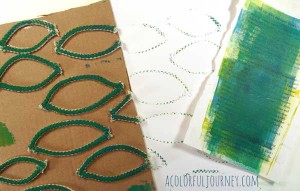
There is more to Gelli Printing than just the prints. The paper that you clean off your brayer on, stamped bits of paint from the texture tool onto paper, even the texture tool itself all become colorful pieces to use in your art.
Want to see what others are making with the Gelli Plate? Take a look in the Google+ community, A Colorful Playground. And while you’re there – share what you’ve been making! New to Google+? No problem! We’re all learning that together.
This website uses cookies to improve your experience while you navigate through the website. Out of these cookies, the cookies that are categorized as necessary are stored on your browser as they are essential for the working of basic functionalities of the website. We also use third-party cookies that help us analyze and understand how you use this website. These cookies will be stored in your browser only with your consent. You also have the option to opt-out of these cookies. But opting out of some of these cookies may have an effect on your browsing experience.
Necessary cookies are absolutely essential for the website to function properly. This category only includes cookies that ensures basic functionalities and security features of the website. These cookies do not store any personal information.
Any cookies that may not be particularly necessary for the website to function and is used specifically to collect user personal data via analytics, ads, other embedded contents are termed as non-necessary cookies. It is mandatory to procure user consent prior to running these cookies on your website.


 Today, my muse decided it was time to add more. Using just one stencil,