Welcome! I’m Carolyn Dube – This colorful journey is all about the freedom of play!
Search My Blog
Search by Category
The Fine Print
Some of the links on this blog are affiliate links and I receive a small percentage. It doesn't cost you anything extra and helps keep all the free tutorials and videos coming! It's a win-win!
The website is copyright Carolyn Dube, and that is kinda common sense since this is my site.
As an Amazon Associate I earn from qualifying purchases.
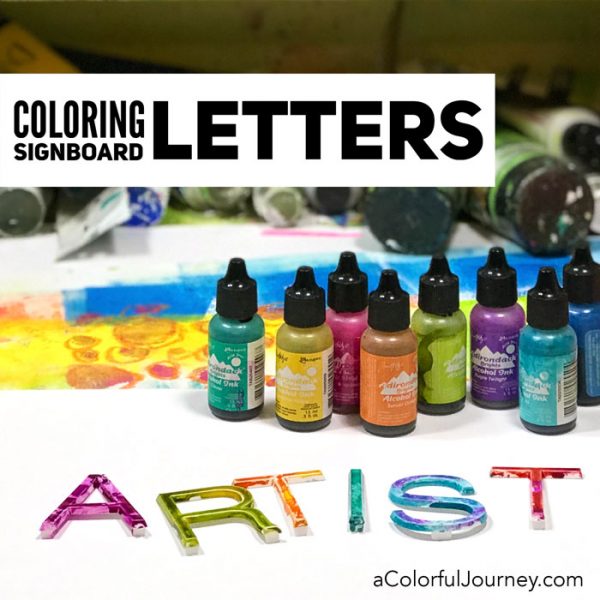
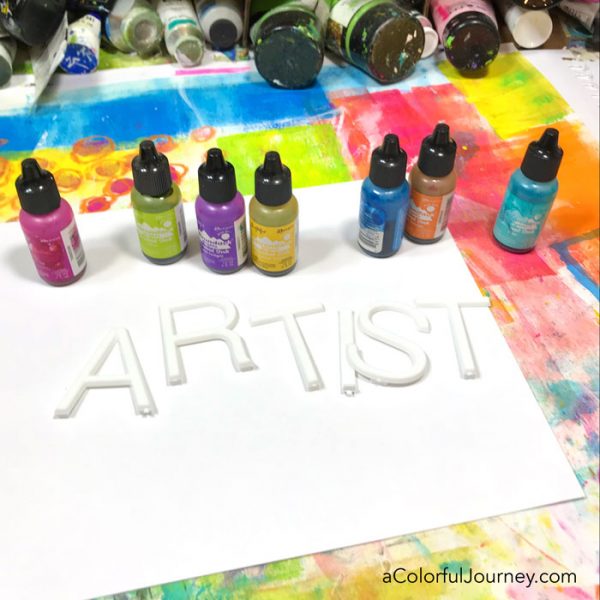
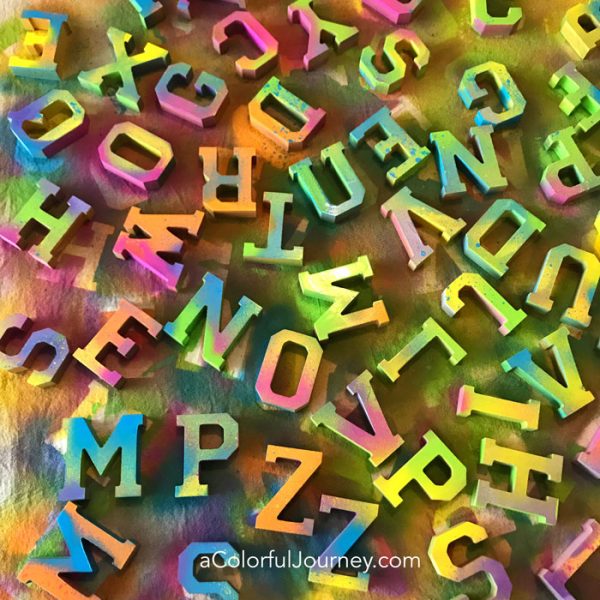
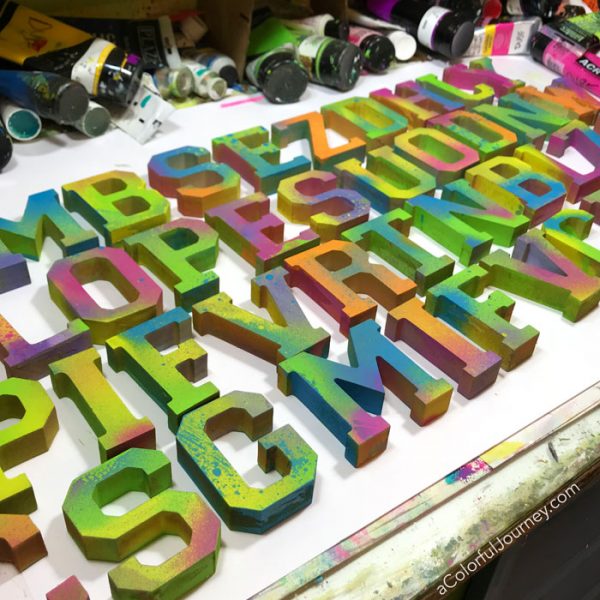
Have you seen those letter boards or sign boards with the white plastic letters? They are a quick way to put a quote on the wall but there is a huge problem. The letters are all white. I had to do something about that. There needed to be some color.
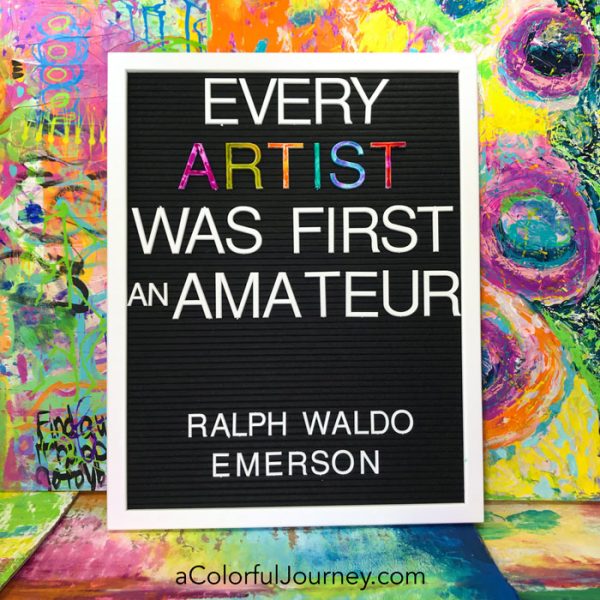
Why did I choose this quote for the felt letter board? It was a conversation happening in the Facebook group. A brave woman started the conversation by sharing she was feeling a little intimidated by how great everyone else’s stuff looked when she compared it to hers. Haven’t we all felt that way?
This is a smart and logical woman so she knew that what we see on social media is everyone’s highlight reel, the best stuff. Rarely do people share something ugly that they’ve made or that they aren’t happy with.
But the great part of this Facbook group is that there are plenty who have come forward and supported her. We are all in different parts of our creative journeys but everyone has been beginner.
O.O.P.S. The inks would have gone more evenly if I had take a split second to just wipe them off with rubbing alcohol to remove any finger oils or residue. But that is just an Outstanding Opportunity Presenting Suddenly, and not the only one today.
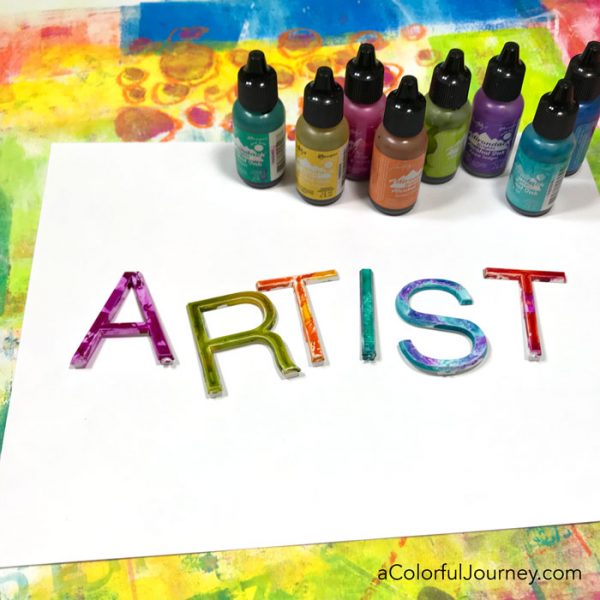
When working with alcohol inks, it is wise to wear gloves. This ink stains fingers quickly. Since I was working with so many colors, that led colors accidentally mingling together. O.O.P.S. again but I am so glad that happened! Now I have a mottled, multi color look on each letter.
Here are the supplies used. Some of these links are affiliate links which means I get a small percentage. It doesn’t cost you anything extra and it helps keep the free tutorials coming!
This signboard was gift, so I have no idea where this exact one was purchased but here’s a link to similar ones.
Decisions can be overwhelming, even paralyzing. I was trapped trying to make the right decision for how to color these wood letters. All the vowels could be one color and the consonants multi colored. I could randomly color each letter. I could use patterns to make different or I could make them all the same. Or I could make them all one color. So many choices!
But there is a way out of this trap of over thinking. The 3 second rule. I gave myself 3 seconds to make a decision and just do it. Suddenly, instead of being trapped in my head, I was playing with the rainbow.
What will these letters be used for? Spelling words on a shelf in the studio. You might have noticed it in the beginning of the video. Hi Phoebe!
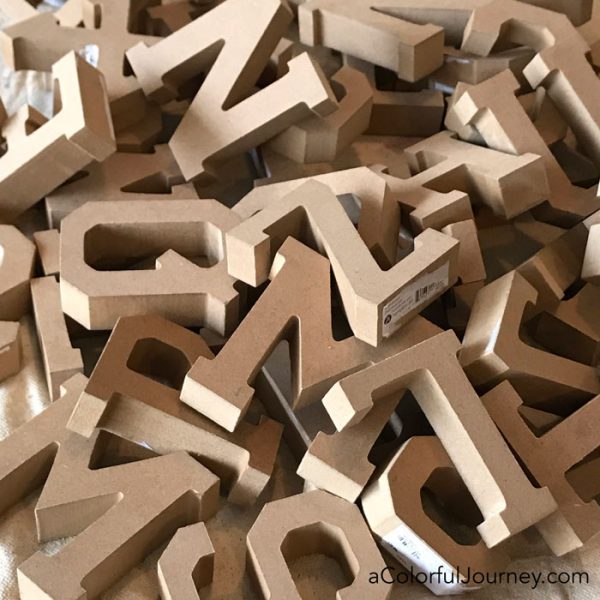
The letters were collected from the clearance section at Joann’s. In order to assemble the alphabet I wanted, it involved roading tripping and searching multiple stores. I was on a quest, so after about 8, I quit counting.
Why use spray paints? It is the fastest way to get color on these. Plus, there is something extra playful about using airborne color. Why do I use Liquitex spray paints instead of another brand? You can see why here.
The tarp that was protecting the table was an unexpected bonus. As a side note, now you know what type of play inspired my Alpha jumble stencil.
Here are all the letters, colorful and ready to spell words on the shelf in my studio. What word or name will be next? Be subscribed to my Youtube channel and find out in my next video!
Here are the supplies used. Some of these links are affiliate links which means I get a small percentage. It doesn’t cost you anything extra and it helps keep the free tutorials coming!
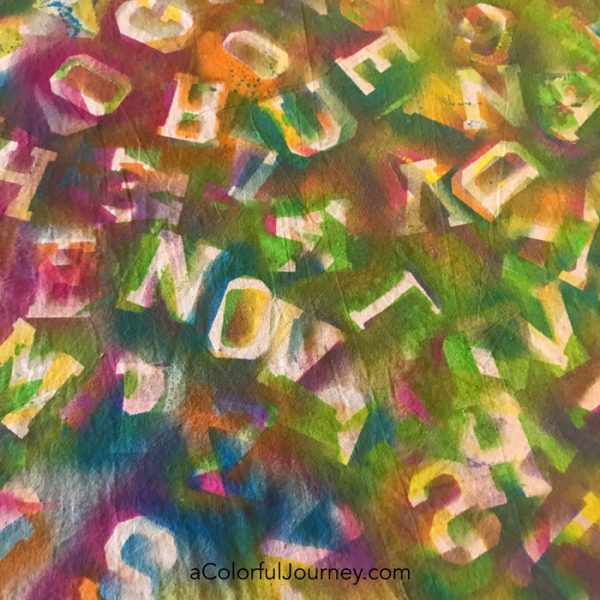
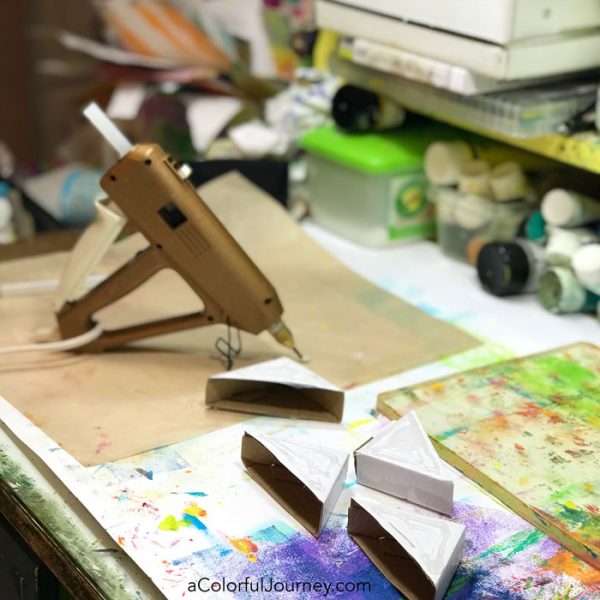
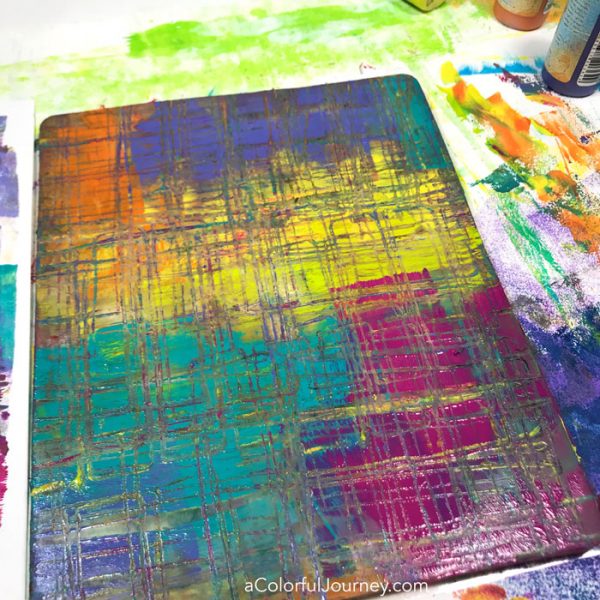
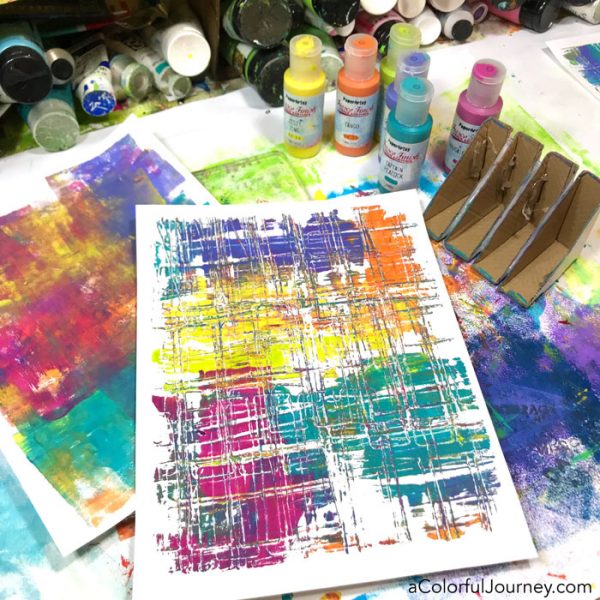
How do you get those gel prints with little bits of color here and there that give a print the wow factor and do it in one pull? By color transference which is a fancy way of saying transferring the color from one area to another on the gel plate. What fancy tool does this? Recycled cardboard.
The pattern making tool created was just packing material from a picture frame. I happened to have the triangular shapes but you can use any cardboard to do this. Look around for some scrap pieces you can glue together. You might be surprised by what you find.
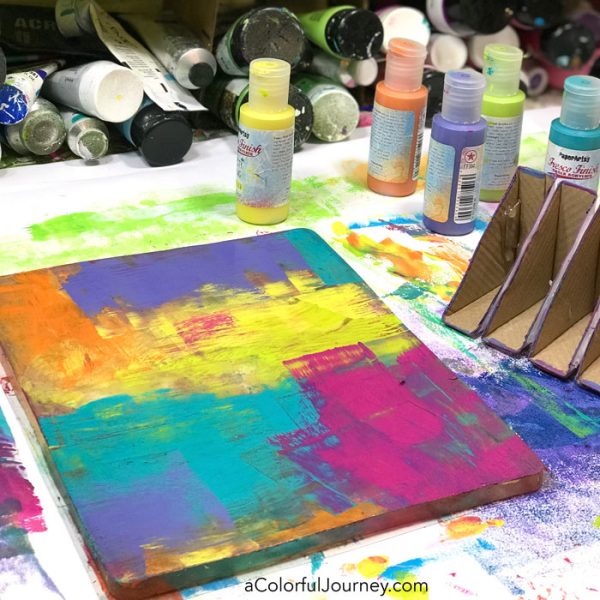
Multiple colors of paint were added to the gel plate. Here I used 6 colors of Paper Artsy paints. Naturally, you can add as many or few colors as you prefer.
By pressing the cardboard tool into the paint over and over, the paint begins to transfer from one area to another. The more you do this, the more color gets transferred. Every so often, I would turn the tool which allowed for a bit of change for what colors were going where.
How do you know when to stop? That’s a personal question and there is no exact answer. Do you love how it looks? Then that’s when you stop. I love very busy prints so I kept going and going to get this look.
Ready for more gel printing fun? Check out the techniques and tutorials page including the Do’s and Don’ts of Gel Printing.
This website uses cookies to improve your experience while you navigate through the website. Out of these cookies, the cookies that are categorized as necessary are stored on your browser as they are essential for the working of basic functionalities of the website. We also use third-party cookies that help us analyze and understand how you use this website. These cookies will be stored in your browser only with your consent. You also have the option to opt-out of these cookies. But opting out of some of these cookies may have an effect on your browsing experience.
Necessary cookies are absolutely essential for the website to function properly. This category only includes cookies that ensures basic functionalities and security features of the website. These cookies do not store any personal information.
Any cookies that may not be particularly necessary for the website to function and is used specifically to collect user personal data via analytics, ads, other embedded contents are termed as non-necessary cookies. It is mandatory to procure user consent prior to running these cookies on your website.