Welcome! I’m Carolyn Dube – This colorful journey is all about the freedom of play!
Search My Blog
Search by Category
The Fine Print
Some of the links on this blog are affiliate links and I receive a small percentage. It doesn't cost you anything extra and helps keep all the free tutorials and videos coming! It's a win-win!
The website is copyright Carolyn Dube, and that is kinda common sense since this is my site.
As an Amazon Associate I earn from qualifying purchases.
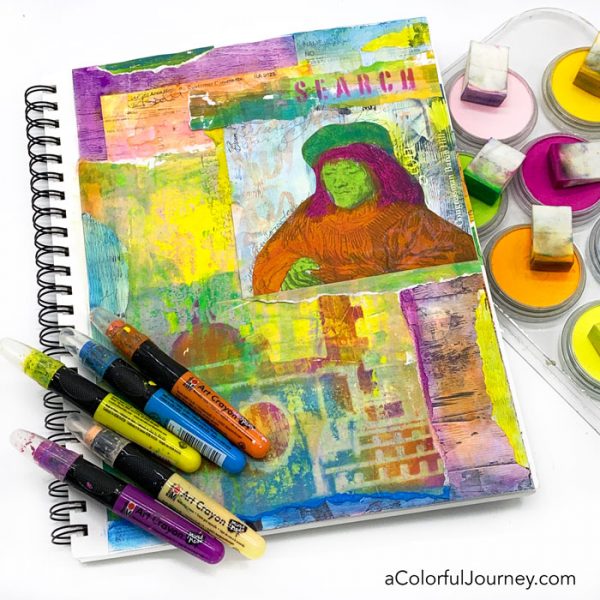
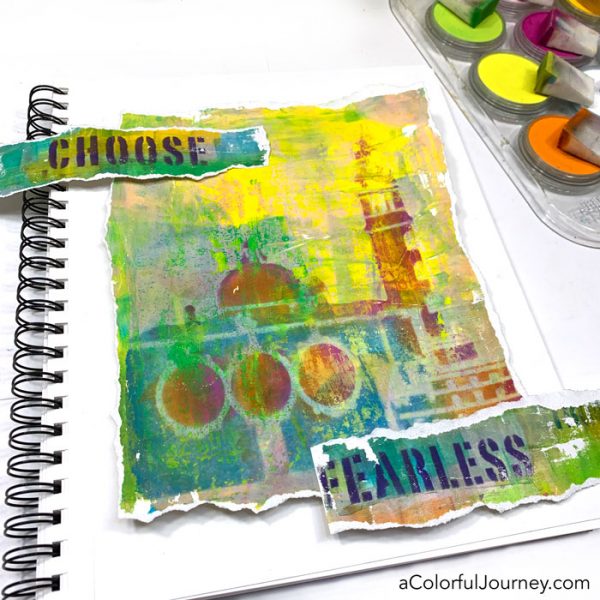
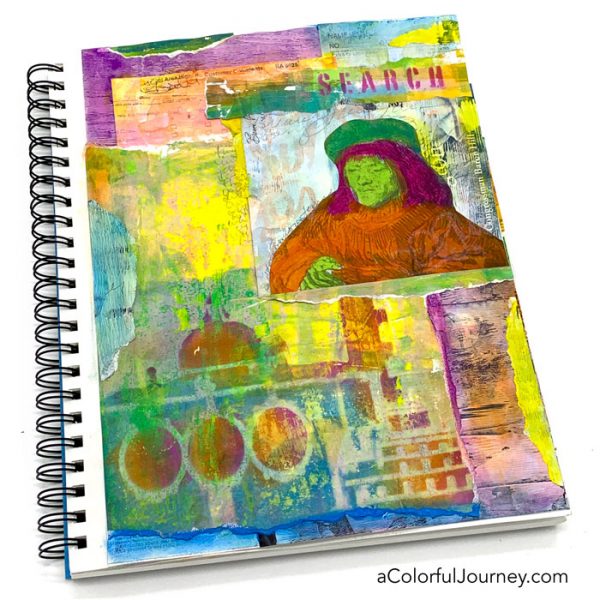
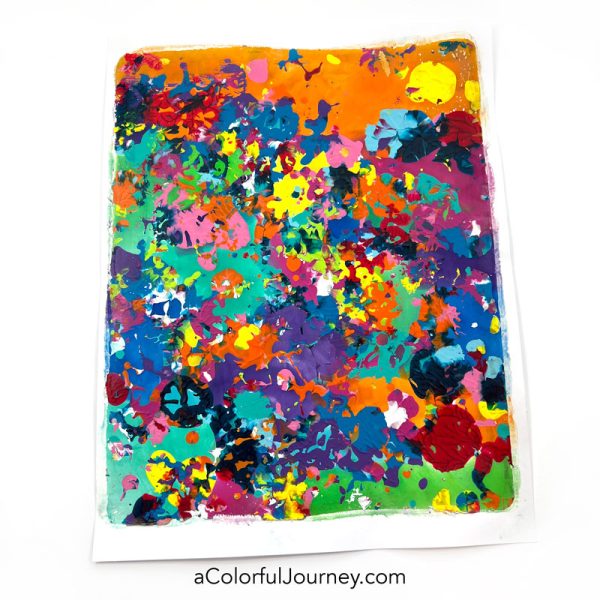
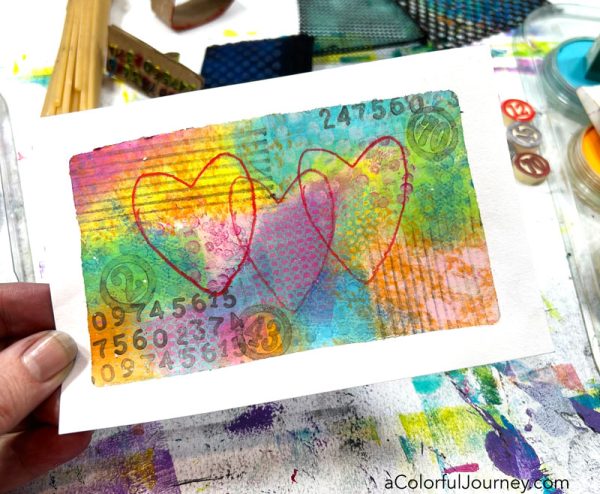
This all started with 2 gel prints. Then the ripping. The tearing. And that’s when I realized the plan I had wasn’t going to work. And that was a good thing because where it ended up was far better than what I had planned!
These 2 gel prints sparked the idea for this art journal page. They’re made with PanPastels on a gel plate using 2 stencils, Venetian Buildings and Uplifting Words.
How do you use PanPastels on a gel plate to get grungy layers in one pull? My process is broken down step-by-step in Gel Printing with PanPastels online workshop. Plus, there’s a bonus video in there of how the techniques were combined to create these exact pages.
The “plan” was to use the entire print and a couple of the words. But I didn’t want to cover up a thing on the print and no matter what I did, the words just didn’t feel right.
Then it finally dawned on me that maybe the plan I had needed to change. So I went through a box of leftovers and scraps to see where that took the play.
What was found in that box pointed me in a new direction and the plan I had was abandoned and the words set aside.
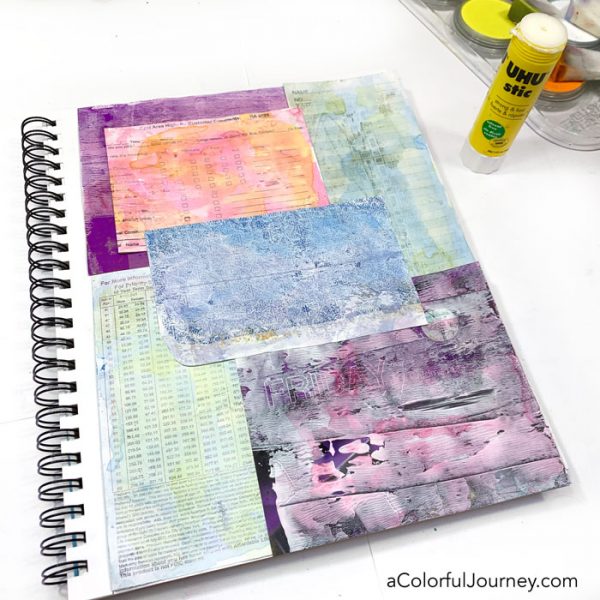
This background is colorful junk mail. Anything can be arted on, and junk mail is a great way to have fun with color.
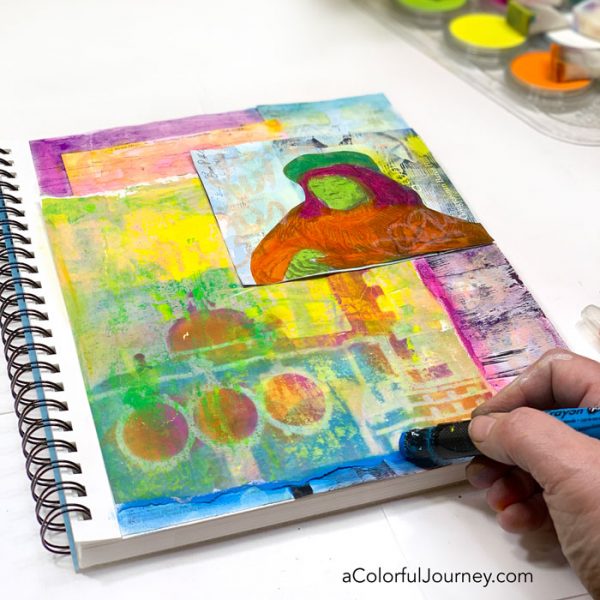
The new plan created a new challenge, how to use all of the gel print and have the colorful Rembrandt on the page looking down. Spoiler alert, something had to be sacrificed.
Torn edges are great for adding extra pops of color, especially with Marabu’s Art Crayons. They’re creamy like my mom’s lipstick (and yes, she did get mad every time I used it like a crayon as a kid) and blend easily.
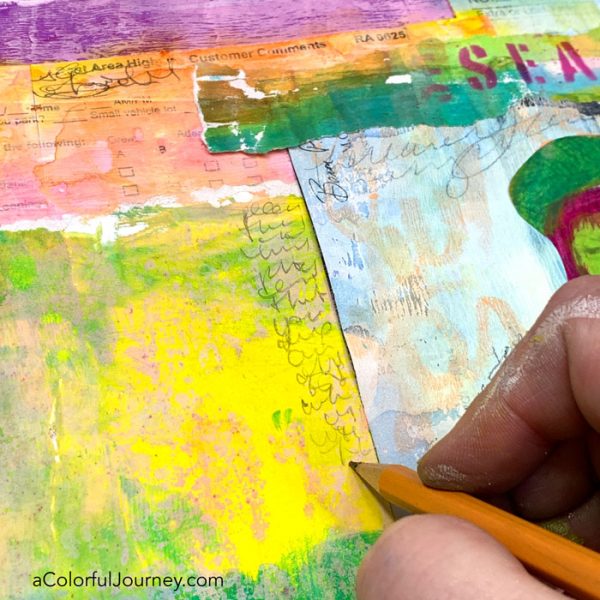
For a bit of scribble journaling, I wanted a gray colored pencil because they write so nicely on a PanPastel gel print. But I didn’t have a gray one. Then it hit me, a regular pencil is gray and I have plenty of those!
There were little bits of paper all around from the ripping and tearing of edges early in the process. Those scraps were colored, torn, and glued all around page.
Public Service Announcement- keep the scraps, leftovers, remnants of other play around you instead of cleaning everything off perfectly, because you never know when those will call to you!
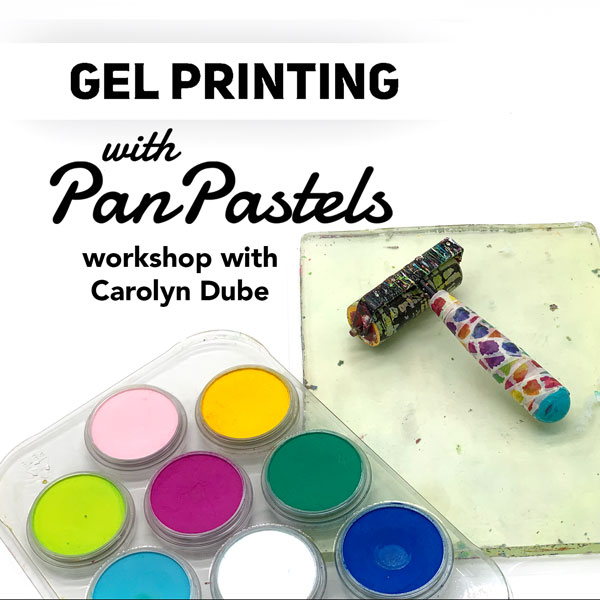
Ready to make layered prints with your PanPastels to use in your art journal? Then check out Gel Printing with PanPastels!
Can you use PanPastel on a gel plate? Absolutely! There are things that PanPastel can only do when using it on a gel plate that it could never ever do with paper alone. Understanding how these two supplies interact opens up a whole world of printing possibilities all while sealing in the PanPastels!
The superpower of PanPastel is blending and a gel plate’s superpower is layering. When you understand how these characteristics play and interact with each other, you hold the key to intentionally creating mysterious layers, bold layers, playful layers or any combination of them. Knowledge is power.
I’ve taken everything I’ve figured out playing with PanPastels on the gel plate and put them into a self paced online workshop, Gel Printing with PanPastels. You’ll see each technique step-by-step but this workshop is about more than the how, it’s also about the why.
If you don’t have the how and the why, gel printing can feel extremely random!
When you understand the nuances of blending on a gel plate, you have the ability to create subtle effects within your layers. But that’s not all!
When creating the look of shading, a dark color can very easily overtake an image. To keep that from happening, and create artistic shading, there’s a simple trick for applying the PanPastel to plate.
You Have Options
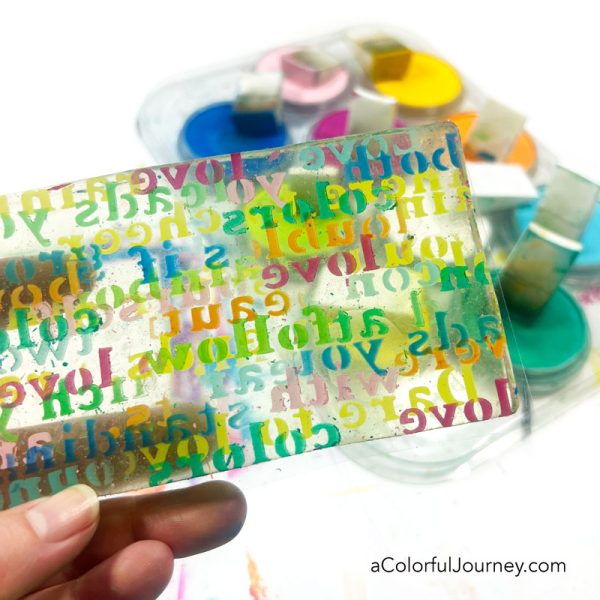
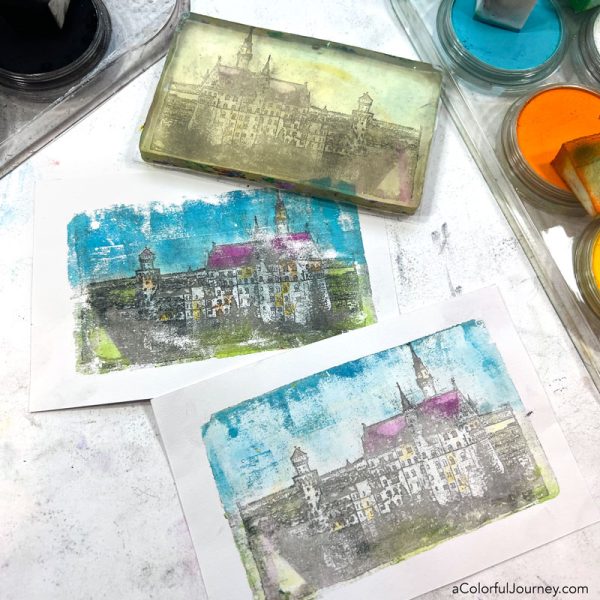
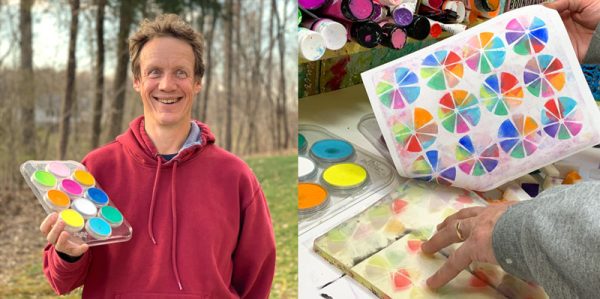
The versatility of PanPastels and a gel plate gives you options. You can go bold with a technique or you can be more monochromatic. The prints below were created with the same reverse stenciling technique, but one has been rainbowed while the other stayed with black PanPastel.
“Stuff”
As well as using traditional supplies, like gel plates, stencils, stamps and acrylic paint, we’re also using “stuff”. This is a very technical term that applies to things from your kitchen, from the trash, from around the house or garage. Everything used to make the print below is “stuff”. Wait till you see how to use the patterns and textures you have all around you with PanPastels!
Until I started gel printing with them, my PanPastels didn’t get used very often for one big reason. Pastels need to be sealed. But gel printing with them seals in all that color! That means as soon as you take the pull, they are sealed and good to go for art journaling, card making, scrapbooking, collage, or ready for framing!
Who is this workshop for?
Anyone who wants to have fun making gel prints! Your gel plate can still be in the original packaging because no experience is needed! Every technique is explained step-by-step. No experience needed with PanPastels either!
If you’re an experienced gel printer, working with PanPastels is different than working with paint on a gel plate and that opens up a whole new world of techniques! Understanding how and why these two supplies work together lets you take your prints up to the next level.
What’s Included in the Workshop:
19 lessons
Downloadable videos
Self-paced – content immediately available
Lifetime access
14 day money back guarantee
5 Bonuses! Color Explosions, Printing on Fabric, Grungy Layers, Aged Layers and the video of newbie Dave making PanPastel prints!
A lot of art workshops don’t offer guarantees. But I do! Why? Because I want you to have the workshop that is right for you and sometimes the only way you can tell that is by watching the workshop.
Try the workshop for 14 days. After watching the videos, you will know how to use PanPastels on a gel plate to make prints. I 100% guarantee it. If you don’t, send me an email, and I’ll gladly give you a full refund.
Your Bonuses!
Dave, the husband, was talked into doing a live video using PanPastels for the very first time, ever! The recording of these shenanigans and his rainbow pizzas print is just one of your five bonuses! Also included in your bonuses:
Colorful Explosions– make the colors of the rainbow pop with incredible vibrancy with this technique! And NO MUD!
Aged layers-Creating the look of aged layers using a combination of techniques from the workshop.
Soft and Mysterious Layers-See how a ho-hum background in an art journal becomes one filled with mysterious layers!
Gel printing on fabric with PanPastel. The fabric is not washable, so that means it is great for art quilts to be hung on a wall, mixed media fabric art, home decor items – basically, any fabric use that won’t involve putting it in a washing machine.
What supplies do you need? The basic supplies used in all the techniques are PanPastel in any colors you like, cosmetic sponges from the drug store, gel plates (the techniques work on any size) and the basic supplies for making a gel print (brayer, acrylic paint, paper).
We’ll also be using common art supplies such as stencils, rubbers stamps, plus some “stuff” like some trash, and other household goodies to build pattern on the plate. I encourage you to use what you have on hand! In the classroom, I have a detailed video that walks you through your supply options in depth. I strongly encourage you to substitute with any supplies you prefer or have on hand.
Lessons in this Workshop:
How PanPastels Work on Gel Plate
Cleaning the Gel Plate and Sponges
Blending Colors On the Plate
The Pounce and Grab
How to Avoid Smeared Layers
Using White
Taking Grunge to the Next Level
To Blend or Not to Blend
2 Very Different Looks from the Same Supplies
Combining Techniques
Removing Color
Rainbow Clouds and a Silver Lining
Changing the Shape of the Sponge
Reverse Stenciling
Colorful Reverse Stenciling
Creating Vibrant Layers of Color
FAQ
When does the workshop begin?
As soon as you’re registered! This is a self paced workshop.
What is a self paced workshop?
This is a self-paced workshop which means the videos are available for you to watch at your own pace as soon as you’re registered.
How long do I have access to the workshop?
As long as you need since you have lifetime access and all the videos are downloadable.
Can I do this workshop if I am new to gel printing?
Absolutely! Your gel plate can still be in the original packaging because no experience is needed! Every technique is explained step-by-step.
What if I’m already an experienced gel printer? Is this workshop for me?
Absolutely! Working with PanPastels is different than working with paint on a gel plate. That opens up a whole world of techniques that you can’t do with paint alone. Understanding how PanPastels work on a gel plate can take your prints up to the next level.
Do I need to know how to use PanPastels?
Nope. This is a completely different way of using PanPastels so no experience needed.
What if I’m new to understanding color?
There’s a Mud Makers Cheat Sheet for you to print out so I’ve got your back!
What supplies do I need?
The basic supplies used in all the techniques are PanPastel in any colors you like, cosmetic sponges from the drug store, gel plates (the techniques work on any size) and the basic supplies for making a gel print (brayer, acrylic paint, paper).
We’ll also be using common art supplies such as stencils, rubbers stamps, plus some “stuff” like some trash, and other household goodies to build pattern on the plate. I encourage you to use what you have on hand! In the classroom, I have a detailed video that walks you through your supply options in depth.
How long is each video?
On average, the videos are approx. 10-20 minutes long. Each video is carefully edited so you can see the technique step-by-step and have time to play!
Is there a guarantee?
Yes! Try the workshop for 14 days. After watching the videos, you will know how to use PanPastels on a gel plate to make prints. I 100% guarantee it. If you don’t, send me an email, and I’ll gladly give you a full refund.
A lot of art workshops don’t offer guarantees. But I do! Why? Because I want you to have the workshop that is right for you and sometimes the only way you can tell that is by watching the workshop.
Are the videos downloadable?
Yes! You can watch them on your computer or mobile devices.
Do the videos have closed captions?
Yes!
Is there lifetime access?
Yes! Since this is a self paced workshop, you can watch it on whatever timetable fits your needs best!
Am I able to ask questions about or get help with my prints?
Absolutely! I am here to answer all of your PanPastel gel printing questions.That’s one of the perks of taking a workshop! You can upload a photo of your prints, post your questions and share your prints inside the classroom.
Play. It isn’t just for kids, it’s for grown-ups too. Kids jump right in to play – no warm-up needed. Adults sometimes need a little help getting to that playful place. That’s where my free Sparks of Art-spiration can help.
See how to use a Spark as a springboard for your play in the video and you can get the Spark that goes with this video here. Then each week, you’ll get a brand new Spark as well as creative encouragement in your inbox.
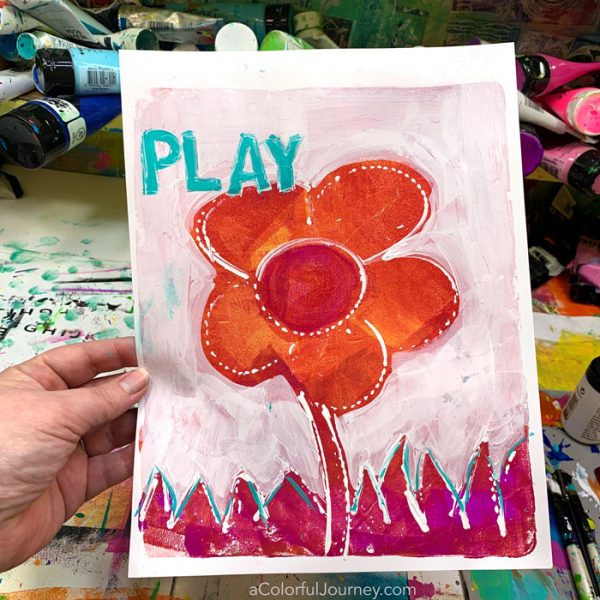
When I looked in the Spark I saw a flower. The cool thing about Sparks is that it’s like looking at clouds, everyone can see something different. I’ve even found that on different days, I’ll see different things in the same Spark.
Since Sparks are downloadable, when you see another shape in it, you can print another and play again. That also takes away any pressure that it might be “ruined”. If it is, you just print another!
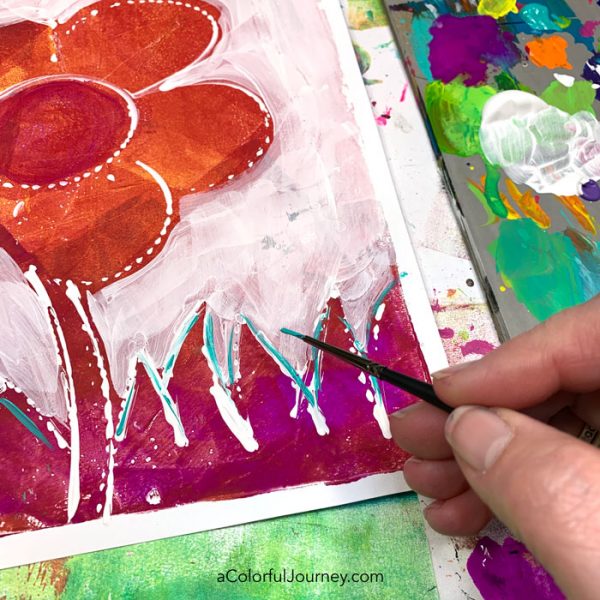
Is that grass shark fins or mountains? It certainly didn’t look like blades of grass to me.
To get a bit of color that was translucent for the center of the flower, a bit of water was added to the acrylic gouache. Acrylic gouache will act like watercolor when you add water but when it dries it is permanent, meaning it won’t reactivate any more the way a traditional gouache or watercolor does.
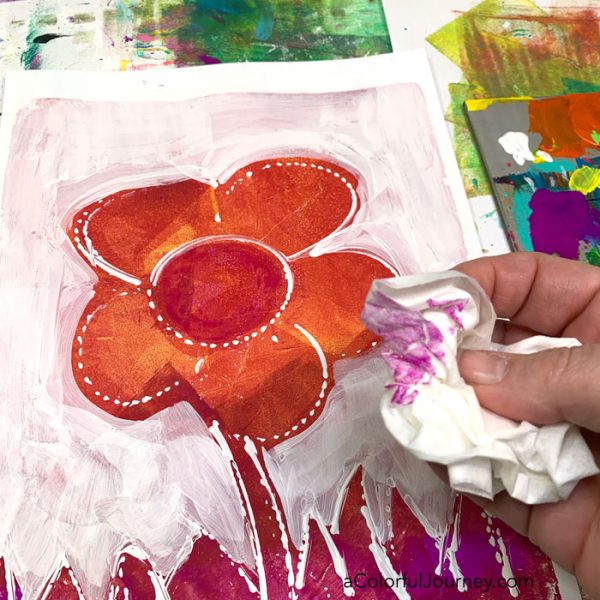
Did you notice that oddball flower petal when the white background was added? Well, that was an O.O.P.S., an Outstanding Opportunity Presenting Suddenly. Not a mistake, but an opportunity.
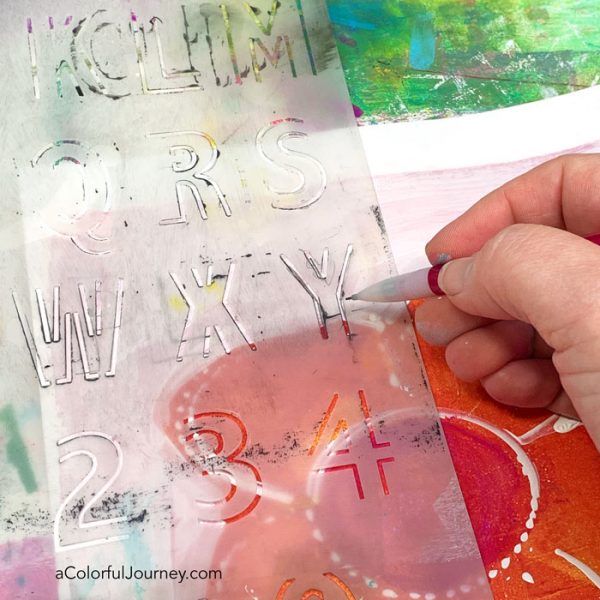
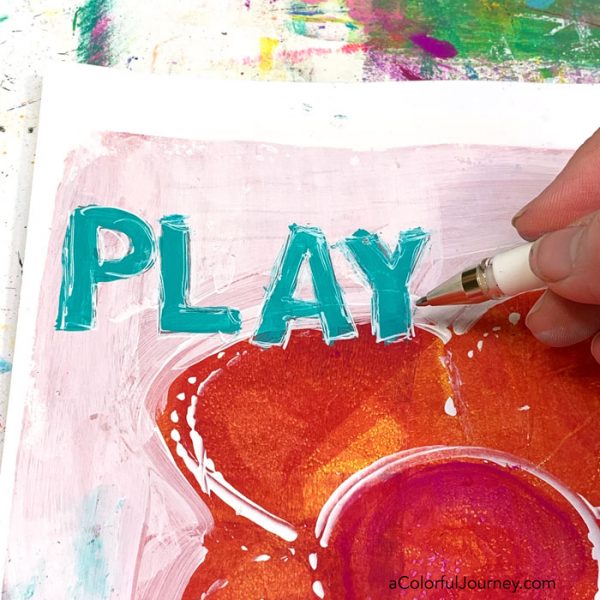
That horrifying petal had to be covered up. Okay, that might be a bit overdramatic, but I really didn’t like it. So I used a word to hide it.
My Open Ended stencil from StencilGirl let me trace the letters to fill in with paint. I designed this stencil to help people like me who are impatient, hate to measure and struggle to make even titles. Without the guide of the pencil lines, my letters would have been 4 different heights!
This is a do as I say not as I do kind of a thing. Pens write really nicely on the acrylic gouache, but you do have to let the paint fully dry before you write on them. That required more patience than I had, so I wrote on there before I “should have”.
That’s why I was wiping the pen tip off in the video. In case you’re wondering, the pen did survive!
Now you know how to use a Spark of Art-spiration as a starting place for your play. Download it from the email, print it out and then use any supplies you have on hand, after all the best ones are the ones within arm’s reach!
What’s a Spark of Art-spiration? It is a springboard for your creative play that comes weekly in the newsletter.
How do you use a Spark? Print out the Spark on a printer, any printer- ink jet or laser, in whatever size you want and then play. You have complete freedom to experiment, play, explore.
What if one gets “ruined”? Simply print another. That means you can never run out of them so there is no pressure whatsoever as you play. Of course, any time there is a “mistake” it is really just an O.O.P.S., an Outstanding Opportunity Presenting Suddenly.
How you can get a new Spark each week?Just click here to get signed up for the newsletter. When you get signed up, you’ll get this Spark right now and you’ll get a new one each week in the newsletter along with creative encouragement.
Here are the supplies used. Some of these links are affiliate links which means I get a small percentage. It doesn’t cost you anything extra and it helps keep the free tutorials coming!
This website uses cookies to improve your experience while you navigate through the website. Out of these cookies, the cookies that are categorized as necessary are stored on your browser as they are essential for the working of basic functionalities of the website. We also use third-party cookies that help us analyze and understand how you use this website. These cookies will be stored in your browser only with your consent. You also have the option to opt-out of these cookies. But opting out of some of these cookies may have an effect on your browsing experience.
Necessary cookies are absolutely essential for the website to function properly. This category only includes cookies that ensures basic functionalities and security features of the website. These cookies do not store any personal information.
Any cookies that may not be particularly necessary for the website to function and is used specifically to collect user personal data via analytics, ads, other embedded contents are termed as non-necessary cookies. It is mandatory to procure user consent prior to running these cookies on your website.