≡ Menu

Video tutorial showing the steps to make a mixed media envelope using StencilGirl stencils and lots of layers with Carolyn DubeGetting started is the toughest part for me many days. Where do I start?  What do I make?  What colors do I use?  These are just questions from a cranky inner critic designed to keep me from getting to my creative side.   So, I decided I was going to shut that critic up by answering those questions.  How? By using challenges.

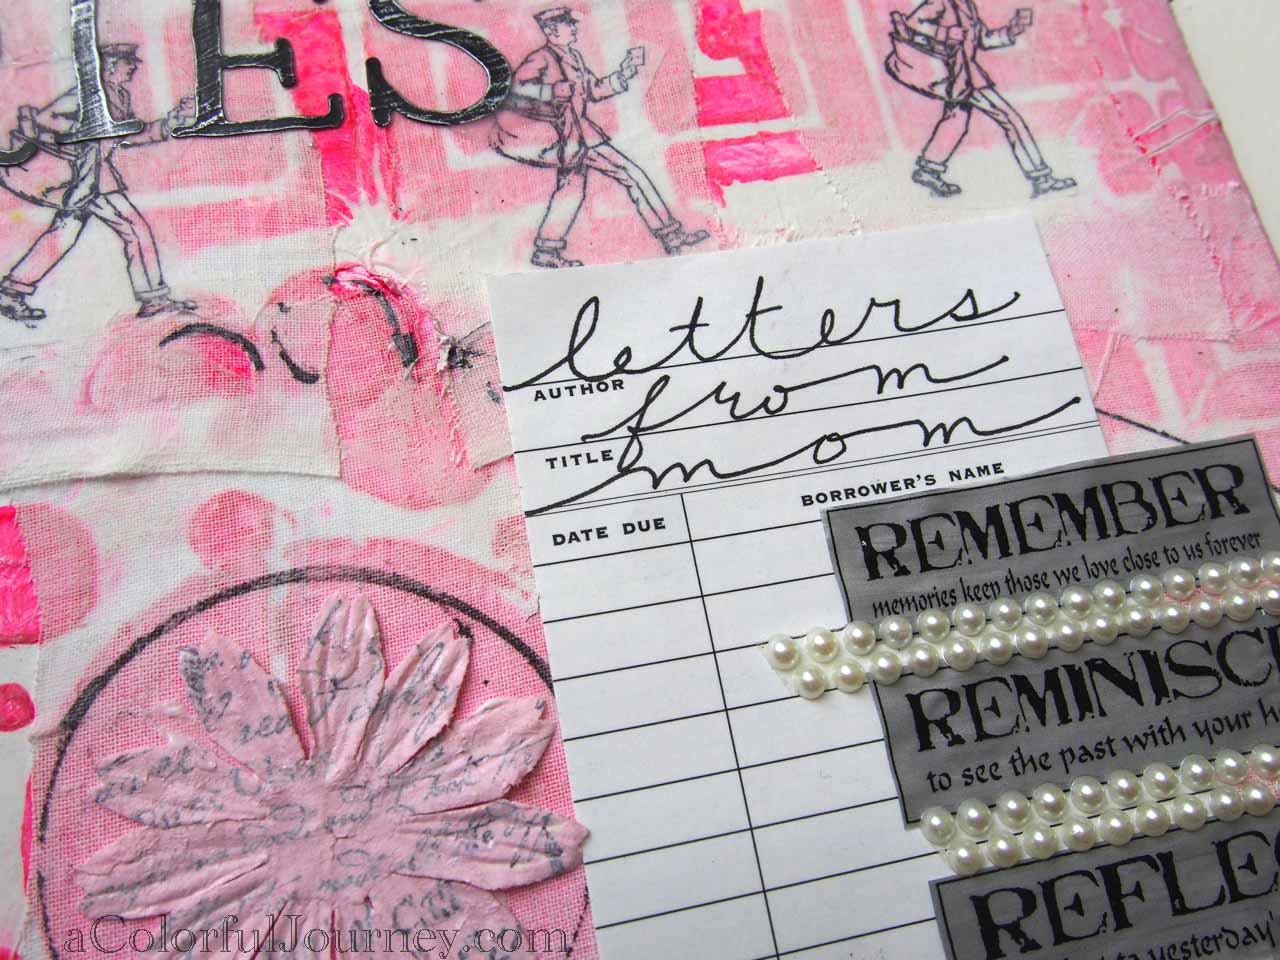
So my colors, soft pink and gray come from the Summer of Color challenge.  The envelope comes from the Lessology recycling challenge of using packaging.  The paint comes from Paint Party Friday.  The postal theme comes from Fashionable Stamping.  The art journal feel to this comes from Art Journal Every Day.

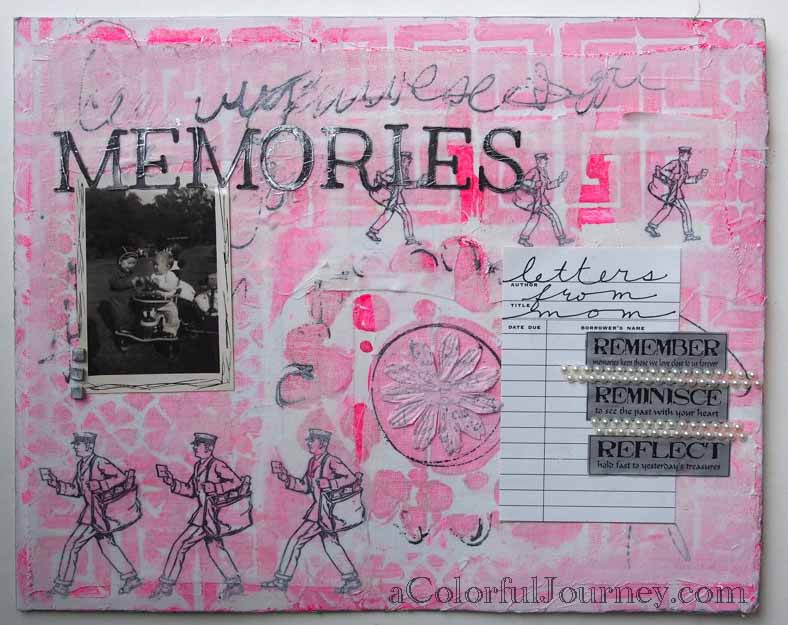
By combining these challenges I now had a plan and that cranky inner critic was suddenly much quieter. Once that critic was quiet I could see where my muse would take me.  I ended up with an envelope that will hold a stack of letters I have that my mother wrote to her aunts, my great aunts when she was a kid.

You can watch the video on YouTube here.


Video tutorial showing the steps to make a mixed media envelope using StencilGirl stencils and lots of layers with Carolyn Dube

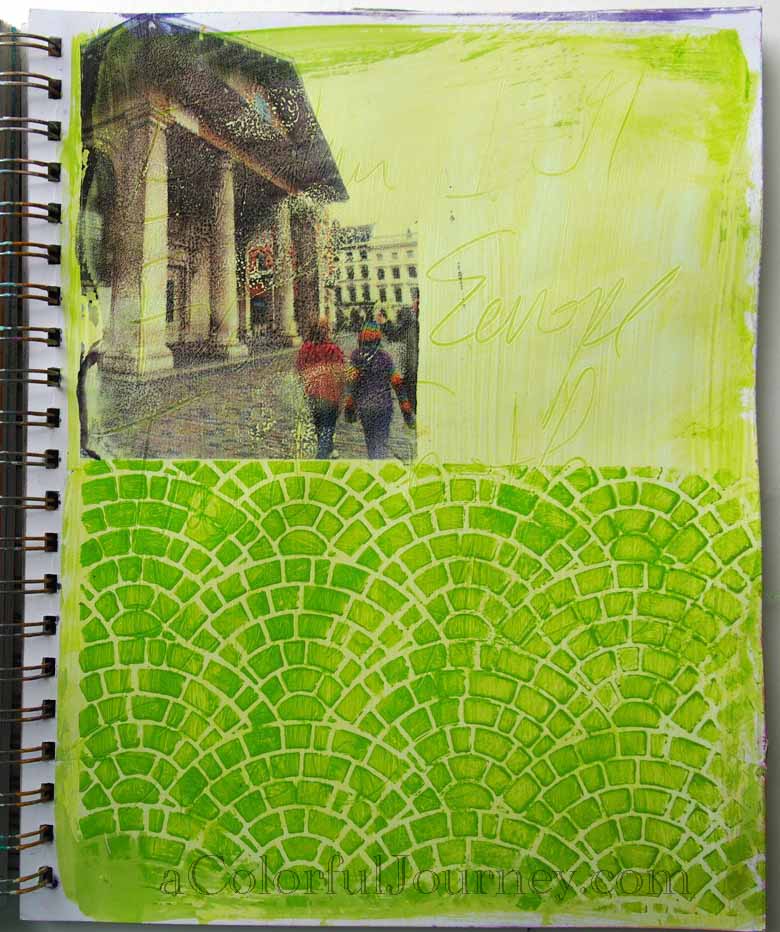
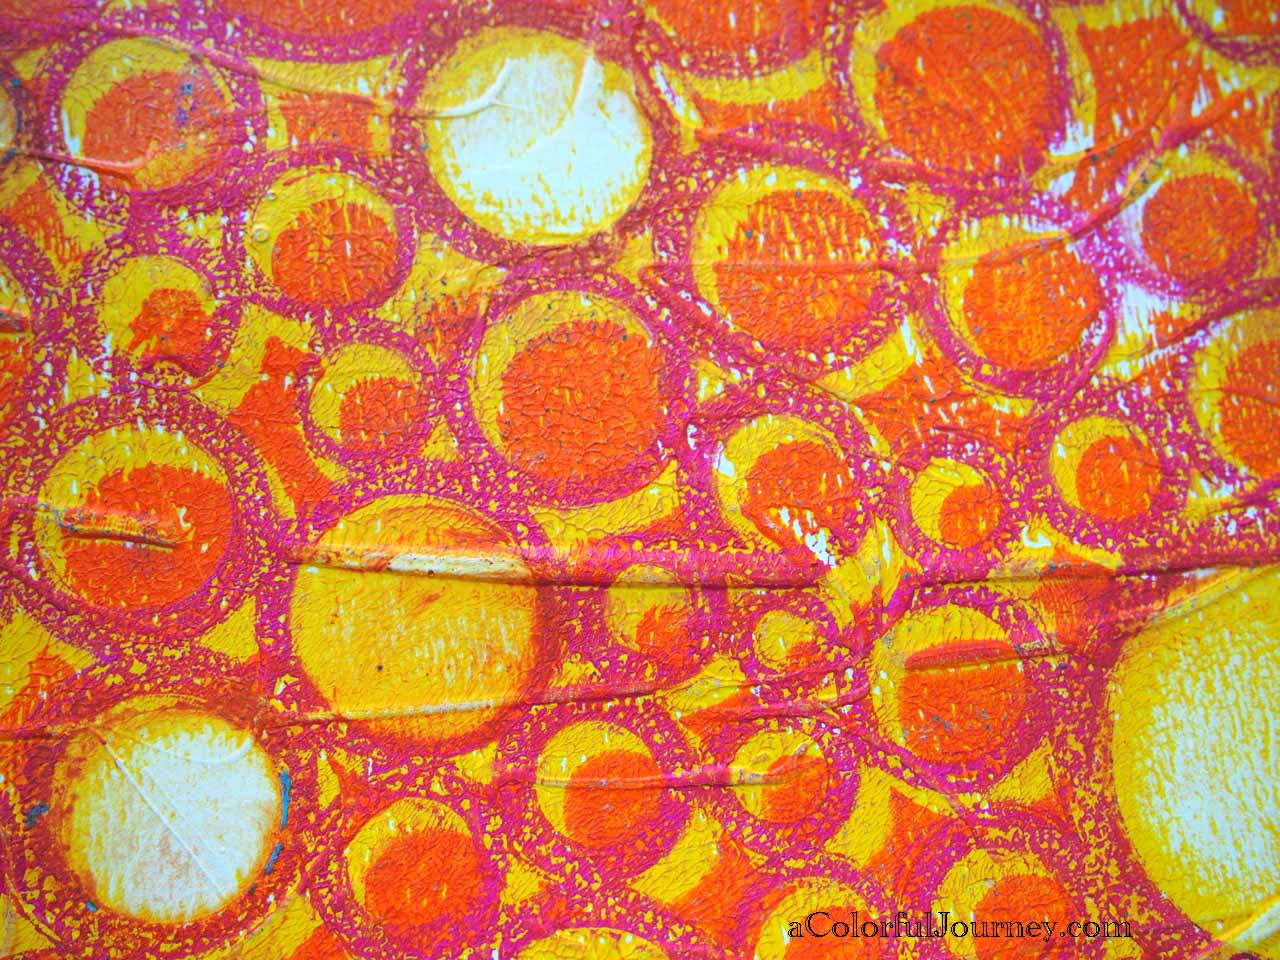
The wonderfully heavy mailer that my StencilGirl stencils were shipped in was the base for  paint and stencils: Greek Key, Blades 6, and Circle Play.


Video tutorial showing the steps to make a mixed media envelope using StencilGirl stencils and lots of layers with Carolyn Dube

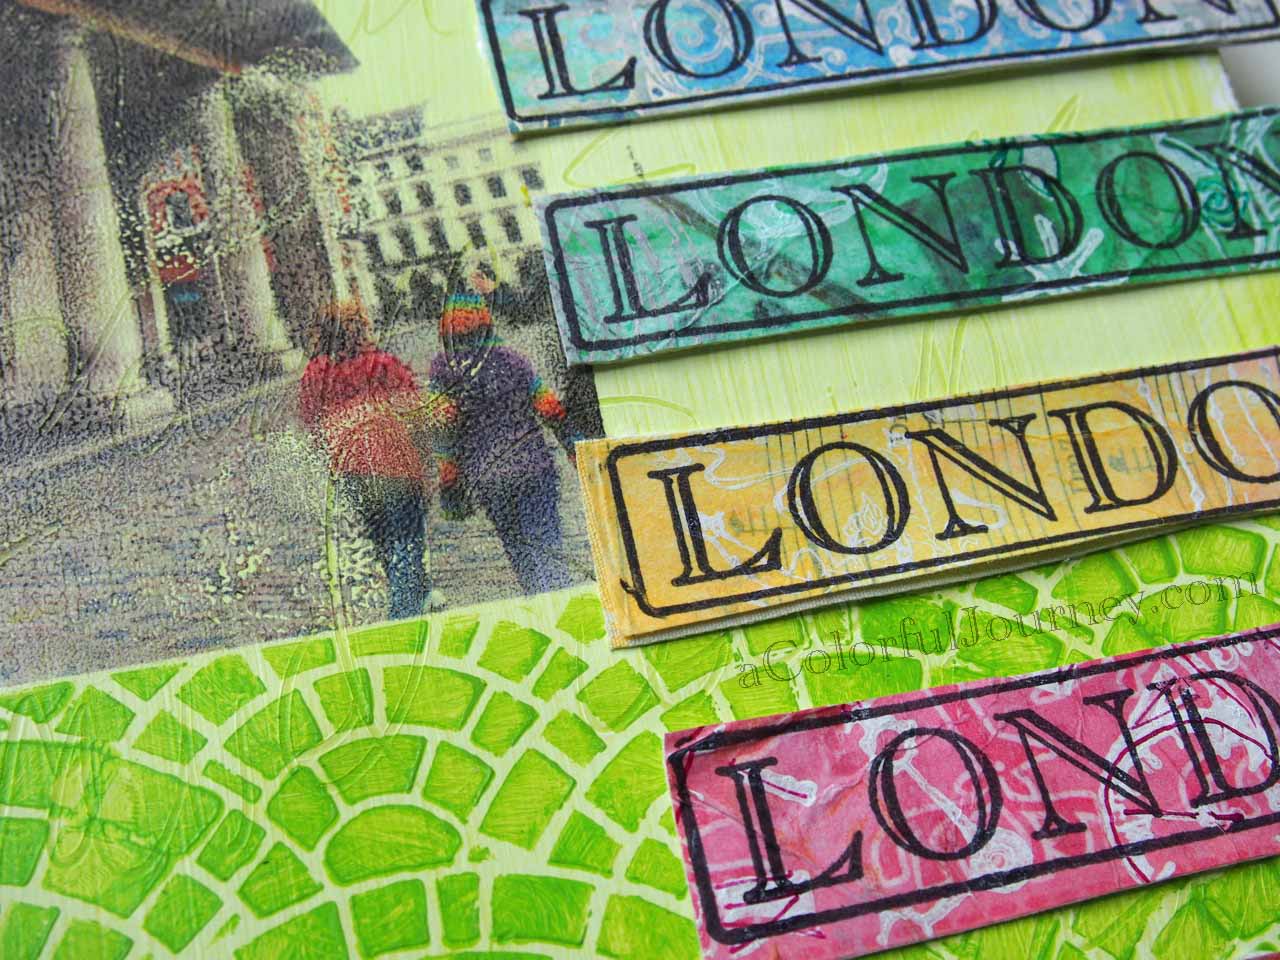
The tissue paper just melts into the background without cutting it carefully!  I used the Catalyst Mini Blade #4 (which looks and works like a great spatula for gel medium).


Video tutorial showing the steps to make a mixed media envelope using StencilGirl stencils and lots of layers with Carolyn Dube

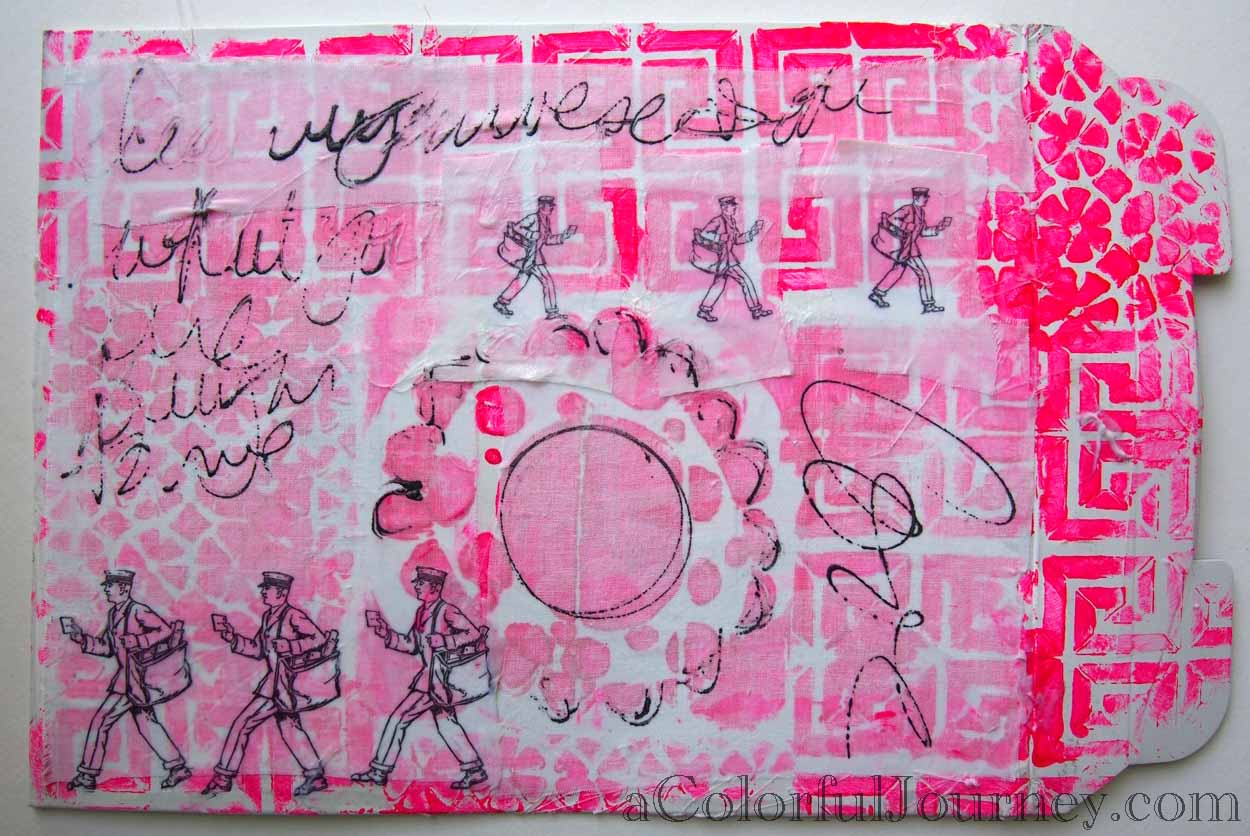
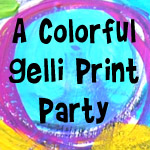
The scribble writing is using Pam Carriker’s Sketching Ink from Derivan.


Video tutorial showing the steps to make a mixed media envelope using StencilGirl stencils and lots of layers with Carolyn DubeAlso linking up with Simon Says Stamp and Show, Show and Tell Saturday, and Pink Saturday.

Step-by-step art journal page using Lesley Riley'sTAP by Carolyn Dube


There is still time to leave a comment and be entered in the giveaway for a free class!  Hop on over here for all the details!


Video tutorial showing how to make your own patterned paper and then using it on a tag by Carolyn Dube


Want more?  Here’s a peek at the tag I made and there is a full video over on the StencilGirl blog!


Thank you for every comment, every share on Facebook & Twitter & Google+, every  subscriber to my YouTube channel, and every newsletter subscriber. It fuels me on to make more art!

{ 48 comments }
Step-by-step art journal page using Lesley Riley'sTAP by Carolyn Dube


Lesley Riley's TAPLesley Riley is celebrating her class, Mastering the Art of Transfers on Multiple Surfaces with a fantastic blog hop!   You get to see so many different artists using TAP and there is a giveaway on each and every blog! Including this one! Be sure to leave a comment here by Wed., July, 10th at noon Eastern time to win a spot in her class!


Lesley Riley's TAP class

Her class teaches you all about TAP (Transfer Artist Paper) on all sorts of surfaces.  TAP is amazing- you can use markers on it, stamp on it, inkjet print on it and more! No wonder TAP was named the Most Innovative New Product at CHA in 2011.


Here’s how I used TAP in my art journal.

Step-by-step art journal page using Lesley Riley'sTAP by Carolyn Dube


I started with scribbling into wet gesso. Once it was dry I added green paint.


Step-by-step art journal page using Lesley Riley'sTAP by Carolyn Dube


Lizzie Mayne’s Fishscale Brick stencil at StencilGirl Products reminded me of so many old walkways we saw on our trip to London.  Of course, those walkways weren’t green due to acrylic paint…


Step-by-step art journal page using Lesley Riley'sTAP by Carolyn Dube


I used my ink jet printer to put a photo from our trip onto TAP.  Then I ironed it right into the journal.  So easy and so fast!


Step-by-step art journal page using Lesley Riley'sTAP by Carolyn Dube


Lesley shows you how to get amazing transfers in her class.  I didn’t want perfect. I wanted aged and imperfect so I did not iron it as long as I “should”…love that I can adjust it to what I want!  Notice how the texture in the gesso comes through!


Step-by-step art journal page using Lesley Riley'sTAP by Carolyn Dube

This is what the release paper looks like!  This will definitely be showing up in an art journal or on a canvas.  Maybe some stitching…lots of possibilities….nothing wasted here!


Step-by-step art journal page using Lesley Riley'sTAP by Carolyn Dube


London (by B Line Designs) was stamped on some old paper cloth I had made long ago.  It felt good to use something I had been saving!


Step-by-step art journal page using Lesley Riley'sTAP by Carolyn Dube


I wanted a bit of journaling but I don’t love my handwriting so I typed it.  I painted a piece of card stock and let it dry COMPLETELY!  Couldn’t decide on a font so I just printed the text in 3 different fonts.  My ink jet printer’s ink is very wet on painted surfaces so I let it sit overnight to dry.

I picked one and glued it onto the page.


Step-by-step art journal page using Lesley Riley'sTAP by Carolyn Dube

Thanks Lesley for such a fabulously easy way to get transfers into my art journals!

TAP can be purchased online from LesleyRiley.com, TAP at Amazon.com, Joann.com and more.  Also look for it (or ASK!) at your local art, craft and quilt shops.

You can also win a 5-sheet pack of TAP Transfer Artist Paper!  Hop over to Lesley Riley’s blog to leave a comment for that giveaway but before you go be sure to leave a comment here! I’ll be randomly picking a winner for a free spot in Lesley’s class, Mastering the Art of Transfers on Multiple Surfaces, on Wed., July 10th!

Check out these blogs for more chances to win a free spot in Lesley’s class!

June 26 – Christine Urias – Scrap Time
June 27 – Karen Watson – The Graphics Fairy
June 28 – Judy Coates Perez – Judy Coates Perez
June 29 – Theresa Wells Stifel – Stifel & Capra
June 30 – Lynn Krawczyk – Fiber Artysta
July 1 – Claudine Hellmuth – Claudine Hellmuth
July 2 – Gina Rossi Armfield – Joyful Purpose
July 3 – Carolyn Dube – A Colorful Journey
July 4 – Liz Kettle – Stitch Journeys
July 5 – Jane LaFazio – Janeville
July 6 – Joanne Sharpe – Whimspirations
July 7 – Pam Carriker – Pam Carriker
July 8 – Theresa Martin – Theresa Martin

It’s a busy day for me! I’ve also got a stencil tutorial today over on the StencilGirl Products blog, StencilGirlTalk!

{ 163 comments }
Video tutorial for A Colorful Gelli Print Party with Carolyn Dube Using a StencilGirl Stencil Join me for a Colorful Gelli Print Party!

Welcome to July’s Colorful Gelli Print Party!  At long last it is getting hot here, just like summer should.  In honor of that beautiful ball of golden happiness I’m playing with hot colors making a page full of my own little Suns!


You can watch the video on YouTube here.

You can do a messy layer of gesso, a neat and tidy and smooth layer of gesso, or something in between but you need a layer of gesso.  The gesso layer is very very very, did I mention very, important for this technique!  I used a heavy watercolor paper because that is what was around.  I love the extra texture it added. I used a Catalyst blade (size 30 #6) to spread on the gesso.

I’m using the 12×14 size Gelli Plate today but this will work with any size plate.Video tutorial for A Colorful Gelli Print Party with Carolyn Dube Using a StencilGirl Stencil

Both of these prints were made with the same stencil, Random Circles by Mary Beth Shaw at StencilGirl Products.  One of the things I love about using stencils with the Gelli Plate is that you can get so many different looks with the same supplies. One print has me thinking about the hot summer sun and the other bubbles surrounded by journaling.

Video tutorial for A Colorful Gelli Print Party with Carolyn Dube Using a StencilGirl Stencil

Sharing the fun with Creative Every Day, Inspire Me Monday, Make it Monday, Mandarin Orange Monday, Create Daily, Anything But a Card (get messy) and Be Inspired.


Thank you to everyone who linked up for June’s party.  There were so many great ideas for tools, prints, and projects linked up!  If you missed it, you can see it here.  Now on to this month’s party.  It is open all month!

Link up your Gelli Plate blog posts, flickr photos, YouTube videos , any online media you’re using to share your work– it is all welcome!  New posts or recent posts are welcome!

  • Link to a specific blog post or flickr page or YouTube video or other source that way people can easily find your Gelli goodness.
  • Add a link back to the party so others can join us too!
  • Leave a comment on at least 2 other links from the party.  You know how  comments encourage us creative types!
  • Participate as many times as you want- just be sure it relates to the Gelli Plate.
{ 47 comments }