
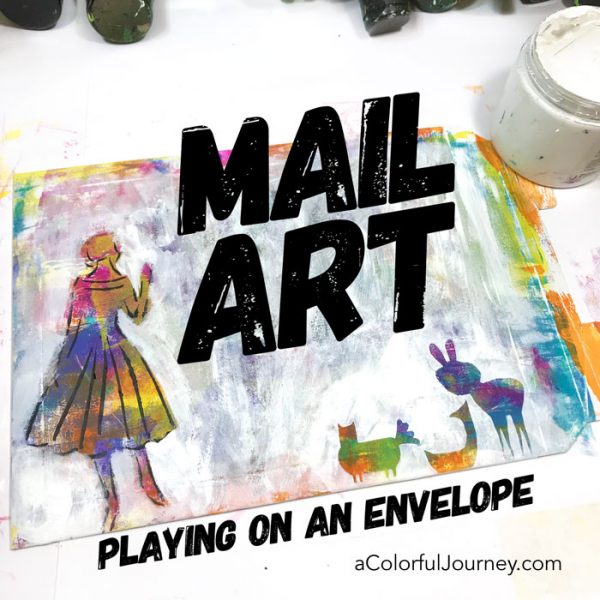
 What do I do with plain white envelopes before I mail them? I add the rainbow…and stencils! This one in particular went out to Erika, who won the 10 stencil giveaway recently. How did I do it? It’s all in the video, including the OOPSies and the part where I unexpectedly felt a ton of resistance!
Watch Mail Art- going from plain white to colorful on YouTube.
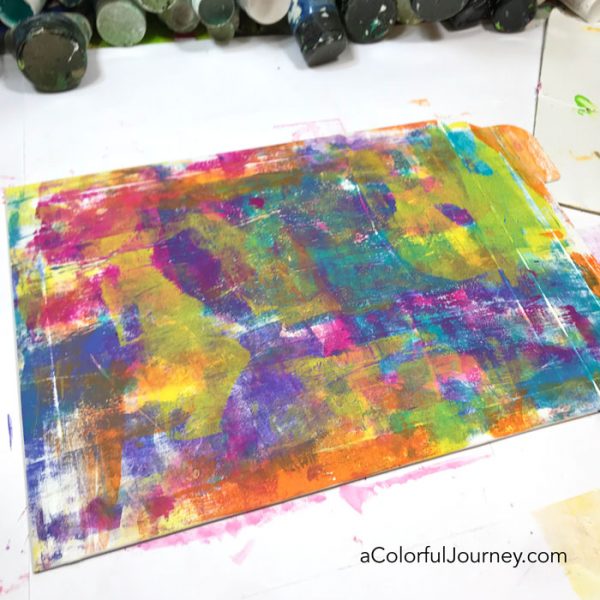
The 5 x 7 Gel Press plate and Paper Artsy paints created the background on the formerly plain mailing envelope.
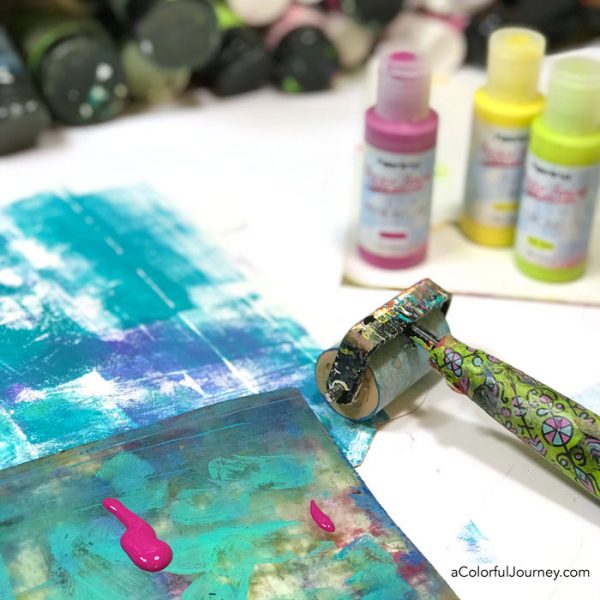
This was my first time exploring these paints on the gel plate, and I have to say, they were a joy to work with. Some of the colors were opaque and and some semi. Since they put that information right on the front of the bottle, it was easy to know which paints would cover up well and which would let the other layers peek through more.
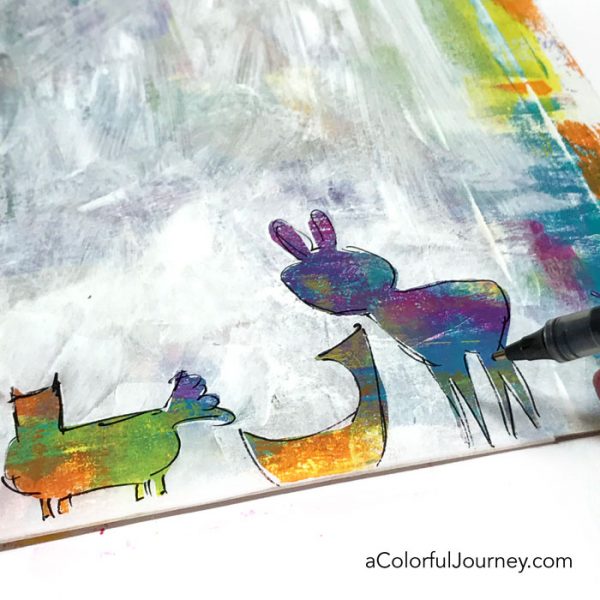
Next, I stenciled one of the Sketchy Women with Class so she could hold the address of the person this is being mailed to. To create a spot for the name, I used the Alpha Jumble small stencil on a piece of scrap cardstock.
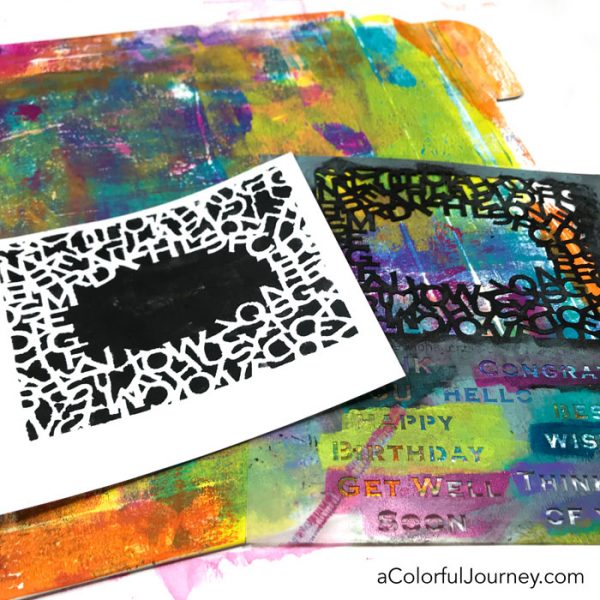
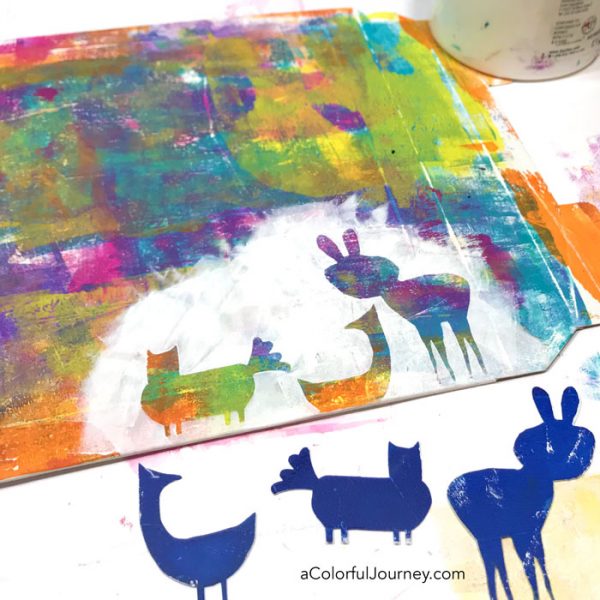
The right side called for some fun so I used the Little Figments of Imagination masks (included with the stencil). The joy of having masks it is makes it easy to arrange the shapes before using the paint, and adjusting things like the height as I did with the middle Figment.
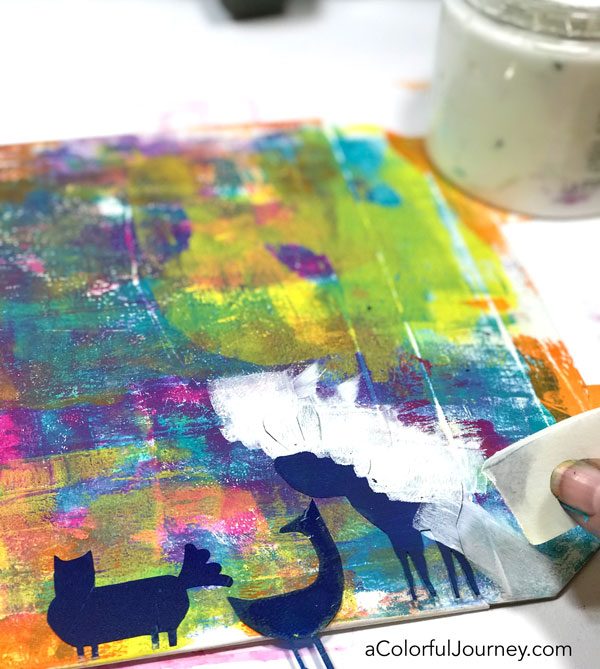
Stencil masks are a quick way to use busy or colorful backgrounds. When the masks were lifted, the color was revealed below.
This is when something strange happened. I had become attached to that colorful background and didn’t want to cover it up completely with the white. I compromised with myself and did a light covering of the white so that bits of the colorful background still peeked through.
After all, this was just paint and paper. I could make another gel print. Later I realized it wasn’t so strange that I had a hard time covering it up, I was using white. And I usually fill all the white spaces with color so no wonder I was resisting covering it up!
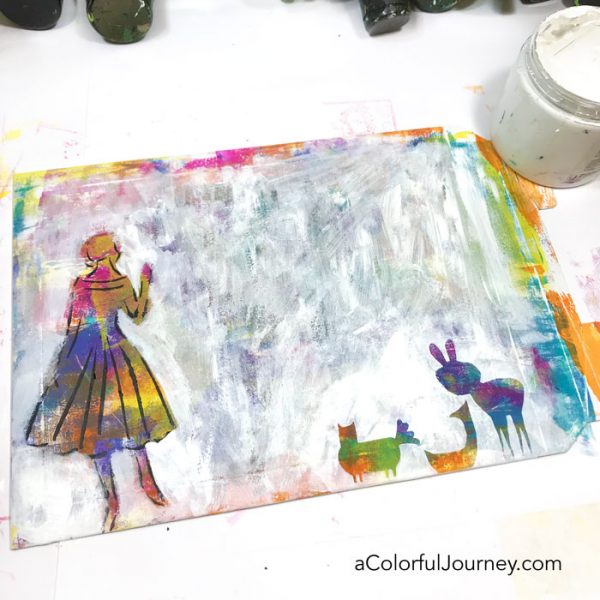
My stenciling job on her was not that neat and tidy. Nor was my white painting around her. And that didn’t matter one bit. Call them O.O.P.S.ies, Outstanding Opportunities Presenting Suddenly. A great reason to let loose and add sketchy lines all around her.
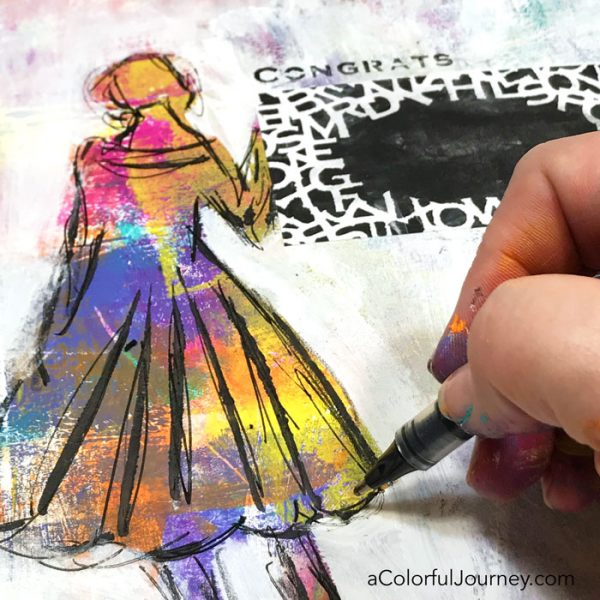
Adding sketchy touches feels very freeing to me, so I added them to the Figments too.
Here are the supplies I used. Some of these links are affiliate links which means I get a small percentage. It doesn’t cost you anything extra and it helps keep the free tutorials coming!

Fun, colorful envie! I also find it hard to cover up colorful bg’s. Love the purple hippo too.
I have been trying to get on to permission to play and can’t get a password. Can someone please help me.
Hi Sarah, I have sent you an email with directions for how to get into the classroom.
Thanks so much Carolyn for being an inspiration for freedom in art. I really enjoy watching your videos…you make me want to play!
You make everything so fun and easy! I love your whimsy spark and look forward to more videos! I also LOVE the Purple Hippo! Thanks for sharing!
Great project!
Love this! So pretty. I too have a problem covering beautiful backgrounds!
Hi Carolyn,
I really liked your video tutorial. I’m wondering if you could provide some clarification on a few of the details. For the past year, I’ve been TRYING to figure out a way to paint on paper so that people could write notes or lists on the paint with a “regular” pen…not a thick marker or whatever. Because you didn’t show us how you wrote the name on the envelope, I’m wondering if you can write directly on the paint, or if you wrote the address on a mailing label and stuck it onto the envelope.
I went to your links but I still have some questions.
1. The link to the colorful paint takes me to a shop that sells chalk acrylics. So is that what you used? Chalk acrylic paint? You didn’t specify “chalk” so I wanted to be sure.
2. The link to the white paint was NOT chalk paint but just regular acrylic…so is that stuff NOT able to be written on?
3. The black paint wasn’t referenced at all so I wanted to check and see if that was the chalk paint, the acrylic paint, or something else entirely?
4. Your link to the pens: they are listed as ball point pens…am I understanding that correctly? I would think any sort of roller ball would not work on top of paint. Is this the only pen that works on paint or is this a link to a “type” of pen that works on paint?
I have not yet found a paint that the regular pen can easily write on. May have found one paint but still testing it to see if it will really do it. When I find out that paint, I’ll do a blog post on it. As for your questions- I can’t remember if I wrote with a Sharpie or with a label. It’s the fresco paint from Paper Artsy, the white paint is regular acrylic, the black paint was regular acrylic paint, the pen is one that writes well on hard to write on surfaces. Hope that helps!