Welcome! I’m Carolyn Dube – This colorful journey is all about the freedom of play!
Search My Blog
Search by Category
The Fine Print
Some of the links on this blog are affiliate links and I receive a small percentage. It doesn't cost you anything extra and helps keep all the free tutorials and videos coming! It's a win-win!
The website is copyright Carolyn Dube, and that is kinda common sense since this is my site.
As an Amazon Associate I earn from qualifying purchases.
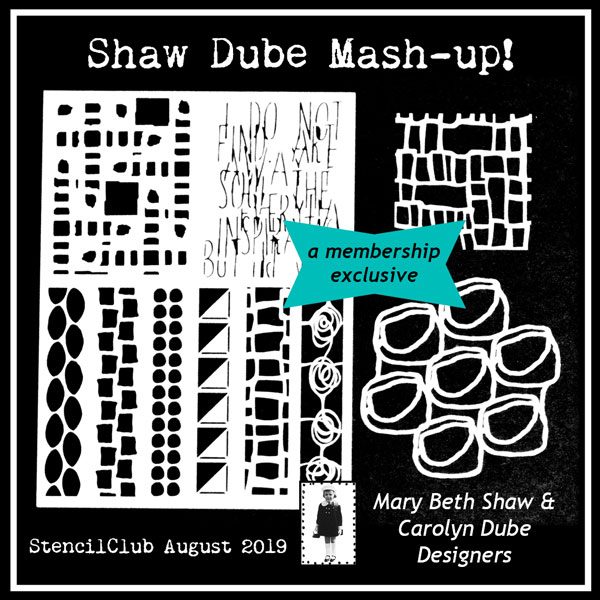
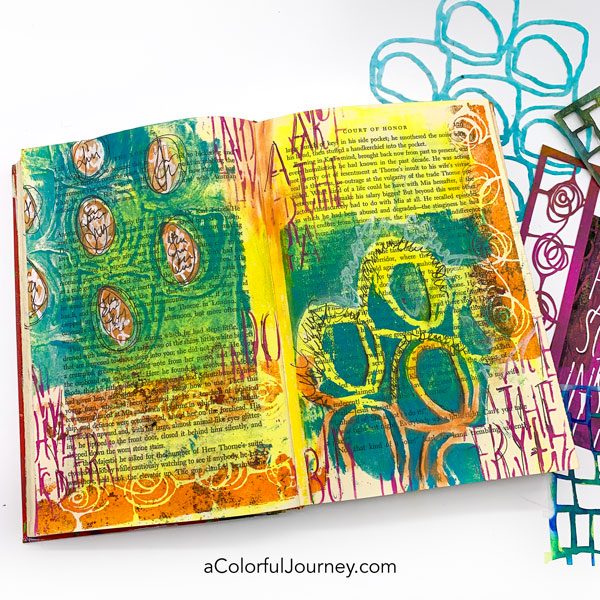
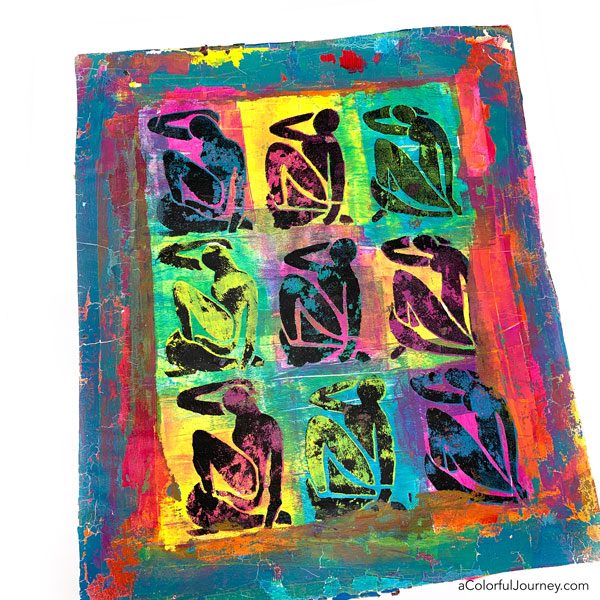
Excited to share a Mash up collaboration with the ever fun Mary Beth Shaw with you for this month’s StencilClub release! It’s a mash up and what that means is we picked our faves from each other’s stencils and then riffed on them isolating part of the design and shifting the size up or down.
In the video, you’ll see how to use them with a gel plate for speedy stenciling and you’ll see how I handle an OOPS or two!
What’s StencilClub? It’s exclusive stencils that aren’t sold anywhere else, delivered to your door each month. It includes a 9x 12, a 6×6, and a 4×4 stencil plus there’s a members only video and downloadable PDF each month from the artist(s) who created that month’s stencils.
That means this month, you’ll get to see both our takes on playing with stencils- we’re sharing transparent parts and gelli sandwiches with club members. StencilClub is only $25 a month (yup, that includes shipping in the US)! You can find all the club details here.
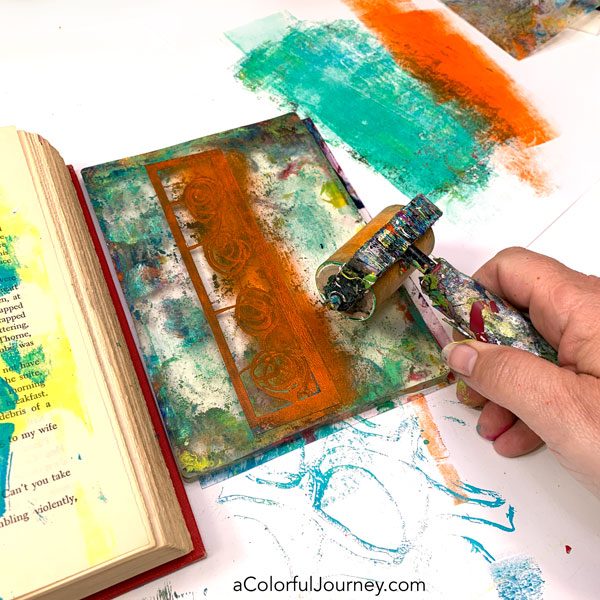
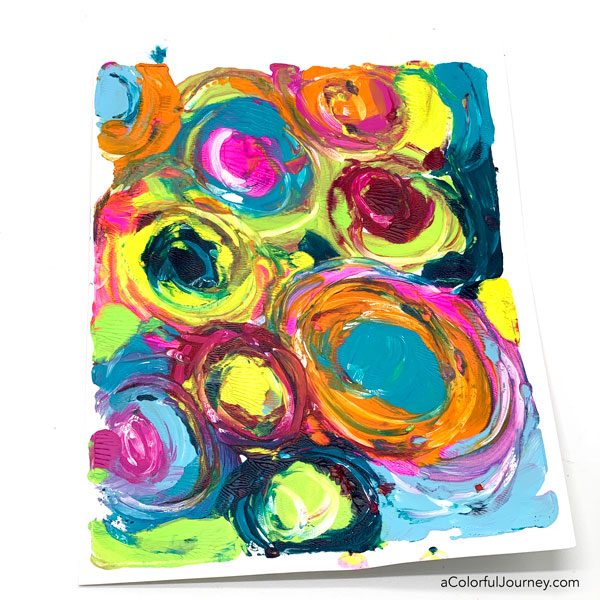
The fastest way to stencil is with a gel plate. The first way I shared in the video gives you loose, mixed media type of stenciling.
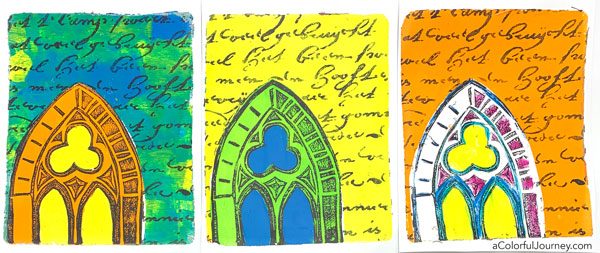
But what about if you want crisp details? The fine lines of the squiggly circles were captured by putting the stencil on the plate first and then adding paint.
One of the reasons I love this mash up is the choices. After having 2 loose circle patterns, I love that there were contrasting patterns to pick from!
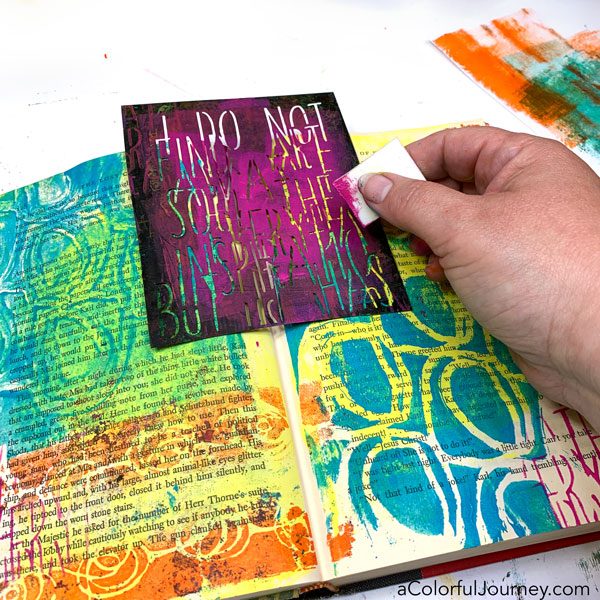
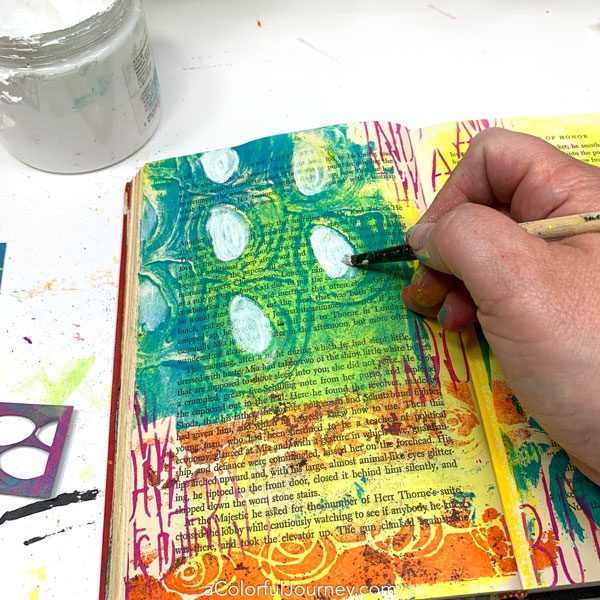
One of the challenges of using an altered book for a journal is that there is the middle issue. It can be tough to stencil there but if you hold the book as flat you can as you’re stenciling then the pattern will go across it.
To fill in the areas of the center that didn’t have color on them, I used an Art Crayon by Marabu.
OOPS! As soon as that white paint hit the page, I knew it was an O.O.P.S., an Outstanding Opportunity Presenting Suddenly. Never would have had that pastel touch of orange here if it wasn’t for that white paint OOPS.
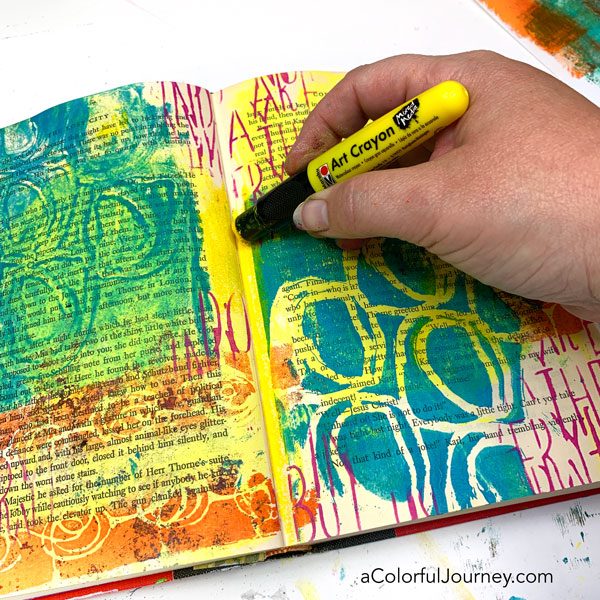
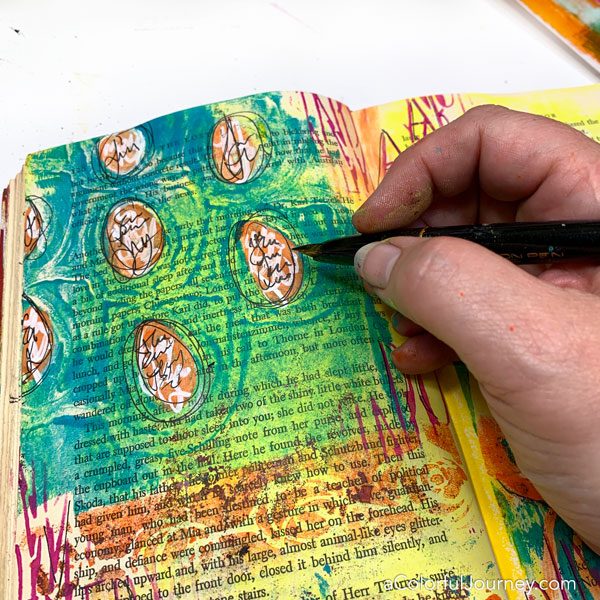
When adding writing on top of paint, a patient person would wait for the paint to completely and totally dry. I’m not that patient so I use a fountain pen to scribble journal.
Fountain pens have very few parts, unlike a ballpoint pen. The tip can be wiped off if paint builds up on it, unlike felt tip pens, which struggle even on dry paint.
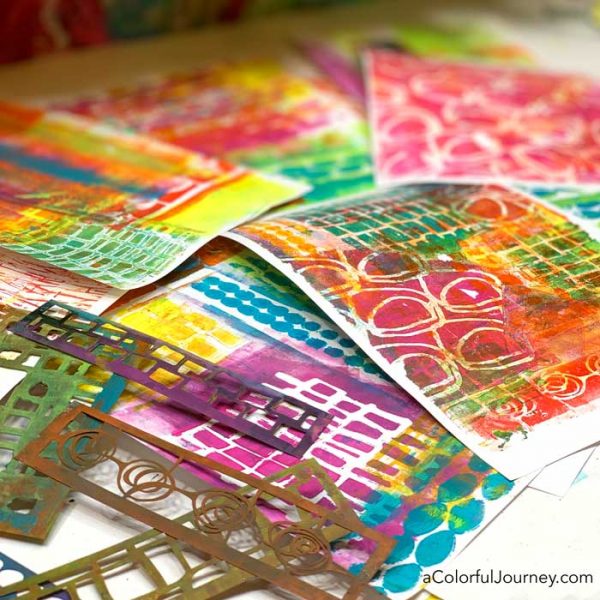
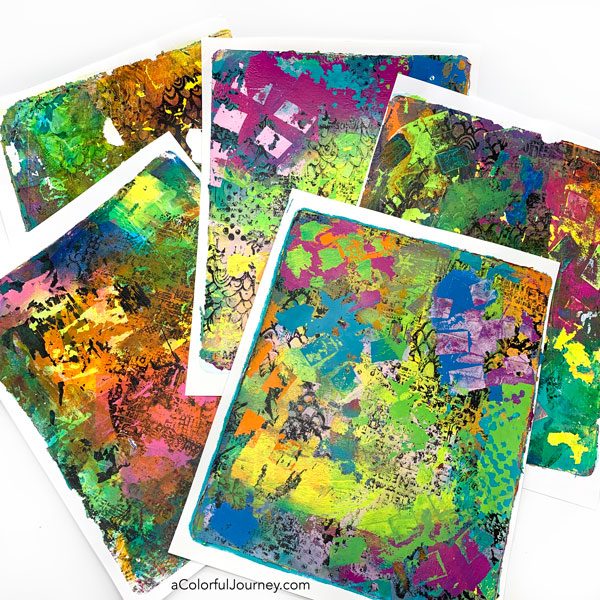
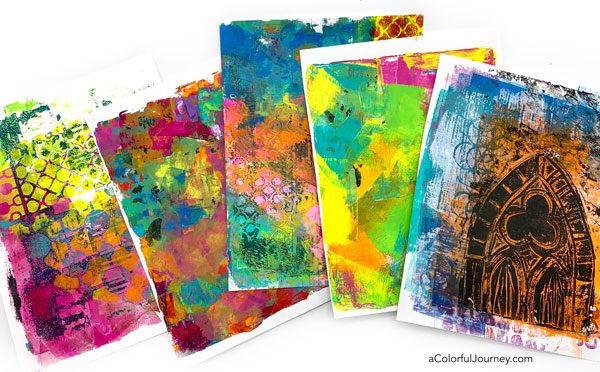
Gel printing directly into an art journal is one way to use these stencils, keep scrolling to see more gel printing with these!
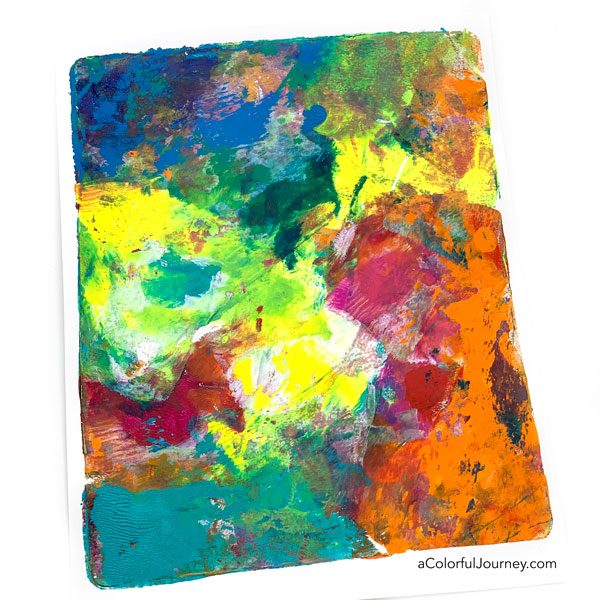
Below are prints I made just horsing around with a gel plate and all the mash up stencils.
When you’re not gel printing directly in your art journal,what can you do with the prints? Backgrounds for art journal pages, collage, anything mixed media, and when you need a really quick card, these are so handy!
Thanks Mary Beth for being so much fun to collaborate with! This month’s StencilClub stencils ship out to you on August 15th, so get signed up before that!
Here are the supplies used. Some of these links are affiliate links which means I get a small percentage. It doesn’t cost you anything extra and it helps keep the free tutorials coming!
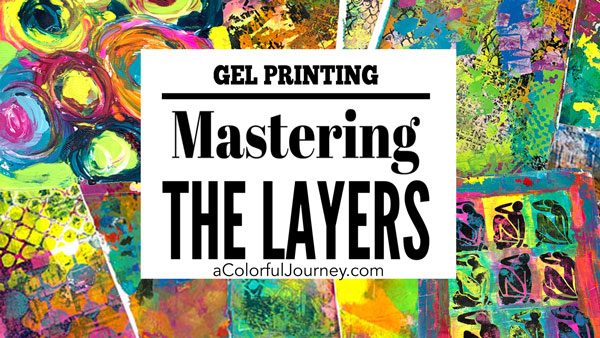
Can creating complex layers on a gel plate be simple? Absolutely! Layering comes down to just 2 factors. Once you understand how to use these 2 factors on a gel plate, you can consistently create the kinds of prints you want. And more importantly, have even more fun printing!
You can use the slap-dash method of printing and go through the frustration of trial and error, or you can skip all that and go straight to making prints you love with Mastering the Layers. Your prints don’t have to be random luck!
“Amazing how little I knew and how much I could learn given that I’ve been using a gel plate for about 3 years now!” -Cynthia Silveri
This online workshop is about both the techniques to create layers and the understanding of how layers interact. Knowing this enables you to create the kinds of prints you want on command. The more you understand the gel plate, the more fun you can have with it!
“You have saved us so much time, so now we can just play and play and have a bit of say over the final print!! Thank you!!”-Marrianne Pagnani.
In Mastering the Layers you’ll:
Discover how to add layers and not mess up the bright, vibrant colors
Find out simple ways to achieve interest or depth in your prints
Be confident in your layering choices as you fully understand the 2 key factors that impact layering
And so much more!
Want to feel confident with your color choices?
“I’m thrilled to get past all mud!” -Sue Johnson
Color plays a huge role in gel printing and it’s covered in depth inside Mastering the Layers. This is practical color, explained in a way that can be easily applied when you’re printing.
“Years ago I took a color course at the college and still came away confused about the colors and how to use them with each other. Thank you for simplifying this for me.”-Deborah Reis
You can know color theory and still manage to fall into ugly color situations when gel printing. That’s because color on the gel plate has a bit of a twist to it that can significantly impact your colors.
Once you know how to apply that twist then you can:
vary your color combinations so your prints don’t all look the same at the end of a printing session
know just the right amount of paint you need to use
get colors to integrate and blend without a blocky look
“NOW I understand why so many of my prints are dark and gloomy! Thanks, Carolyn!” -Deanna Robbins
“This class brought me to art again. And I am so happy!” -Andrea Miller
Layered prints look thought out, yet so random at the same time. Is it serendipitous or is it planned?
There’s always an element of serendipity to gel printing, but knowing how to layer means you can steer the serendipity in the direction you want to go.
“You make it very easy to understand what to do when…Thank you!” -Lisa Mendez
What about making a series of prints with more control?
When you possess an understanding of the layering process, you can create a repeatable series of prints.
This was really fun. Such an easy technique but such fantastic results. Love it!!! -Maggie Hanus
What about the ugly prints?
Ugly prints happen to us all, including me. But when you understand the layers, you can rescue it! Often the ugliest prints become my favorite by just adding a few more layers. I’m sharing how I do that in your first bonus:
What To Do with an Ugly Print. In this video, you’ll be looking over my shoulder to see specific ways ugly prints can be rescued. It’s not random how they’re transformed into prints you love, it’s a matter of understanding how to layer.
Bonus Videos 2 & 3
2nd Bonus: The Painterly Brayer that gives you the one simple thing to do to create loose brush stroke looking prints using a brayer.
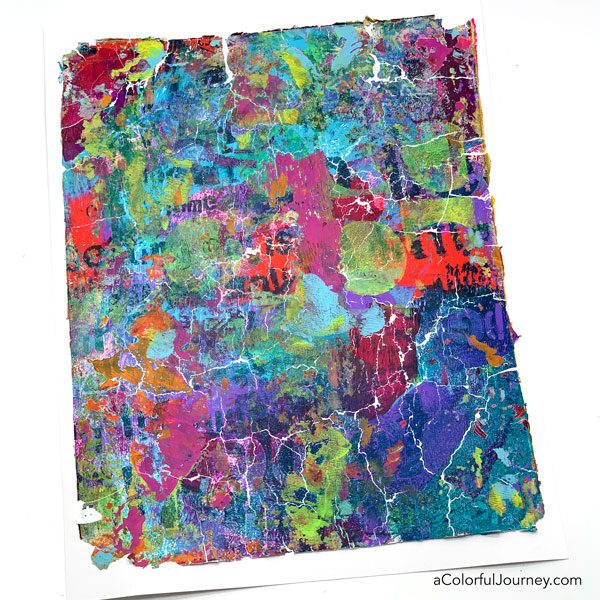
3rd Bonus: The Crackle Effect where you see how to create the cracked and aged look on command.
“This is the best online class I’ve ever enrolled in.” -Amy Schneider
“Wow! I have learned so much in just a few lessons! As a former art teacher I appreciate that you are so prepared for your classes and there is no wasted time.” -Sandra Pineault
What’s included in Mastering the Layers:
15 lessons all with downloadable videos
3 bonus videos
over 4+ hours of carefully edited instruction! Each lesson thoughtfully chosen to build your understanding one step at a time so you can easily apply it while printing.
This three week workshop begins the moment you register. Immediately upon registering, you’ll get the entire first week (5 videos) and then for each of the two following weeks, you’ll get 5 new lessons. That’s a total of 15 videos with lifetime access. Actually, 18 because there are three bonus videos! On top of that, there are getting started videos for you if you’re new to gel printing.
How long is the workshop?
This is a three week workshop that begins the moment you register. Each week, you get 5 new lessons with lifetime access.
How long is each lesson?
The lessons are about 15 minutes long, some a little longer, some a little shorter. They are all edited so that you can get the key information and get to playing.
I’ve never gel printed before. Can I make prints like this?
Absolutely- everything you need to know is in this workshop. This is a great way to get started because this workshop includes techniques, but more importantly it breaks down the process so you can fully understand the hows and whys of gel printing.
I’ve been making prints for a while, will this workshop help me make better prints?
Yes! Because this workshop is about more than just techniques, it’s about understanding why the layers do what they do. As you know, once you understand how a tool works, then the sky’s the limit.
I’m new to online workshops, how does this work?
Once you register, you’ll log into the classroom to access the lessons and videos. You can do this on a computer, a tablet, or mobile device.
This is a three week online workshop that begins the moment you register. Each week, you get 5 new lessons, each with a video.
All the videos are downloadable and have closed captions. You have lifetime access once you’re a member, so you can stream them online or watch them offline- whichever fits your schedule best.
I am here to help you throughout the workshop, so if you have any questions about the lessons or videos, simply ask them on the lesson page and I’ll get you an answer.
The basic supplies you’ll need are a gel plate, any size, a soft rubber brayer, paper, acrylic paints, and texture/pattern making tools such as stencils and found objects like bubble wrap.
What kind and size of gel plate do I need?
The important thing about your gel plate is that it has squish. Not a technical term, but when you push on it is should have some bounce to it and why I love using Gel Press plates. As for size, that is personal preference. If you like to work big, get a bigger plate, if you like to work small, get a smaller plate. If you’re not sure, then go for the middle with an 8 x 10 size.
Do I need a specific kind of paint?
You need acrylic paint, it can be any brand, any color. Acrylic paints are the ones that clean up with water.
How long do I have to watch the videos?
You have as long as you need. You have lifetime access to the workshop.
Do the videos have closed captions?
Yes, every video has captions.
Can I watch it on an iPad or mobile device?
Yes, you can watch any of the videos on any device. The videos are hosted at Vimeo and they have a mobile app so you can even download them onto your mobile device.
Is there a Facebook group?
There is no longer a Facebook group for this workshop. Now we can share photos directly inside the classroom.
Is there a guarantee?
Absolutely. It’s important to me that you have the workshop that is right for you. That’s why I offer a 14 day no hassle money back guarantee. How does it work? Just email me within 14 days from when you join and let me know in a one line email that the workshop isn’t right for you. I’ll get you a prompt and full refund.
What if I have a question you haven’t answered here?
over 4+ hours of carefully edited instruction! Each lesson thoughtfully chosen to build your understanding one step at a time so you can easily apply it while printing.
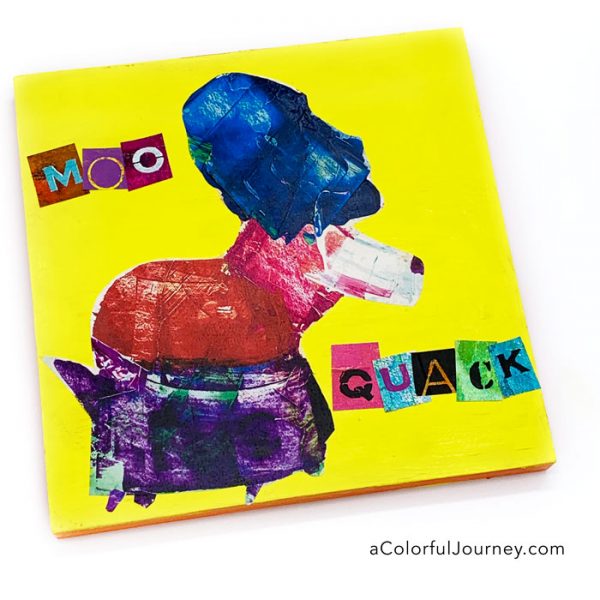
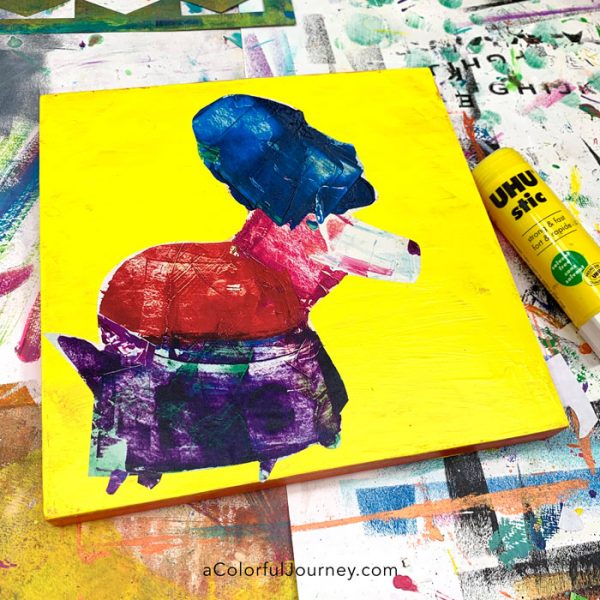
It’s a silly day of play using a Spark of Art-Spiration. It all starts with finding this very unusual creature in the free download. Of course there’s an O.O.P.S. or two, but the underwear malfunction was a first. It was with the creature, not me but still, the poor dear might have been a bit flustered by it all!
Get this exact Spark of Art-spiration sent to your inbox here. This will also get you signed up for the newsletter so each week you’ll get a new Spark for you to download and use in your play.
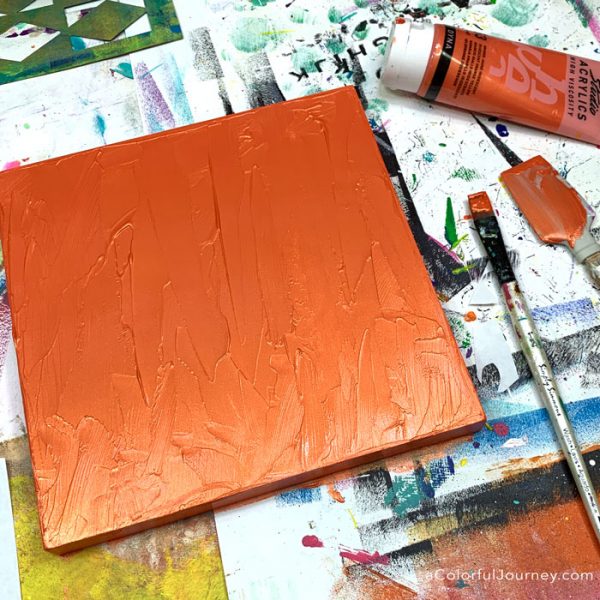
The play started with an O.O.P.S., an Outstanding Opportunity Presenting Suddenly. I was sure I wanted orange paint as the base color. Nope, but as long as the paint was already out, I might as well use it up.
Then when I painted the sides, I realized I couldn’t pick it up to keep it from sticking to the paper. But there was a great opportunity in that to show you how to make sure that it won’t stick by raising it up. Use whatever is on hand just like I did in the video.
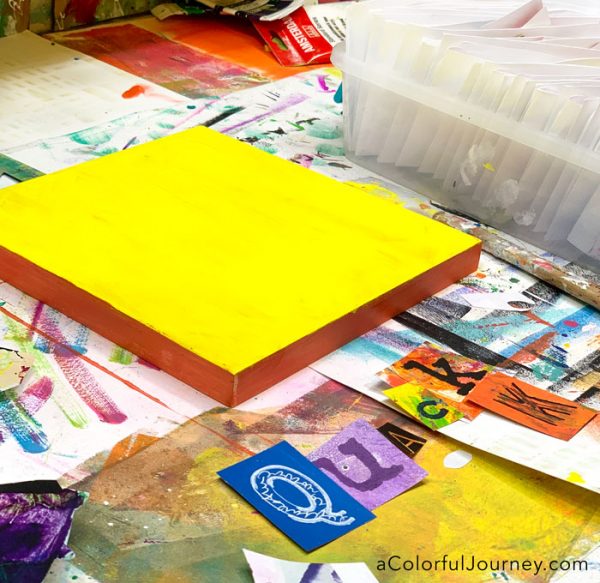
The orange was an OOPS and the opportunity there was to now have the top and sides be 2 different colors.
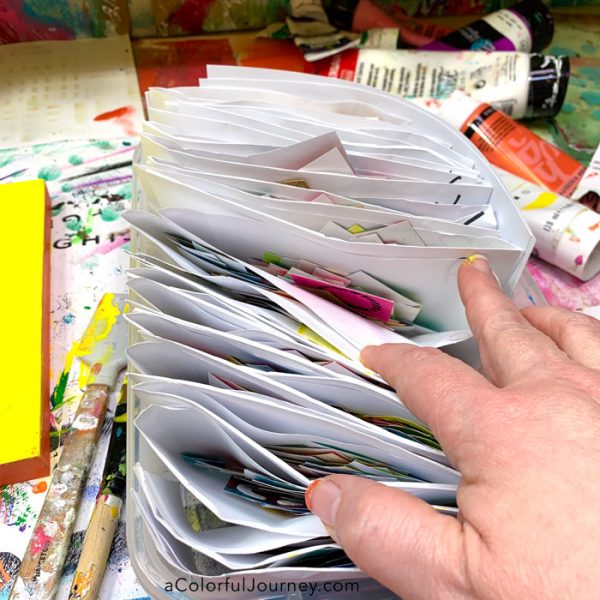
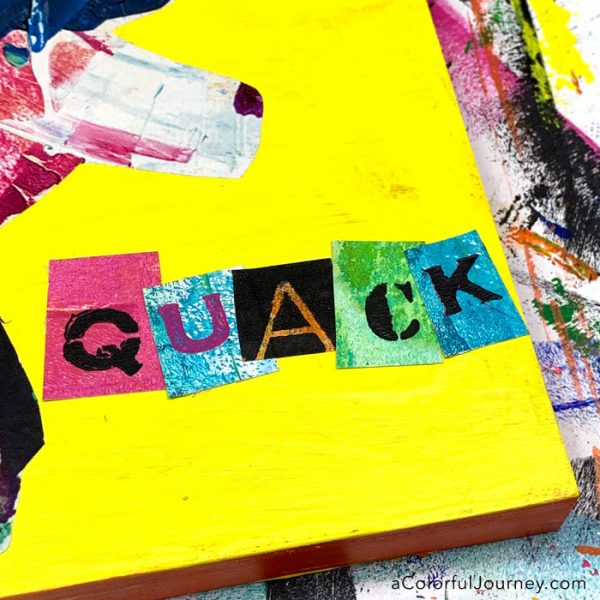
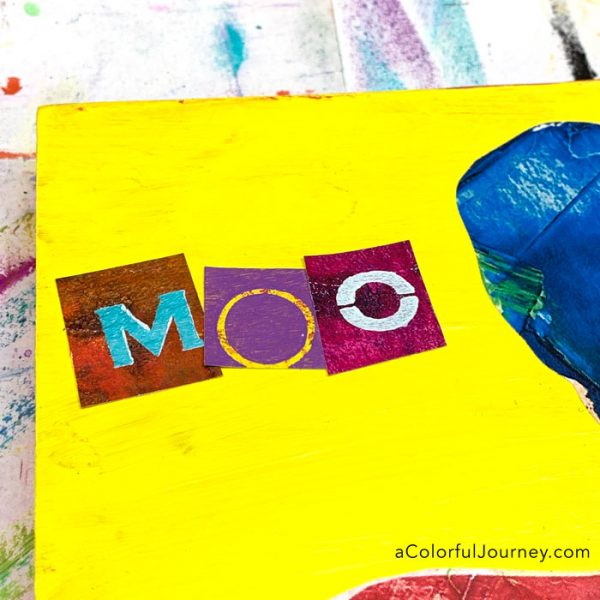
Having a stash of premade letters makes it easy to put together a word for a title. How did I quickly make all those letters? I’ve got a video showing how I use alphabet stencils from StencilGirl with gel prints to create them. This is a great way to use gel prints by the way!
There was a bit of an underwear malfunction for this creature. It’s all covered up in this photo thanks to using a scrap of the Spark!
I never get the glue all the way to edges, but I did this time. O.O.P.S. again. So instead of tucking the extra feet under the purple body, I had to improvise. Yup, that was some serious thinking on my feet happening there 🙂
The words you choose to incorporate into your art are significant. They impact the meaning of your piece. So what word belonged with quack? Moo of course!
Why Moo? What deep philosophical reason did I have for that word? The book, Click Clack Moo, Cows that Type – a favorite with my kids, was going through my head. Quack and Clack were close so of course, Moo had to go with it.
One the many reasons I love sharing a weekly Spark of Art-spiration is that we can all see different things in it. I saw this crazy thing in the Spark of Art-spiration, what do you see in it?
This website uses cookies to improve your experience while you navigate through the website. Out of these cookies, the cookies that are categorized as necessary are stored on your browser as they are essential for the working of basic functionalities of the website. We also use third-party cookies that help us analyze and understand how you use this website. These cookies will be stored in your browser only with your consent. You also have the option to opt-out of these cookies. But opting out of some of these cookies may have an effect on your browsing experience.
Necessary cookies are absolutely essential for the website to function properly. This category only includes cookies that ensures basic functionalities and security features of the website. These cookies do not store any personal information.
Any cookies that may not be particularly necessary for the website to function and is used specifically to collect user personal data via analytics, ads, other embedded contents are termed as non-necessary cookies. It is mandatory to procure user consent prior to running these cookies on your website.