Welcome! I’m Carolyn Dube – This colorful journey is all about the freedom of play!
Search My Blog
Search by Category
The Fine Print
Some of the links on this blog are affiliate links and I receive a small percentage. It doesn't cost you anything extra and helps keep all the free tutorials and videos coming! It's a win-win!
The website is copyright Carolyn Dube, and that is kinda common sense since this is my site.
As an Amazon Associate I earn from qualifying purchases.
True friends don’t cough on each other. And they wash their hands at every turn (but that I had hard time figuring out how to paint birds washing hands).
I don’t know what will be coming in the next day, week, or month, but whatever comes, our art supplies can help us get through it.
It’s true that paint or gel plates or stencils don’t fight germs but they can at least help us process all that’s happening.
The handwashing and social distancing will help combat the germs. Taking even just a few minutes to play with our art supplies can keep us sane.
And my husband says I could use a bit more sanity in my life right now. What about you?
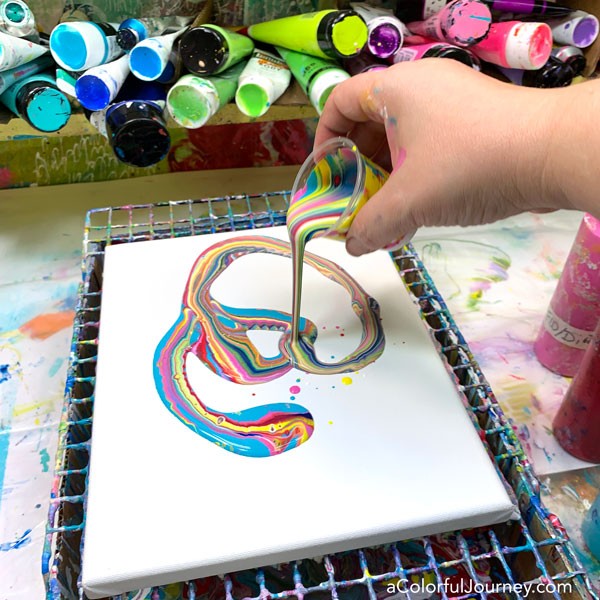
There are 2 big reasons to love paint pouring. One, it’s mesmerizing when the color flows out the cup. Two, the freedom. There’s no wrong way to do it, so each person can pour in the way that makes them happiest.
If you’re new to paint pouring, you’ve probably got a bunch of questions about how it all works. To save you time, I’ve put everything you need to know to get started in the free Paint Pouring Guide. There are over 20 pages of information and checklist to help you out.
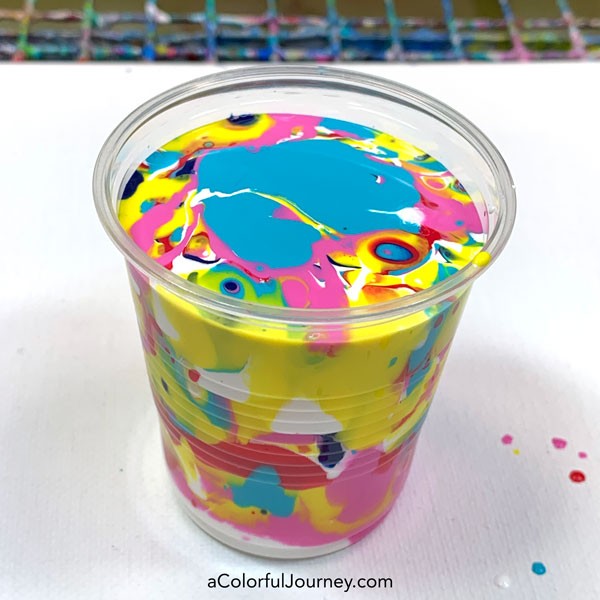
What’s in the cup? More than just paint. There’s also a pouring medium mixed with each color. There are lots of pouring mediums out there to choose from so I usually go with the easiest, Floetrol. It’s easy to use and easy to get from the hardware store or online.
This is the mesmerizing part, when the color flows out of the cup. If you can tip a cup, you can do this! As the color moves around the canvas, cells begin to appear and the colors spread apart.
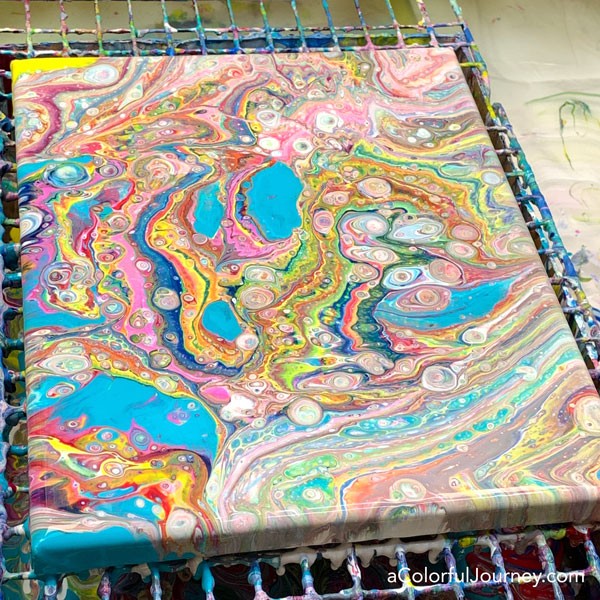
There’s no right way or wrong way to do paint pouring, just the ways that bring you joy. Some people like to have a bit of white around the edges, and some don’t. When you’re making your canvas, you have the freedom to do it the way you want!
I am a paint over the entire canvas kind of gal so I tilted and tipped the canvas to get the paint to cover the entire canvas.
It takes about a day for a canvas to dry, and naturally, if you live in a very dry climate it will go a bit faster and if you’re in a very humid climate it may take a little longer.
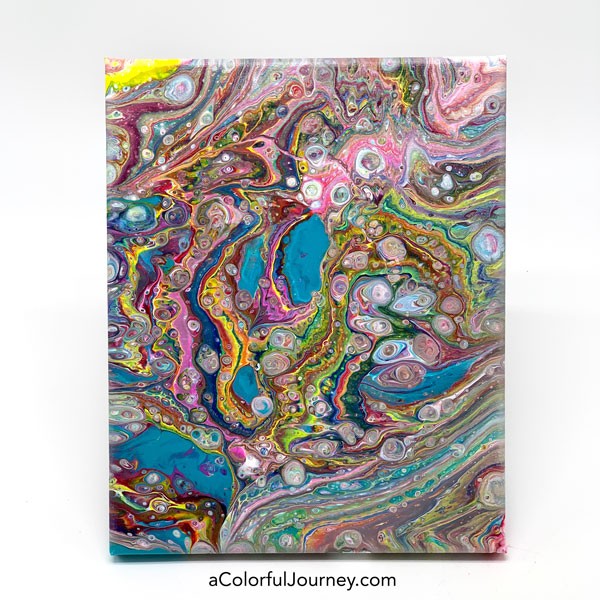
The process of pouring is so much fun that you might end up with more than one. What can you do with them? Turn them into a giant piece of art for your wall. You can see how I did that in this video.
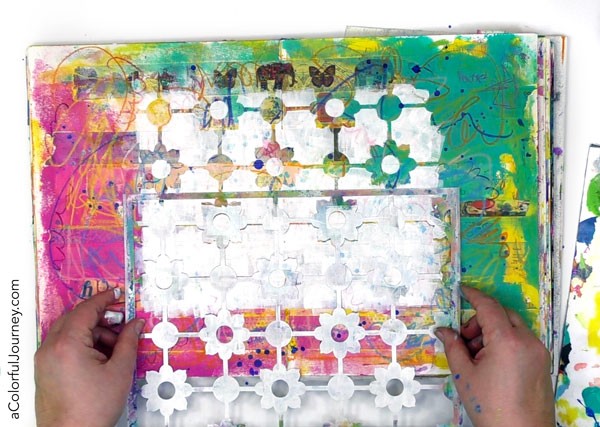
You can cover any size area with a repeating pattern no matter the size of the stencil. But beware, you might create a background you love so much you don’t want to cover it up. At the end I’m sharing how I handle that challenge!
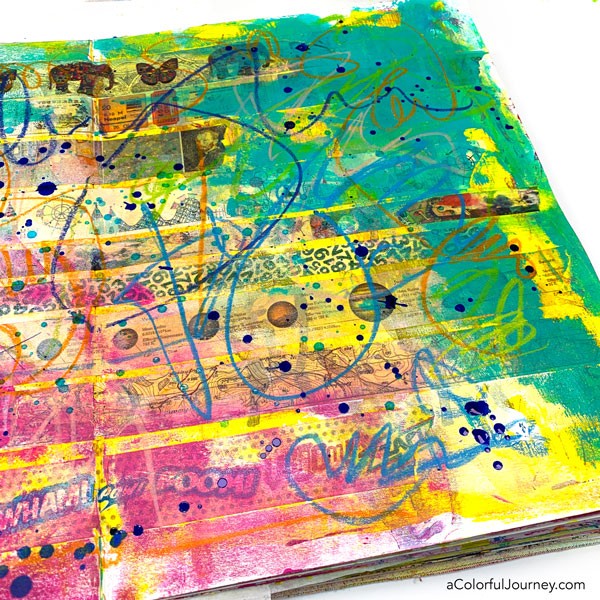
Start with anything. Any background you’ve got. Here I have layers of washi tape with all sorts of alcohol ink splats and colorful scribbles.
Start with your stencil in the middle of your page, wall, collage, whatever you’re stenciling. Why the middle even if it would line up so nicely on an edge?
That’s something that I learned when I was laying and grouting ceramic tile down on floors in our house. If you start in the middle, where most people will see it or notice imperfections, it’s line up and complete. Then you build out from there.
Should any imperfections happen, and they always do for me, they’re near the edges and less noticeable.
Another tip is to position the stencil where you want it, about 2-3 inches above the surface. Once you’re sure you know where you want it, then gently put it down in place.
The trick is to not slide the stencil but place it from above. This allows you work over damp paint and not smear things. Meaning you don’t have to wait for everything to be perfectly dry to go on to the next area.
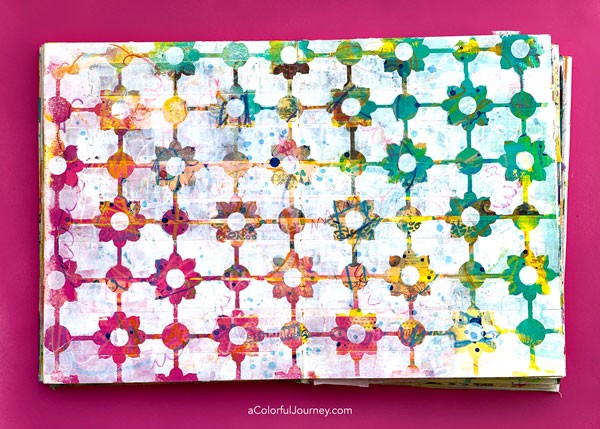
I am absolutely in love with this background. So in love with it that I don’t want to cover any of it up. But I also know that it isn’t finished.
So what am I going to do? I’m going to enjoy it just the way it is for a while because I love looking at it. Part of the reason why art journal, why I make things, is for the enjoyment and if I’m enjoying that layer then by golly I’m going to take full advantage of that.
At some point down the road, I’ll open this journal up and I’ll decide that it’s time to put something on top of it, but I’m not going to put any pressure on myself- that would take away some of the joy!
I encourage you, if you’ve ever got an art journal page that you’re just absolutely in love with, you just can’t stop looking at it and you don’t want to add anything to it. Even if you know it’s not finished. Just enjoy the gift that it is.
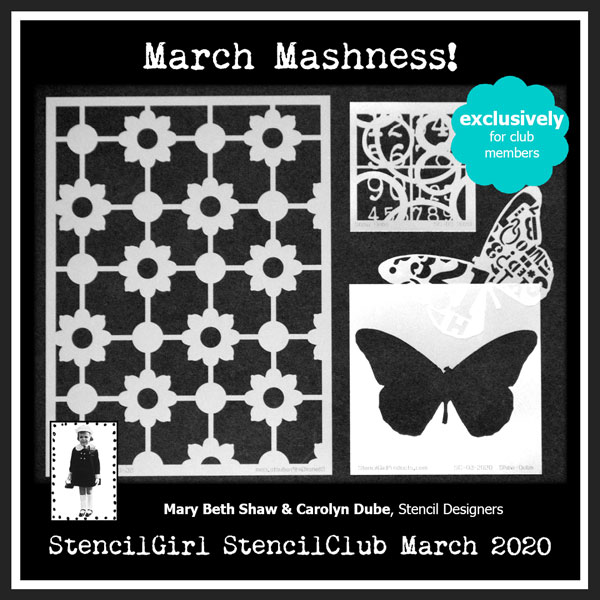
This stencil is part of this month’s StencilClub set, that I was honored to create in collaboration with Mary Beth Shaw. Of all the perks of being a member of StencilClub, there’s one that I adore the most. The exclusive video each month by the stencil designer.
That means this month it’s Mary Beth Shaw and myself who created the exclusive members only video. You’ll get to see 2 different approaches and color schemes to using them with a gel plate!
This website uses cookies to improve your experience while you navigate through the website. Out of these cookies, the cookies that are categorized as necessary are stored on your browser as they are essential for the working of basic functionalities of the website. We also use third-party cookies that help us analyze and understand how you use this website. These cookies will be stored in your browser only with your consent. You also have the option to opt-out of these cookies. But opting out of some of these cookies may have an effect on your browsing experience.
Necessary cookies are absolutely essential for the website to function properly. This category only includes cookies that ensures basic functionalities and security features of the website. These cookies do not store any personal information.
Any cookies that may not be particularly necessary for the website to function and is used specifically to collect user personal data via analytics, ads, other embedded contents are termed as non-necessary cookies. It is mandatory to procure user consent prior to running these cookies on your website.