Welcome! I’m Carolyn Dube – This colorful journey is all about the freedom of play!
Search My Blog
Search by Category
The Fine Print
Some of the links on this blog are affiliate links and I receive a small percentage. It doesn't cost you anything extra and helps keep all the free tutorials and videos coming! It's a win-win!
The website is copyright Carolyn Dube, and that is kinda common sense since this is my site.
As an Amazon Associate I earn from qualifying purchases.
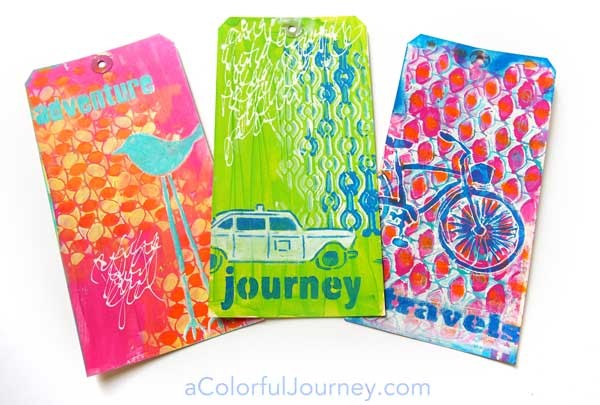
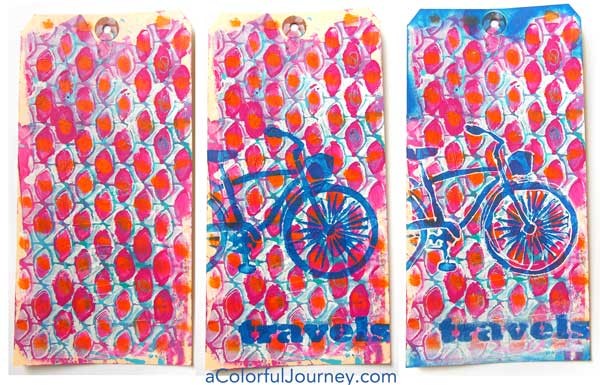
The muse gave me the imperfect vibe today so I went loose with the paints. That means getting paint under the stencil in places as well as more here and less here. Total freedom to be messy and imperfect.
These stencils also look fabulous with a crisp, more “perfect” look and I share how to do that in a video in yesterday’s blog post. While you’re there, you can get entered to win my 3 newest stencils! Check it out and how you have a total of 6 chances to win!
After stenciling the bike, I realized it didn’t stand out the way I had planned. Oops. Opportunity to add some white lines loosely around the edges of the bike…which led to some blue around the edges of the tag.
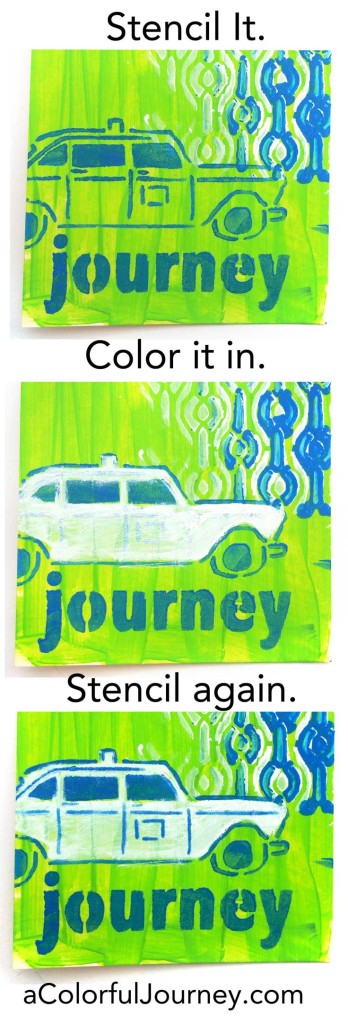
My Coming and Going stencil made it fast and easy to get the taxi cab colored in on the green background. I stenciled it, then painted it white by going over all the inside lines. This was quick, messy painting. Then I lined the stencil back on top and put the blue on again so that the inside lines were added back in to the design.
Thanks for stopping by for a little play and thanks for being a part of this colorful journey!
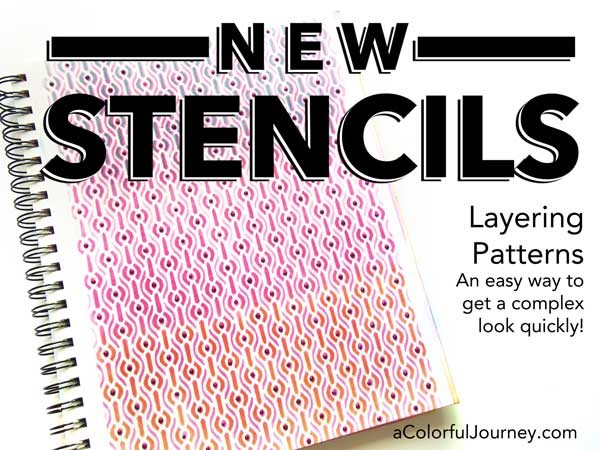
I love the look of detailed and complex designs however, that usually takes more patience than I have. Until now! I don’t have more patience suddenly, I have a stencil that will quickly do the job thanks to my layering stencils.
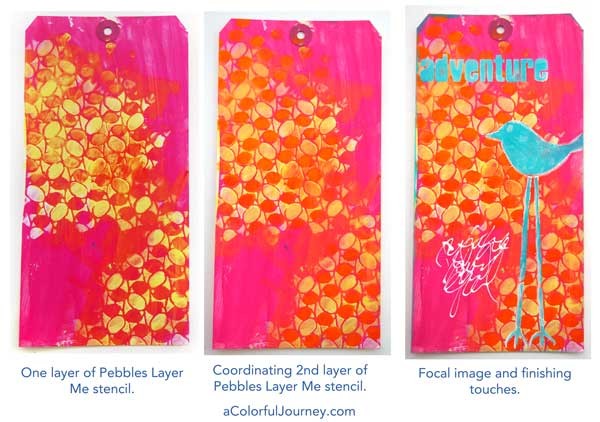
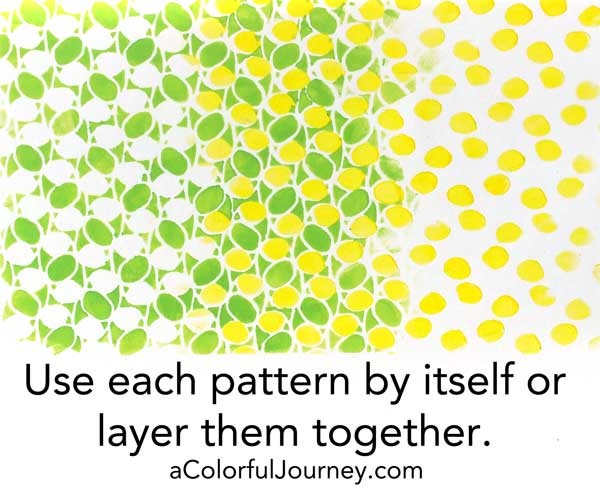
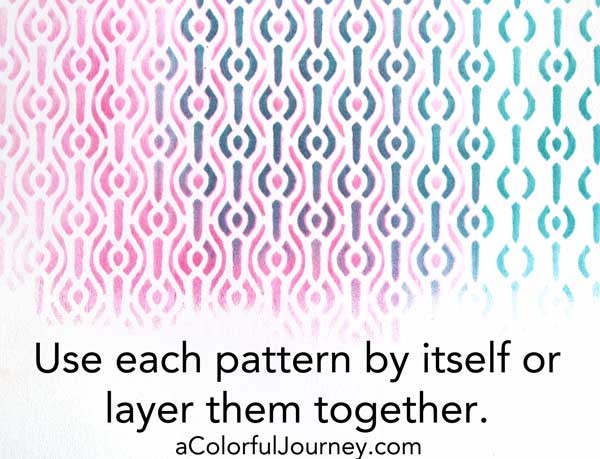
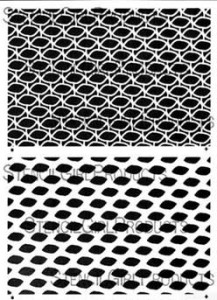
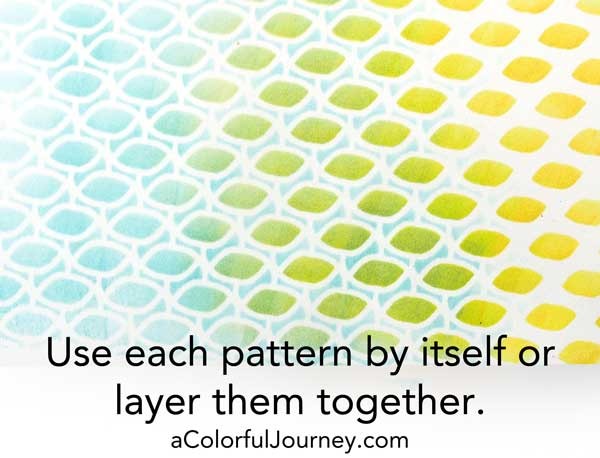
These are all a part of my Layer Me collection. Each stencil comes with 2 patterns that layer so you can create a complex design in no time. In the video, I show you how with Distress ink and paint…with a little touch of sparkle too.
Want to win all 3 of these stencils? I’m giving one set away to random commenter here on the blog! Want a chance to win? Leave a comment to be entered. Want more chances to win? How about 5 more chances? For each of these that you do, you’ll get another entry! Each time you do one of these, come back and leave a comment tell me you did it and you’ve got more chances to win. Giveaway closes on Tuesday, July 21st, midnight EST. Be sure to stop back on the 22nd to see if you’ve won! And yes, I will ship these to where ever you live so everyone is eligible! And if you’ve already ordered these three – you can pick any 3 of my other stencils! The giveaway is closed- thank you to everyone who entered! You can find the winner in this post here.
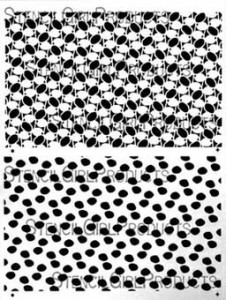
Introducing Pebbles Layer Me stencil. This was inspired by very relaxing walk along a stream and my hunt for the perfect skipping stone. See more samples with this stencil here.
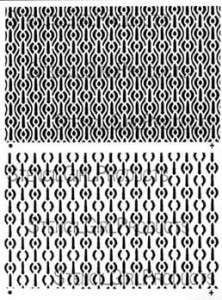
Introducing the Iron Grate Layer Me stencil. The inspiration for this stencil came from Victorian homes. Why? They captivate me with their details, details truly everywhere, even when you look down at mundane things like grates. See more samples with this stencil here.
Connected Eyes Layer Me stencil was inspired by the connection for me, as an artist, between what I see and what I feel in my soul. See more samples with this stencil here.
The sky seems to be the limit as to how many different ways these stencils can be used to create different patterns! Here is an example where I only used one of the patterns on a stencil.
I’ll be sharing more of my play with stencils over the next few blog posts – so be sure to stop back…but if you’d like a sneak peek take a look at each of them at StencilGirl. There are pictures for upcoming blog posts with each stencil!
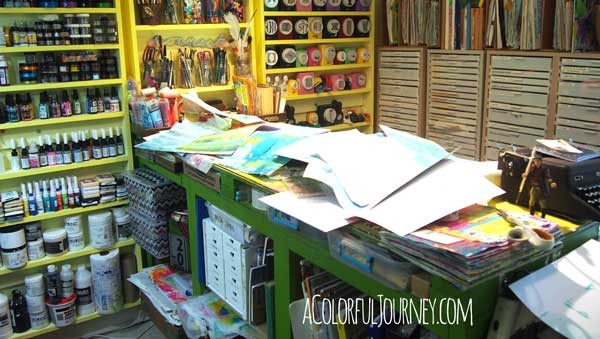
Welcome to my studio! It’s where I make my messes while having fun playing. What’s most important to me in my studio? Being able to spend more time playing and less time finding or cleaning.
What you see is my attempt to keep supplies within easy reach and limit the effort needed to clean it up. I hate cleaning….but I love having an organized studio. So the shelves and drawers are usually organized but the counters are full of stuff. But I cleaned it up since I was having a guest – YOU!
Here’s more of what it looks like a typical day…journals stacked on journals and then covered with Gelli® prints. No matter how much space I have, there is NEVER enough counter space!
The Details
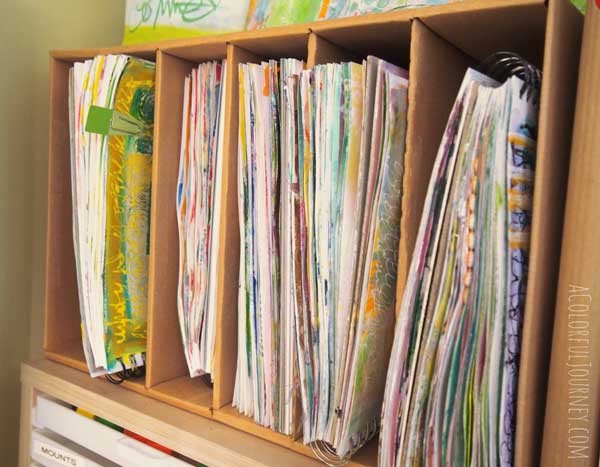
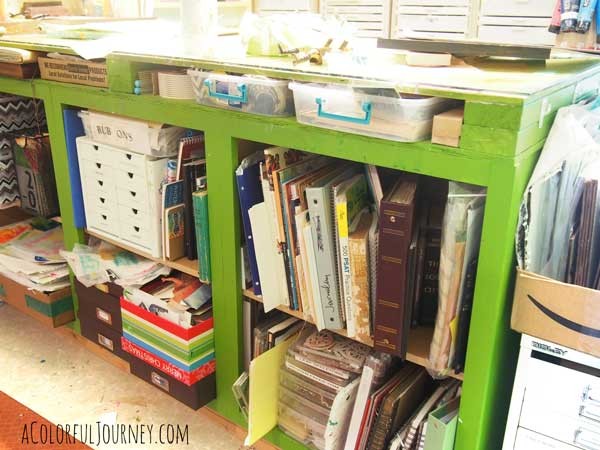
The cardboard sections that hold my journals are repurposed scrapbooking paper shelves turned on their side. This makes it super easy for me to grab any journal without all the others falling and it creates a storage area right on top.
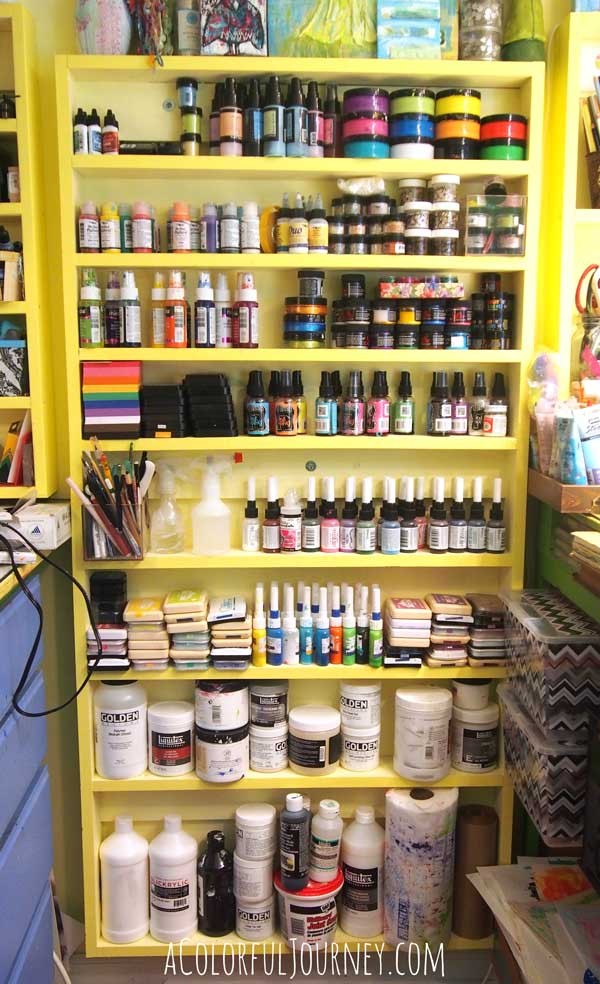
Every inch of space is important to me, so when I can make my storage go to the floor, I do! The narrow shelves I have around my primary work area hold all sorts of supplies in a way that I can see exactly what I have and it’s easy to grab. Master carpenters we’re not…but the basic shelves we built are the exact dimensions I wanted.
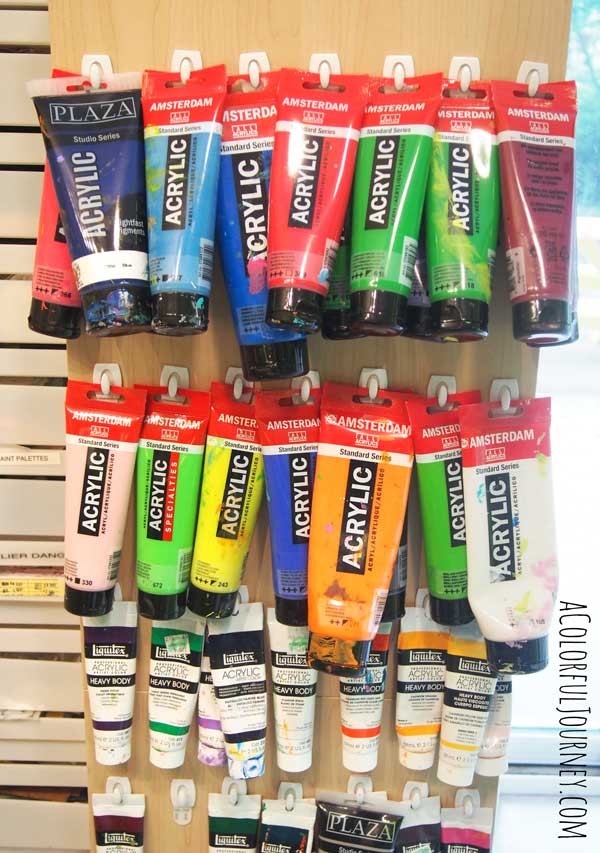
Thanks to plastic Command Adhesive hooks even the sides of my cabinets become storage. Bonus is they aren’t permanent so as I reorganize in the future, there are no nail holes or marks.
In the center of my studio is a custom made counter. Nobody in my home is a carpenter so we take some short cuts. The base is extremely cheap kitchen cabinets. Wall cabinets because they were the cheapest and I didn’t want to mess with doors due to space limitations.
Since they were designed to be wall cabinets the counter would be too low, so we had to adapt. Using 2 x 4’s, we created the extra height to get the counter just where I wanted it. As an unintended bonus, that because another shelf thanks to the plywood top.
On that plywood is glass so the surface is extremely durable and easy to clean. No cutting mat needed for Exacto knives. Paint comes off. Spray ink doesn’t stain. Super low maintenance!
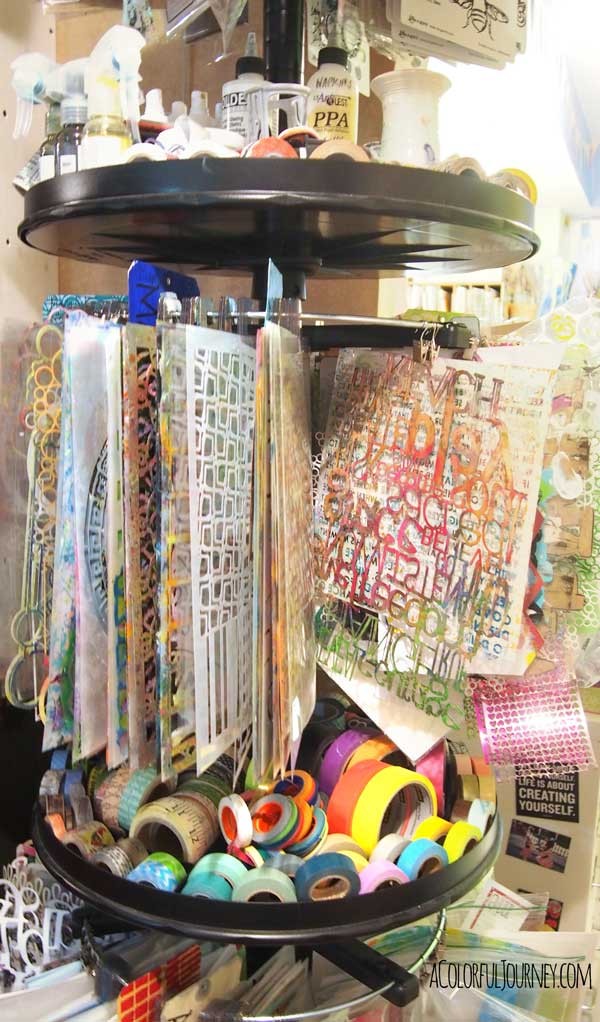
My stencil storage…which is a spinning rack by Simply Renee, but sadly they are now out of business. I have seen table top spinners at Hobby Lobby. You can also repurpose an old wire lampshade to do something similar. The plastic tags that I use to hang most of my stencils are from Uline or in smaller quantities here.
All those shallow shelves with white drawers that you saw in the video, well, I can’t remember who made those! Memory is going it seems. But, those drawers hold a plethora of stuff and it is all easily accessible.
You’ve probably noticed that theme in my studio…easily accessible which is code for I can grab it and put it back quickly. I’d rather spend more time arting than cleaning!
Thanks for stopping by my studio for a tour and thank you for being a part of this colorful journey!
This website uses cookies to improve your experience while you navigate through the website. Out of these cookies, the cookies that are categorized as necessary are stored on your browser as they are essential for the working of basic functionalities of the website. We also use third-party cookies that help us analyze and understand how you use this website. These cookies will be stored in your browser only with your consent. You also have the option to opt-out of these cookies. But opting out of some of these cookies may have an effect on your browsing experience.
Necessary cookies are absolutely essential for the website to function properly. This category only includes cookies that ensures basic functionalities and security features of the website. These cookies do not store any personal information.
Any cookies that may not be particularly necessary for the website to function and is used specifically to collect user personal data via analytics, ads, other embedded contents are termed as non-necessary cookies. It is mandatory to procure user consent prior to running these cookies on your website.


 I love the look of detailed and complex designs however, that usually takes more patience than I have. Until now! I don’t have more patience suddenly, I have a stencil that will quickly do the job thanks to my layering stencils.
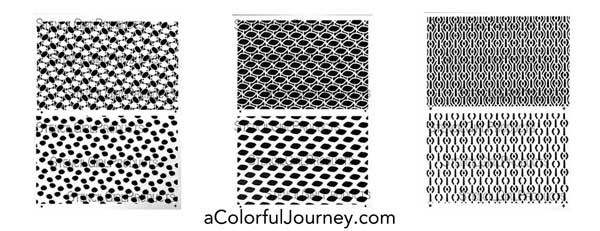

 Welcome to my studio! It’s where I make my messes while having fun playing. What’s most important to me in my studio? Being able to spend more time playing and less time finding or cleaning.