≡ Menu

Can creating complex layers on a gel plate be simple? Absolutely! Layering comes down to just 2 factors. Once you understand how to use these 2 factors on a gel plate, you can consistently create the kinds of prints you want. And more importantly, have even more fun printing!

You can use the slap-dash method of printing and go through the frustration of trial and error, or you can skip all that and go straight to making prints you love with Mastering the Layers because registration is open again! Your prints don’t have to be random luck!

Amazing how little I knew and how much I could learn given that I’ve been using a gel plate for about 3 years now!” -Cynthia Silveri

This online workshop is about both the techniques to create layers and the understanding of how layers interact. Knowing this enables you to create the kinds of prints you want on command. The more you understand the gel plate, the more fun you can have with it!

You have saved us so much time, so now we can just play and play and have a bit of say over the final print!! Thank you!!”-Marrianne Pagnani.

In Mastering the Layers you’ll:

  • Discover how to add layers and not mess up the bright, vibrant colors
  • Find out simple ways to achieve interest or depth in your prints
  • Be confident in your layering choices as you fully understand the 2 key factors that impact layering
  • And so much more!

Want to feel confident with your color choices?

I’m thrilled to get past all mud!” -Sue Johnson

Color plays a huge role in gel printing and it’s covered in depth inside Mastering the Layers. This is practical color, explained in a way that can be easily applied when you’re printing.

Years ago I took a color course at the college and still came away confused about the colors and how to use them with each other. Thank you for simplifying this for me.”-Deborah Reis

You can know color theory and still manage to fall into ugly color situations when gel printing. That’s because color on the gel plate has a bit of a twist to it that can significantly impact your colors.

Once you know how to apply that twist then you can:

  • vary your color combinations so your prints don’t all look the same at the end of a printing session
  • know just the right amount of paint you need to use
  • get colors to integrate and blend without a blocky look

“NOW I understand why so many of my prints are dark and gloomy! Thanks, Carolyn!” -Deanna Robbins

This class brought me to art again. And I am so happy!” -Andrea Miller

Layered prints look thought out, yet so random at the same time. Is it serendipitous or is it planned?

There’s always an element of serendipity to gel printing, but knowing how to layer means you can steer the serendipity in the direction you want to go.

“You make it very easy to understand what to do when…Thank you!” -Lisa Mendez

What about making a series of prints with more control?

When you possess an understanding of the layering process, you can create a repeatable series of prints.

This was really fun. Such an easy technique but such fantastic results. Love it!!! -Maggie Hanus

What about the ugly prints?

Ugly prints happen to us all, including me. But when you understand the layers, you can rescue it! Often the ugliest prints become my favorite by just adding a few more layers. I’m sharing how I do that in your first bonus:

What To Do with an Ugly Print. In this video, you’ll be looking over my shoulder to see specific ways ugly prints can be rescued. It’s not random how they’re transformed into prints you love, it’s a matter of understanding how to layer.

Bonus Videos 2 & 3

2nd Bonus: The Painterly Brayer that gives you the one simple thing to do to create loose brush stroke looking prints using a brayer.

3rd Bonus: The Crackle Effect where you see how to create the cracked and aged look on command.

This is the best online class I’ve ever enrolled in.” -Amy Schneider

“Wow! I have learned so much in just a few lessons! As a former art teacher I appreciate that you are so prepared for your classes and there is no wasted time.” -Sandra Pineault

What’s included in Mastering the Layers:

  • 15 lessons all with downloadable videos
  • 3 bonus videos
  • over 4+ hours of carefully edited instruction! Each lesson thoughtfully chosen to build your understanding one step at a time so you can easily apply it while printing.
  • All videos are closed captioned
  • Lifetime access
  • 14 day no hassle money back guarantee

Lessons in this workshop:

  • Is it a Window or a Door?
  • Building Grungy Layers
  • Wet & Wild
  • How to Use Color to Your Advantage
  • Playing Peek-A-Boo with Colors
  • Painterly Prints
  • Best Friends and the Brayer
  • A Sticky Situation
  • The First Pancake and a Gel Plate
  • The Ins & Outs of Brayer Blending
  • Invisible Gel Printing
  • Fused Layers
  • Intentional Compositions
  • Dragon Scales
  • Deconstructed Layers

Bonus Videos Included when you register:

  • Creating the Crackle Effect
  • What To Do With an Ugly Print
  • The Painterly Brayer Trick

$149

FAQ

When does the it start?

This three week workshop begins the moment you register. Immediately upon registering, you’ll get the entire first week (5 videos) and then for each of the two following weeks, you’ll get 5 new lessons. That’s a total of 15 videos with lifetime access. Actually, 18 because there are three bonus videos! On top of that, there are getting started videos for you if you’re new to gel printing.

How long is the workshop?

This is a three week workshop that begins the moment you register. Each week, you get 5 new lessons with lifetime access.

How long is each lesson?

The lessons are about 15 minutes long, some a little longer, some a little shorter. They are all edited so that you can get the key information and get to playing.

I’ve never gel printed before. Can I make prints like this?

Absolutely- everything you need to know is in this workshop. This is a great way to get started because this workshop includes techniques, but more importantly it breaks down the process so you can fully understand the hows and whys of gel printing.

I’ve been making prints for a while, will this workshop help me make better prints?

Yes! Because this workshop is about more than just techniques, it’s about understanding why the layers do what they do. As you know, once you understand how a tool works, then the sky’s the limit.

I’m new to online workshops, how does this work?

Once you register, you’ll log into the classroom to access the lessons and videos. You can do this on a computer, a tablet, or mobile device.

This is a three week online workshop that begins the moment you register. Each week, you get 5 new lessons, each with a video.

All the videos are downloadable and have closed captions. You have lifetime access once you’re a member, so you can stream them online or watch them offline- whichever fits your schedule best.

I am here to help you throughout the workshop, so if you have any questions about the lessons or videos, simply ask them on the lesson page and I’ll get you an answer.

Have a question right now about the workshop? You can email me at https://acolorfuljourney.com/contact/

What supplies do I need?

The basic supplies you’ll need are a gel plate, any size, a soft rubber brayer, paper, acrylic paints, and texture/pattern making tools such as stencils and found objects like bubble wrap.

What kind and size of gel plate do I need?

The important thing about your gel plate is that it has squish. Not a technical term, but when you push on it is should have some bounce to it and why I love using Gel Press plates. As for size, that is personal preference. If you like to work big, get a bigger plate, if you like to work small, get a smaller plate. If you’re not sure, then go for the middle with an 8 x 10 size.

Do I need a specific kind of paint?

You need acrylic paint, it can be any brand, any color. Acrylic paints are the ones that clean up with water.

How long do I have to watch the videos?

You have as long as you need. You have lifetime access to the workshop.

Do the videos have closed captions?

Yes, every video has captions.

Can I watch it on an iPad or mobile device?

Yes, you can watch any of the videos on any device. The videos are hosted at Vimeo and they have a mobile app so you can even download them onto your mobile device.

Is there a Facebook group?

There are two ways you can share what you create and see what others are creating. One is inside the classroom and the other is an optional Facebook group just for members of this workshop.

Is there a guarantee?

Absolutely. It’s important to me that you have the workshop that is right for you. That’s why I offer a 14 day no hassle money back guarantee. How does it work? Just email me within 14 days from when you join and let me know in a one line email that the workshop isn’t right for you. I’ll get you a prompt and full refund.

What if I have a question you haven’t answered here?

You can reach out to me on my contact form at https://acolorfuljourney.com/contact/ and I’ll get you an answer to your question.

What’s included in Mastering the Layers:

  • 15 lessons all with downloadable videos
  • 3 bonus videos
  • over 4+ hours of carefully edited instruction! Each lesson thoughtfully chosen to build your understanding one step at a time so you can easily apply it while printing.
  • All videos are closed captioned
  • Lifetime access
  • 14 day no hassle money back guarantee

$149

{ 0 comments }

Neat and tidy coloring inside the lines isn’t something you see very often at aColorfulJourney but when I do it here, I am not really staying carefully inside the lines. But it doesn’t really show up because of what I used to add the color to this gel print!

This is the print I started with made using my Overlapping Hearts stencil from StencilGirlProducts.com

In the video below, you’ll see how I stenciled the hearts in gray, the super speedy way, using a gel plate.

Using Inktense pencils, supply link at the end of this post for you, I loosely and imperfectly colored in the white areas.

By simply adding water to the colored pencil, the color came alive. Inktense pencils are very vibrant and intense color, hence their name.

After it was completely dry, a layer of scribble journaling was added.

The plan for this was to create a quick card, but I unexpectedly didn’t want to cut it up, so it just might get a quick 8×10 mat around it. That way it can be sent as a gift instead of a card!

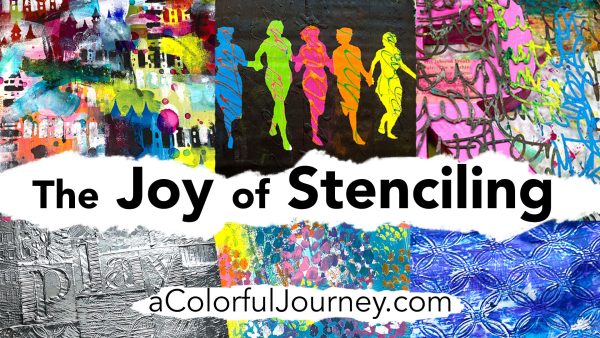
Want more ideas for ways to use your stencils? Then check out my YouTube playlist of stenciling videos!

Here are the supplies used. Some of these links may be affiliate links which means I get a small percentage and it doesn’t cost you anything extra! It doesn’t cost you anything extra and you get a really good feeling knowing that you are helping keep the free tutorials coming!


{ 2 comments }

If it’s got a pattern on it, it just might make a great gel printing tool! Oreos have plenty of pattern on them so I had to give it a try! Fair warning, cookies were harmed in the making of these prints, after all, once they get paint on them they aren’t safe to eat.

Using a cookie to gel print means you have the possibility of bonus textural effects – the occasional crumb.

That’s the way the cookie crumbles. I just didn’t know my own strength and the cookie broke and that’s a good thing! Why? Because it’s an O.O.P.S., an Outstanding Opportunity Presenting Suddenly. Those broken bits make it easy to fill in an entire space, more easily that if they all were still round!

The pattern from the Oreo looks like a pattern on a bandana in some prints, in others it looks like manhole covers, and in others it has a boho kind of vibe.

One color is fantastic but what if you want to add another color? In the video, I shared two quick ways to do that.

To create the green Oreo grunge look here a second color was added directly to the gel plate.

You can also add color to print after you’ve taken the pull. Here, I’m adding a second color using a paint brush.

Which is better? One color, two colors on the plate, or color added after printing? That’s a personal decision and it depends on the look you want.

Oreos aren’t the only thing you can do with a gel plate! There’s a whole lot more and if you’re ready to go deeper then check out my workshops.

Here are the supplies used. Some of these links may be affiliate links which means I get a small percentage and it doesn’t cost you anything extra! It doesn’t cost you anything extra and you get a really good feeling knowing that you are helping keep the free tutorials coming!


{ 13 comments }