Welcome! I’m Carolyn Dube – This colorful journey is all about the freedom of play!
Search My Blog
Search by Category
The Fine Print
Some of the links on this blog are affiliate links and I receive a small percentage. It doesn't cost you anything extra and helps keep all the free tutorials and videos coming! It's a win-win!
The website is copyright Carolyn Dube, and that is kinda common sense since this is my site.
As an Amazon Associate I earn from qualifying purchases.
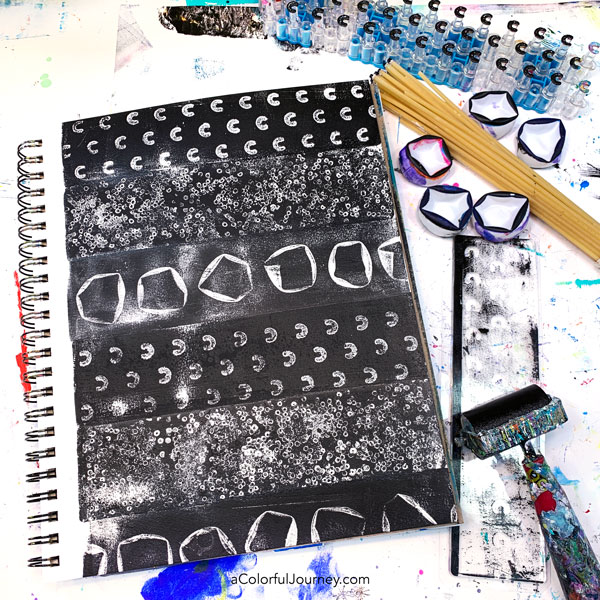
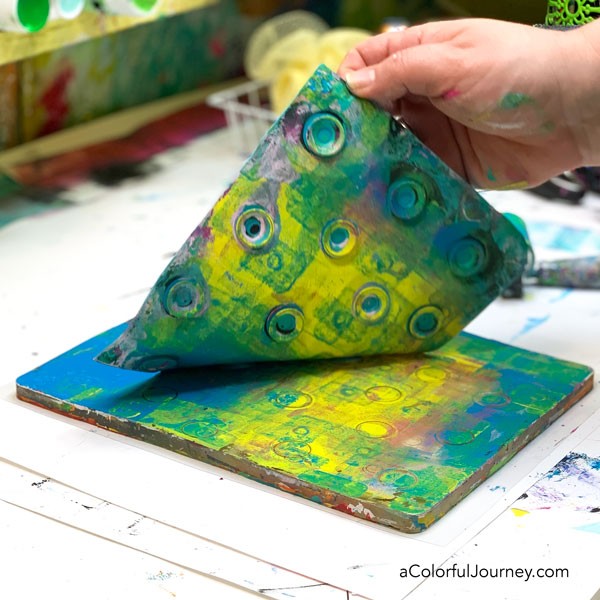
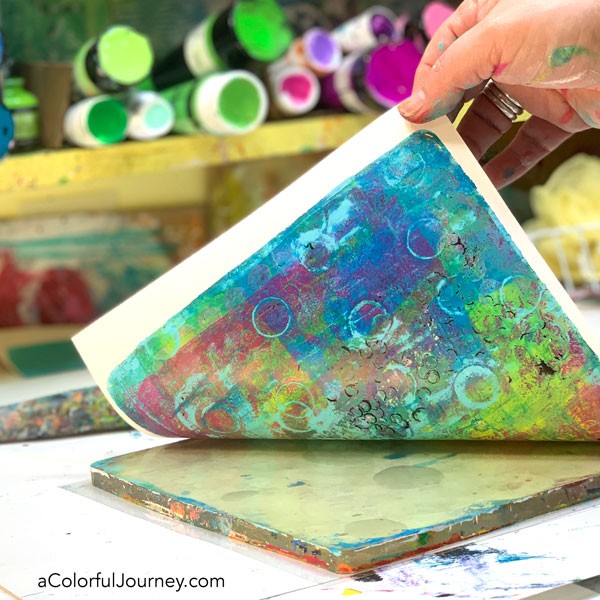
All around you are amazing patterns for you to use on your gel plate! In this video, I’m using three different found patterns and my favorite by far is the ping pong ball!
When I’m using pattern tools on the gel plate, there are three key factors that I pay attention to. These factors guide my decision making process.
In Playing with Found Patterns, my newest online workshop, you’ll go deep into these factors so you fully understand them. And most importantly, easily apply them when you’re printing.
Take a look around you, I bet there are patterns all around for you to explore and use on your gel plate! You might find spaghetti you’ve spilled on the floor, an old kids toy, or cheap ping pong balls. And everything you find can make prints on a gel plate!
Here are the supplies used. Some of these links are affiliate links which means I get a small percentage. For example, I’m an Amazon Associate & I earn from qualifying purchases. It doesn’t cost you anything extra and you get a really good feeling knowing that you are helping keep the free tutorials coming!
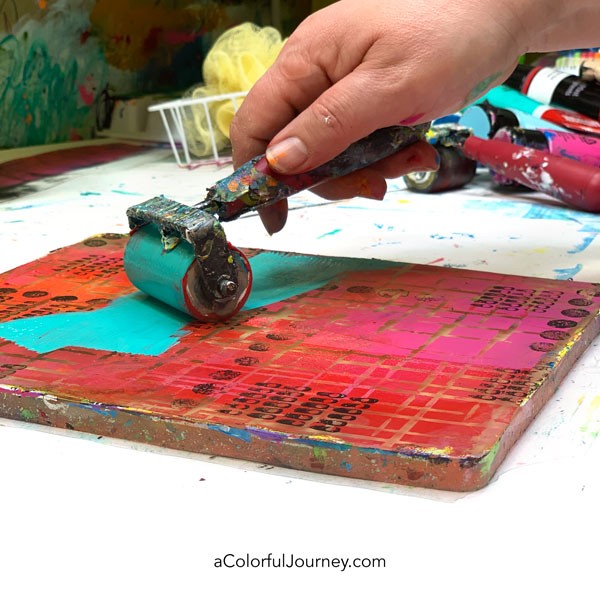
These prints were made with a fancy pattern making tool. Where did I get that tool? Where all the best pattern makers seem to come from – the trash! All around you are amazing pattern making goodies!
When I’m playing with found patterns there are three big factors that I pay attention to because those factors are what guides the decision making process. It isn’t guessing or just luck, it’s about understanding why the gel plate does what it does.
I’ve gone deep on those three factors in my newest online workshop, Playing with Found Patterns. This workshop has 2 parts to provide you with a solid understanding so you can easily apply it when you’re playing.
The first part is all about getting comfortable and fully grasp the main factors that you can control when making a pattern on the gel plate.
The second part is about applying the information in a variety of ways so you never ever have to be stuck in a creative rut. You’ll know how to create different types of prints, using what you have around you right now.
Interesting patterns are all around you, especially at home! But how do you use that trash, junk, and recyclable to make fun gel prints? That’s what Gel Printing: Playing with Found Patterns is all about. Come hang out with me virtually in the studio and let’s make some gel prints together!
This workshop is currently closed BUT get your email on the waitlist and you’ll be the first to know when registration opens back up!
There are 3 key factors to be aware of when using found patterns. Throughout this online workshop you’ll discover how they are used to create prints with pattern making tools from around your home.
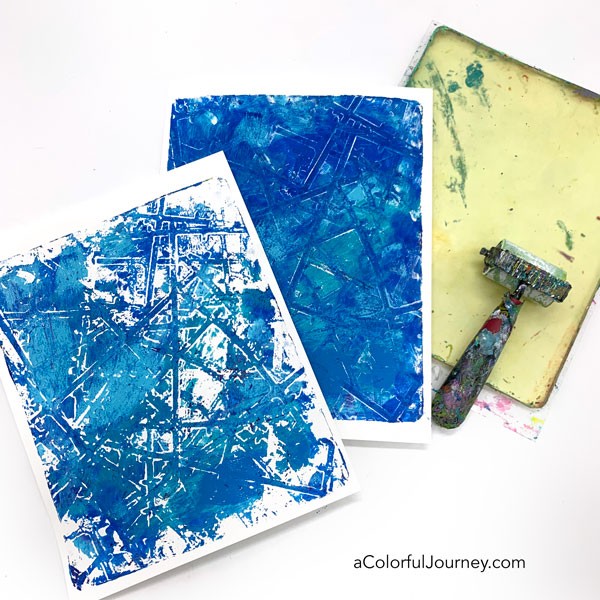
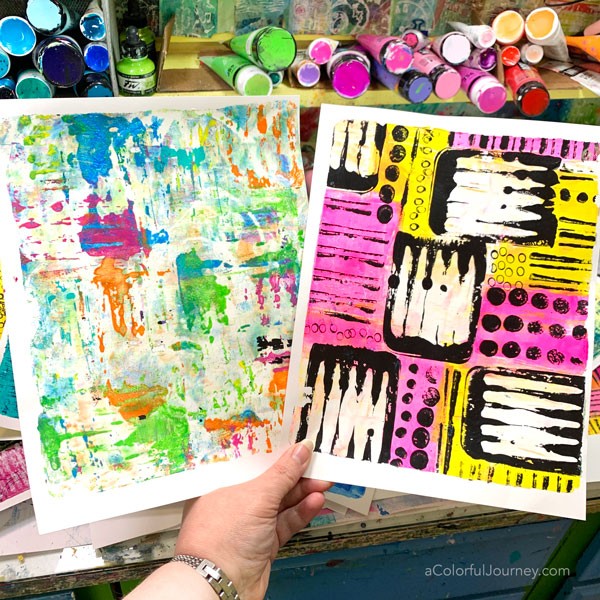
Both of the prints below were made using the exact same common household item. Knowing what to adjust and how to do it means you have the flexibility to take the same tool and create dramatically different looks.
A common kitchen item made the pattern on both of these prints!
This workshop has 2 parts.
The first part is all about getting comfortable and fully understanding the main factors that you can control when making a pattern on the gel plate.
Here’s what student Geri Beam said about the workshop:
“Wow – this was awesome. As I started this video I started wondering what would happen if? And then you took all my what ifs and answered them. Thanks for visually showing me in a simple way leading into a more complex way.“
The second part is about applying the information in a variety of ways so you never ever have to be stuck in a creative rut. You’ll know how to create different types of prints, even using what you have around you right now.
After finishing the workshop, here’s what Donnalee Nichols said:
“The attention to detail about the how to & why guided me to fearless action with the gel plate that’s been sitting for months. her techniques lead thru an open door of action . AND now there’s no urge to use other folks collage papers, I can make my own, with confidence”
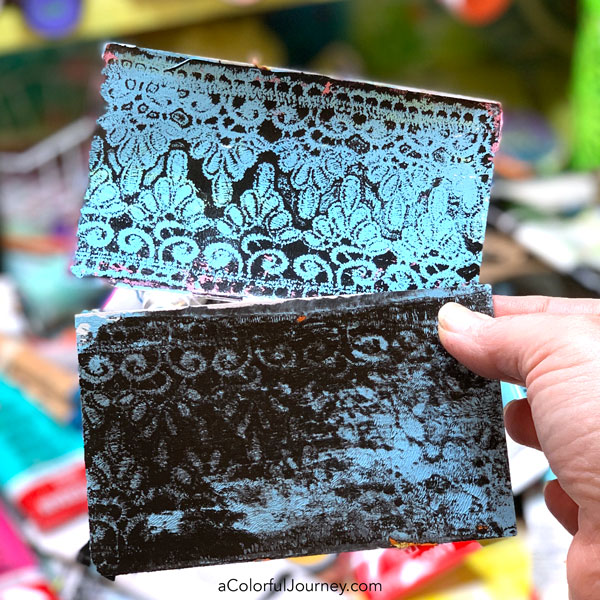
Understanding what’s happening and why banishes the guesswork and frustration when you’re printing. You’ll understand things like why one blue lace print is full of details while the other isn’t, so you can steer your prints in the direction you want them to go.
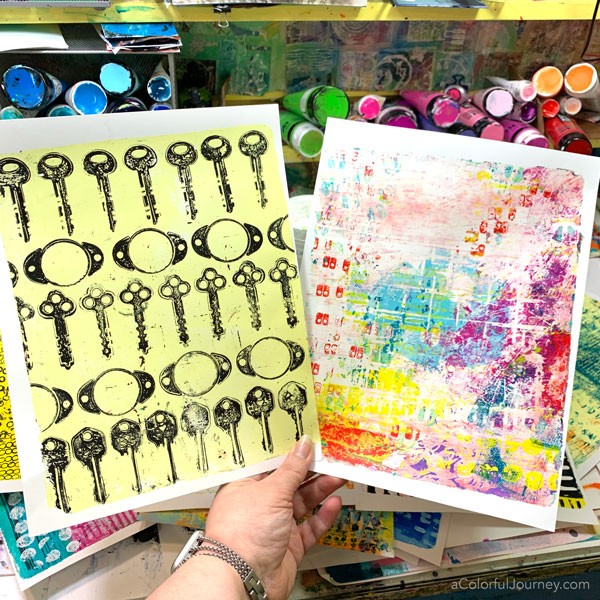
You’ll see how to get clear crisp detailed impressions and buried layers of patterns. By the way, keys were used on both of these prints. The same tools can create such a variety of looks!
You won’t believe what made the circle shape here!
Finding Your Pattern Making Tools
This workshop is about seeing the junk, trash, and stuff around your home through the eyes of gel printing. There are interesting patterns all around you right now and as you go through the workshop, you’ll discover how to look for & use them to make prints you’re excited about!
The Ugly Prints
Have you ever had what you thought was a great plan and instead it turned out ugly? You’ll see that happen to me as I’m printing and how you can apply the 3 key factors to turn any ugly print into a favorite!
Getting into the Flow of Printing
Part of the fun of playing is getting into the zone or the flow of printing. You’ll get specific strategies to guide you into the flow, that magically relaxing place where the world, and all its stress, fades away for a little while.
If you’ve seen any of my gel printing videos on YouTube, you might be wondering how this workshop is different from those. It probably won’t surprise you that you get a lot more from a paid workshop than a free video.
My workshops include more in-depth explanation than a YouTube video. More step-by-step, more how, more why, and a structure so that each video builds your skills and knowledge in a practical way.
What’s Included
14 step-by-step lessons
downloadable videos
self paced with immediate access to lessons
lifetime access
optional Facebook group
Bonus: The Basics of Gel Printing
Here are the lessons included in Playing with Found Patterns:
Under Pressure
Why It’s Good to Have a Squishy Middleman
The Icicle Stick
Deciding Which Paint to Use
The Gift of Cheap Plastics
Addition by Subtraction
The Big Factor When Choosing a Color
Review of the 3 Big Factors
Grungy Layers that Pop
Building Bold Patterns
The Secret Key
Unlock The Hidden Layer
Conquering the Ugly Print Part 1
Conquering the Ugly Print Part 2
How to Get into the Zone, the flow of printing
Bonus mini workshop included, The Basics of Gel Printing. If you’re wondering what size gel plate is right for you, how to clean or store a gel plate, or what paints or paper to use you’ll find all those answers in here.
Is this workshop right for you?
This workshop isn’t for you if you’re looking for a formal, college lecture type experience. If you’re looking for a relaxed & encouraging experience loaded with practical information and techniques you can use right away then you’re in the right place.
Is this for beginners or experienced gel printers? The answer is yes. Yes to both. Can a workshop really be for both beginners and experienced gel printers? Here’s what student Kathy Cornwell said:
“Even though I’m a fairly experienced gel printer, I’m learning new things (where was this class when I was a beginner?!) and it’s a terrific value. Your teaching background is a real asset. Thanks for taking me to the next level!”
Each technique is broken down so you can understand why it’s happening & then combined to create more complex prints. It doesn’t matter if you’ve never made gel prints before! You can do all of this!
For the more experienced gel printers, you’ll see my process and the reasons behind what’s happening so you will know how to consistently steer your prints in specific directions.
The Guarantee.
I stand behind this workshop 100% with a 14 day no-hassle money back guarantee. How does it work? Just email me within 14 days from when you join and let me know in a one line email that the workshop isn’t right for you for any reason. I’ll get you a prompt and full refund. It really is that easy.
What supplies do you need?
It’s not about having the exact same supplies that I do, it’s about how to look at what you already have in a different way. You’ll need basic gel printing supplies such acrylic paint you like, a brayer, paper, a gel plate or two and items you’ve found around your home for pattern making.
Gel Printing: Playing with Found Patterns includes
14 lessons
downloadable videos
lifetime access
optional Facebook group
Bonus: The Basics of Gel Printing
This workshop is currently closed BUT get your email on the waitlist and you’ll be the first to know when registration opens back up!
Life is a bit upside down right now. How much time do I need to give to the workshop? Since you’ve got lifetime access you can go through this at your pace. You can binge watch it all Netflix style or watch just one video a week. You have that freedom. Each lesson is about 15 minutes long (some longer, some shorter). Each lesson is carefully edited which means you get all the important information quickly so you can get to playing!
When does the workshop start? It is available right now as a self paced workshop.
Can I ask questions? Yes! You can ask questions in the classroom or in the optional Facebook group where you can share what you’re printing and see what your fellow classmates are making.
What supplies do I need? You’ll need basic gel printing supplies: a gel plate, any size, a soft rubber brayer, paper, acrylic paints, and pattern making tools. That’s code for stuff, junk, and trash in your home.
Do I need a specific kind of paint? You need acrylic paint, it can be any brand, any color. Acrylic paints are the ones that clean up with water.
I’ve been making prints for a while, will this workshop help me make better prints? Yes! This workshop is about more than just techniques, it’s about understanding. As you know, once you understand how and why a tool works, then the sky’s the limit for you to add your personal creative style to it.
Can I make prints like this even if I’ve never printed before? Absolutely- the techniques are explained step-by-step plus it includes access to the mini workshop The Basics of Gel Printing. In there you’ll find answers to questions such as what size gel plate is right for you, how to clean & store a gel plate, what paints or paper to use and more.
Are the videos downloadable? Yes!
Can I watch it on an iPad or mobile device? Yes, you can watch any of the videos on any device. The videos are hosted at Vimeo and they have a mobile app so you can even download them onto your mobile device.
Are there subtitles? Yes, every video in this workshop has subtitles.
I’m new to online workshops, how does this work? To access the course videos, all you need to do is log into the classroom. Once logged in, you’ll see all the lessons immediately. You have immediate access to all of them. Each lesson has a video that you can watch online or download.
Is there a guarantee? Absolutely. I stand behind this workshop 100% with a 14 day no hassle money back guarantee. How does it work? Just email me within 14 days from when you join and let me know in a one line email that the workshop isn’t right for you. I’ll get you a prompt and full refund.
This workshop is currently closed BUT get your email on the waitlist and you’ll be the first to know when registration opens back up!
This website uses cookies to improve your experience while you navigate through the website. Out of these cookies, the cookies that are categorized as necessary are stored on your browser as they are essential for the working of basic functionalities of the website. We also use third-party cookies that help us analyze and understand how you use this website. These cookies will be stored in your browser only with your consent. You also have the option to opt-out of these cookies. But opting out of some of these cookies may have an effect on your browsing experience.
Necessary cookies are absolutely essential for the website to function properly. This category only includes cookies that ensures basic functionalities and security features of the website. These cookies do not store any personal information.
Any cookies that may not be particularly necessary for the website to function and is used specifically to collect user personal data via analytics, ads, other embedded contents are termed as non-necessary cookies. It is mandatory to procure user consent prior to running these cookies on your website.